Style terrain with color relief
Color relief is a visualization method that styles the map in diferent colors based on altitude. Unlike hillshading, color relief focuses purely on elevation data without any simulated light or shadows. This allows you to show elevation using smooth color gradients, which is perfect for creating the “old-school geographical atlas” look or high-contrast environmental maps.

Our Topo map with color relief (left) vs hillshading (right)
Predefined color ramps
Our cartographers have prepared a selection of beautiful predefined color ramps for any map look and type of terrain. Here’s how to add the relief with a specific color ramp:
-
In your MapTiler account, page Maps, click on the map you want to use. It can be any map including custom.
-
Under the map preview, click Customize. This opens the map in Map Designer.
-
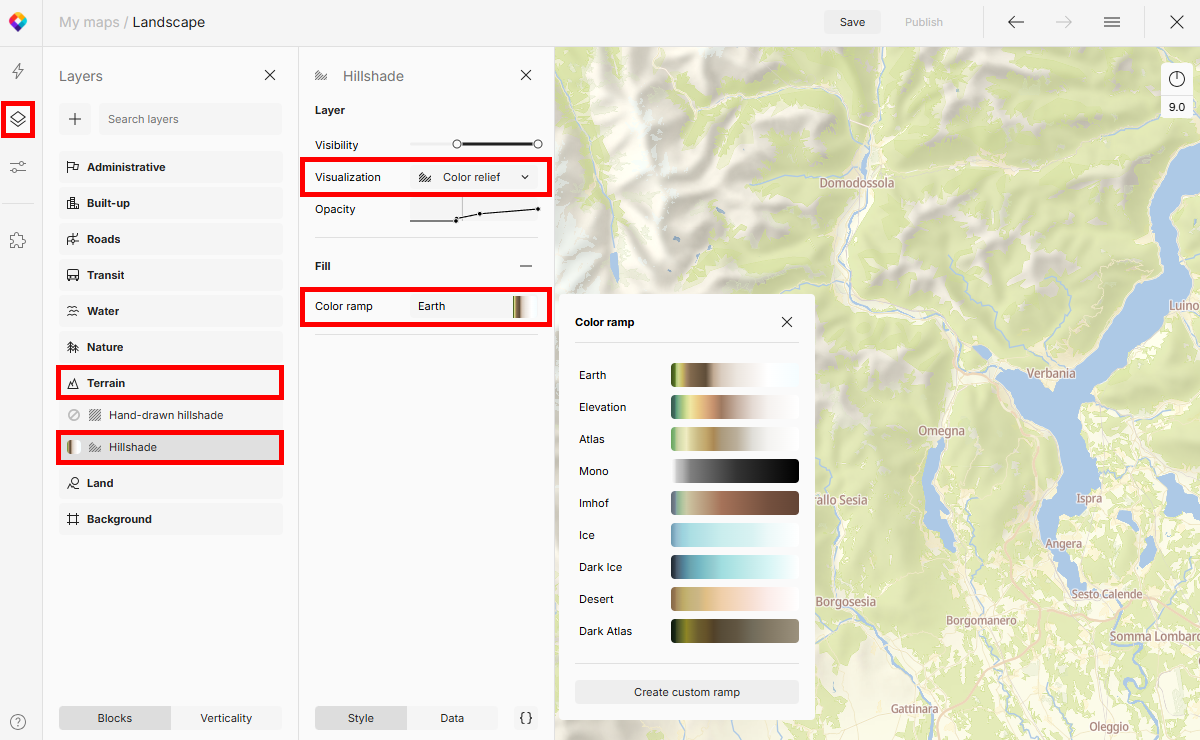
Go to menu Layers → block Terrain → layer Hillshade.
☝️ If the Terrain block is missing, click the plus button to add a new layer. Search for
Terrain RGBand add it to your map. -
In the Hillshade panel, set Visualization to
Color relief. -
Choose a Color ramp from the presets.
Warning
If you can’t see your color ramp applied, check the Visibility and Opacity settings. The Landscape map, for example, only makes the layer visible from zoom level 8 up. Adjust the settings manually if needed.
Advanced techniques
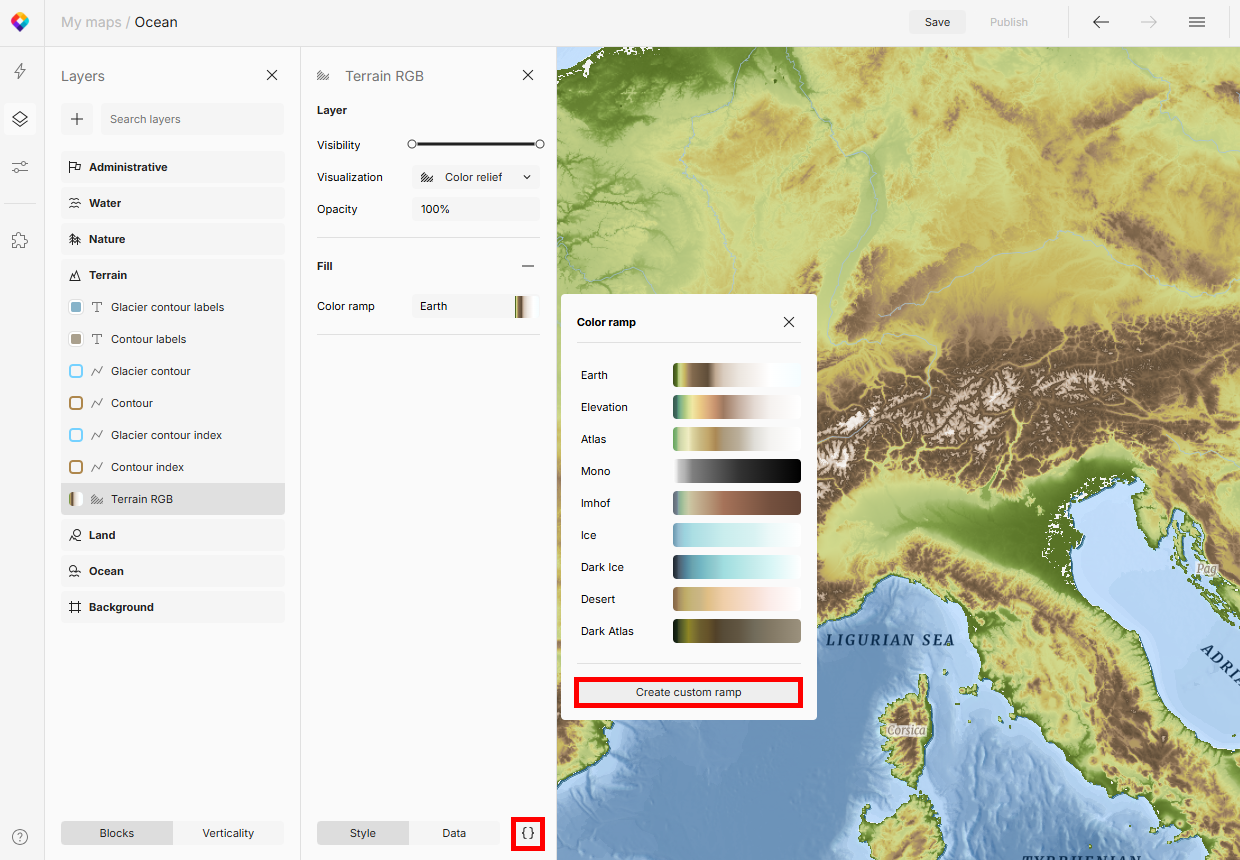
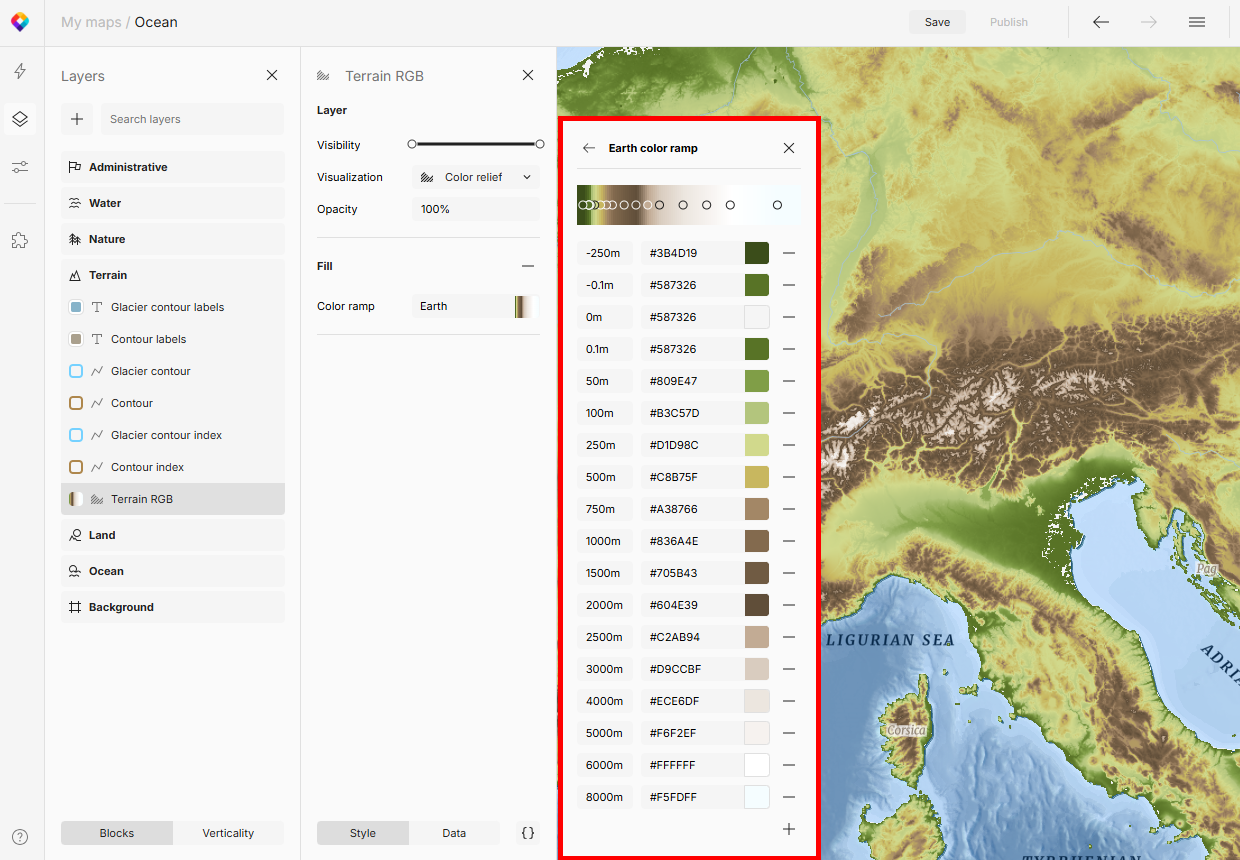
Custom color ramps
You can create your own color ramp from scratch, or modify a preset to match a specific branding or map style. For power users, clicking the {} icon allows you to edit elevation values directly in the style JSON, giving you total control over the gradient interpolation.
Adjusting breakpoints
Default color ramps are calibrated globally, from sea level to Mount Everest. If your map is focused on a flatter region (like the Netherlands or Kansas), the color differences might be nearly invisible. To fix it, remove elevation breakpoints for values that aren’t used in your map, and adjust the color of remaining breakpoints to increase the contrast.
Styling combinations
To combine a color relief with shading, use the Landscape map which additionally contains the hand-drawn hillshading layer, or add this layer to any map manually.
For realistic 3D appearance with the selected tint, you can add a new hillshading layer. Place it on top of the color relief and adjust its opacity. This helps you achieve special effects like “plastic” or embossed.
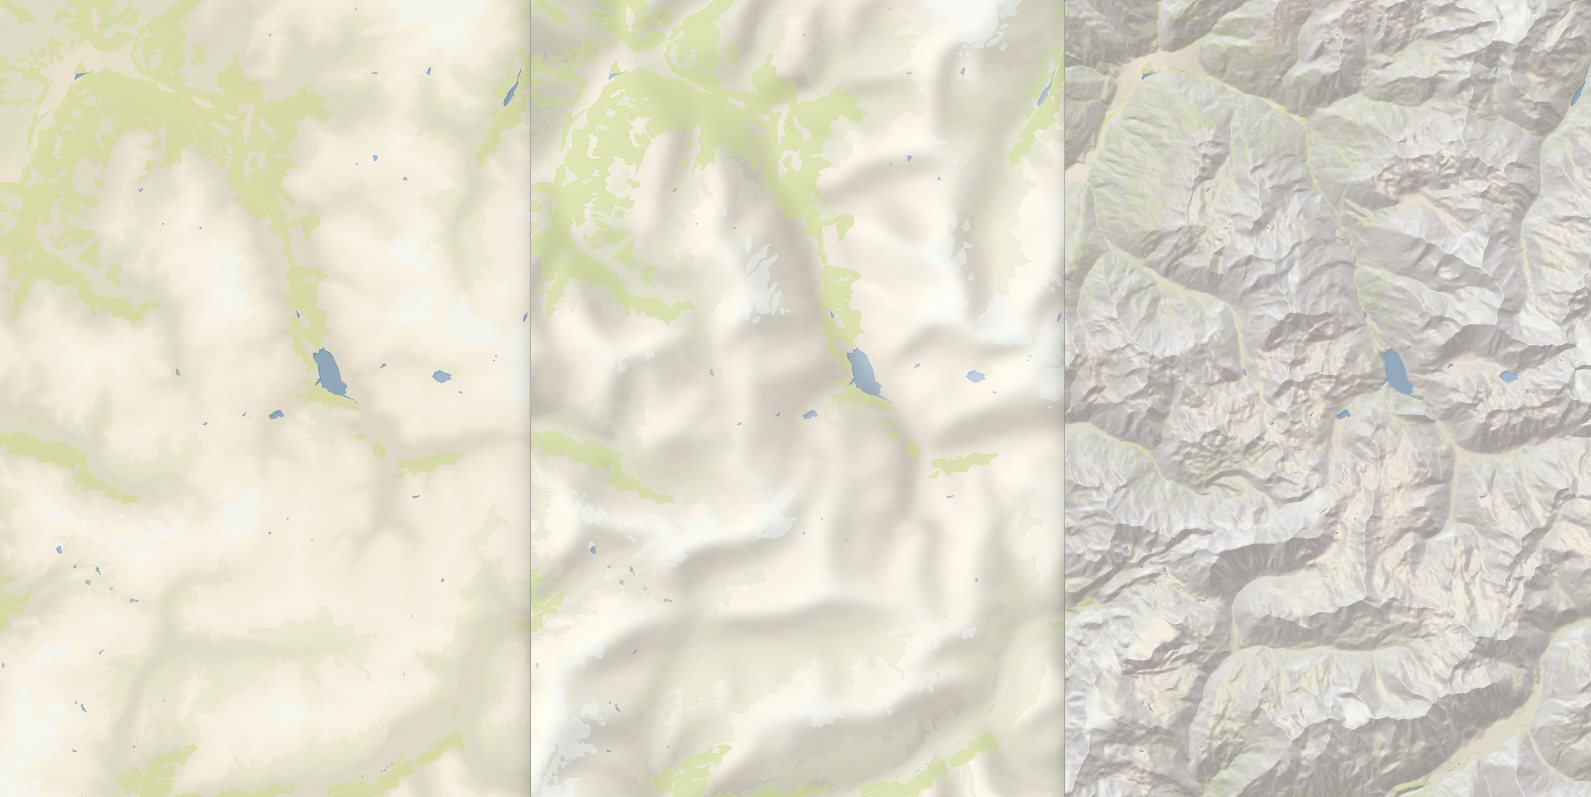
Various terrain styling techniques combined (from left to right): color relief, color relief with hand-drawn hillshade, color relief with an extra hillshade layer
Technical details
The color relief feature is powered by our Terrain RGB tileset. When you select a color ramp, the elevation data from the tileset is translated into the colors defined in the ramp.
The Ocean map uses an additional tileset Ocean RGB. In this map, you can adjust separate color ramps for Terrain (land) and for Ocean.