How to georeference your image
This guide explains how to assign a precise location to your images in our visual Georeferencer, so that you can add the image to a map.
Upload your image
-
In your MapTiler account, go to page Tiles → New tileset and upload your image.
-
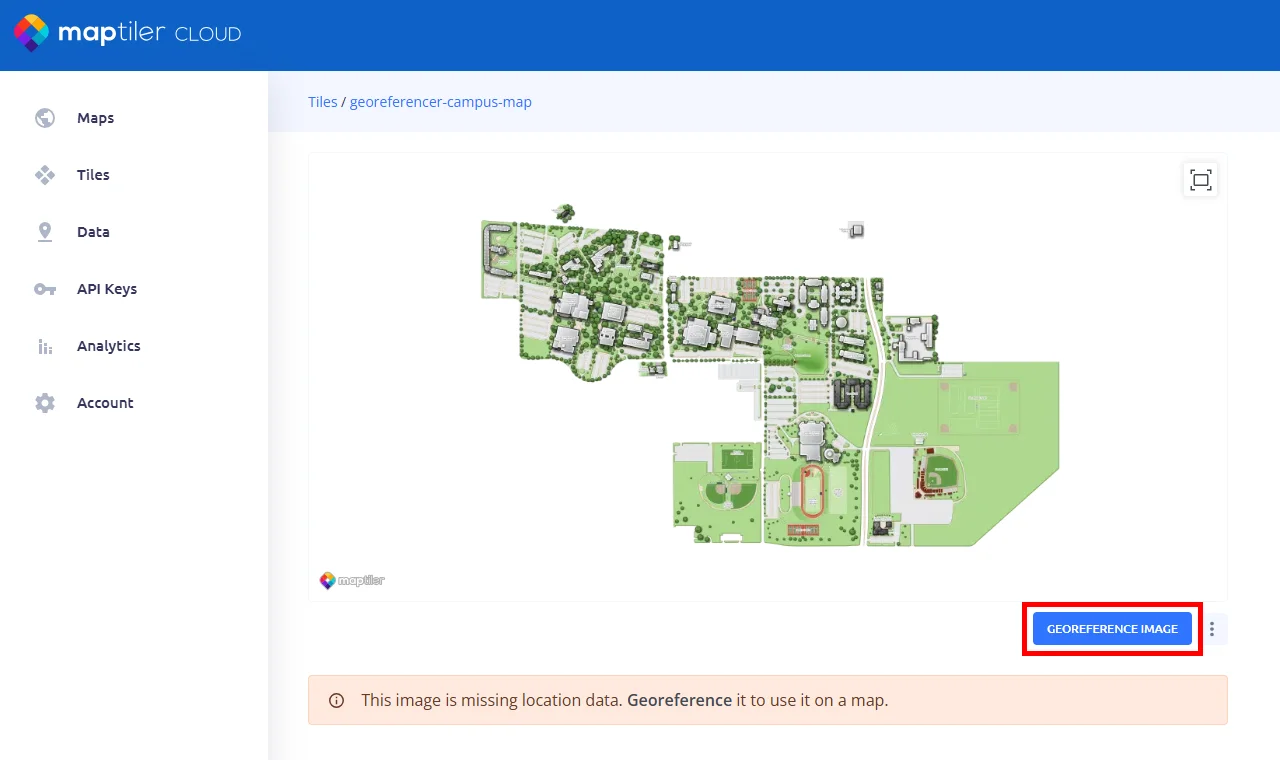
In the image preview, click Georeference image.
Locate the image
-
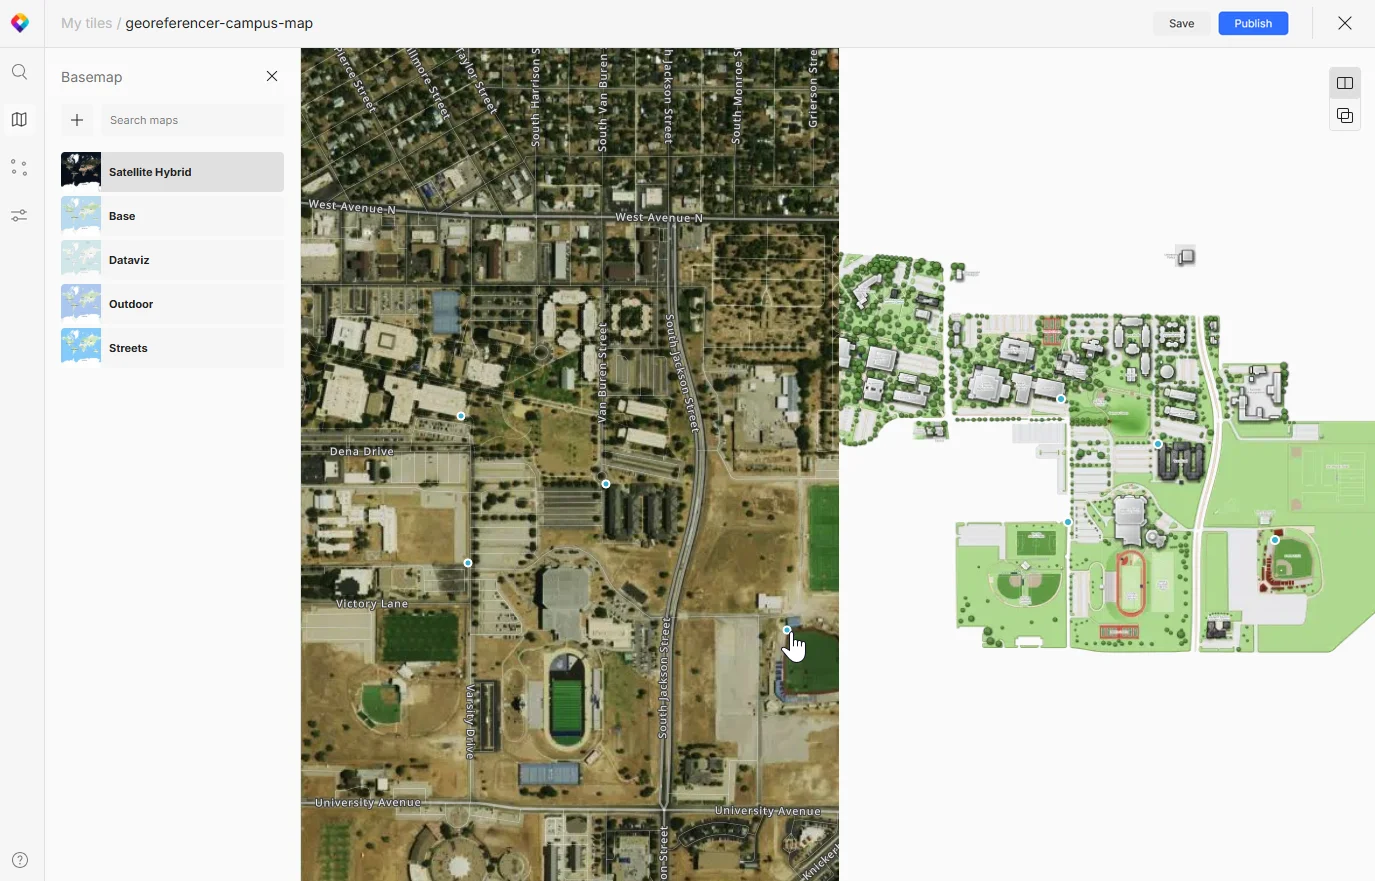
Find the location: When you open the editor, you see your image and a map. The map is only for reference, helping you visually find the location where the image should be placed.
The default map with satellite imagery is best for georeferencing drone photos and other real-world data. You can choose a different map using the Basemap button in the left menu.
-
Add a control point: Click on a spot in the image and then on the same spot on the map (or vice versa). This creates a point which ties your image to the map location.
-
Place more points: Repeat the previous step in different parts of the image to get the required minimum of control points (depends on the transformation method, see next step). Place them as accurately as possible.
If you make a mistake, move the point, or delete it with
DeleteorBackspacekey.To see all points you’ve placed so far, go to Control points in the left menu. Right-click any point in the list for more actions and editing.
-
Change transformation method (optional): During georeferencing, we adjust your image to fit the coordinates, and you can choose how exactly we do that. In the left menu, go to Settings and use the slider to set your preference:
- Fit to image will keep your image untouched (without any distortion) but the location might not be 100% accurate.
- Fit to map will fit your image to location accurately, but the image might get slightly skewed or distorted to achieve that.
- The default position in the middle keeps a balanced default.
Alternatively, open the Advanced transformations menu and pick your transformation method directly. The default is Similarity for 2 control points, Affine for 3+ control points.
-
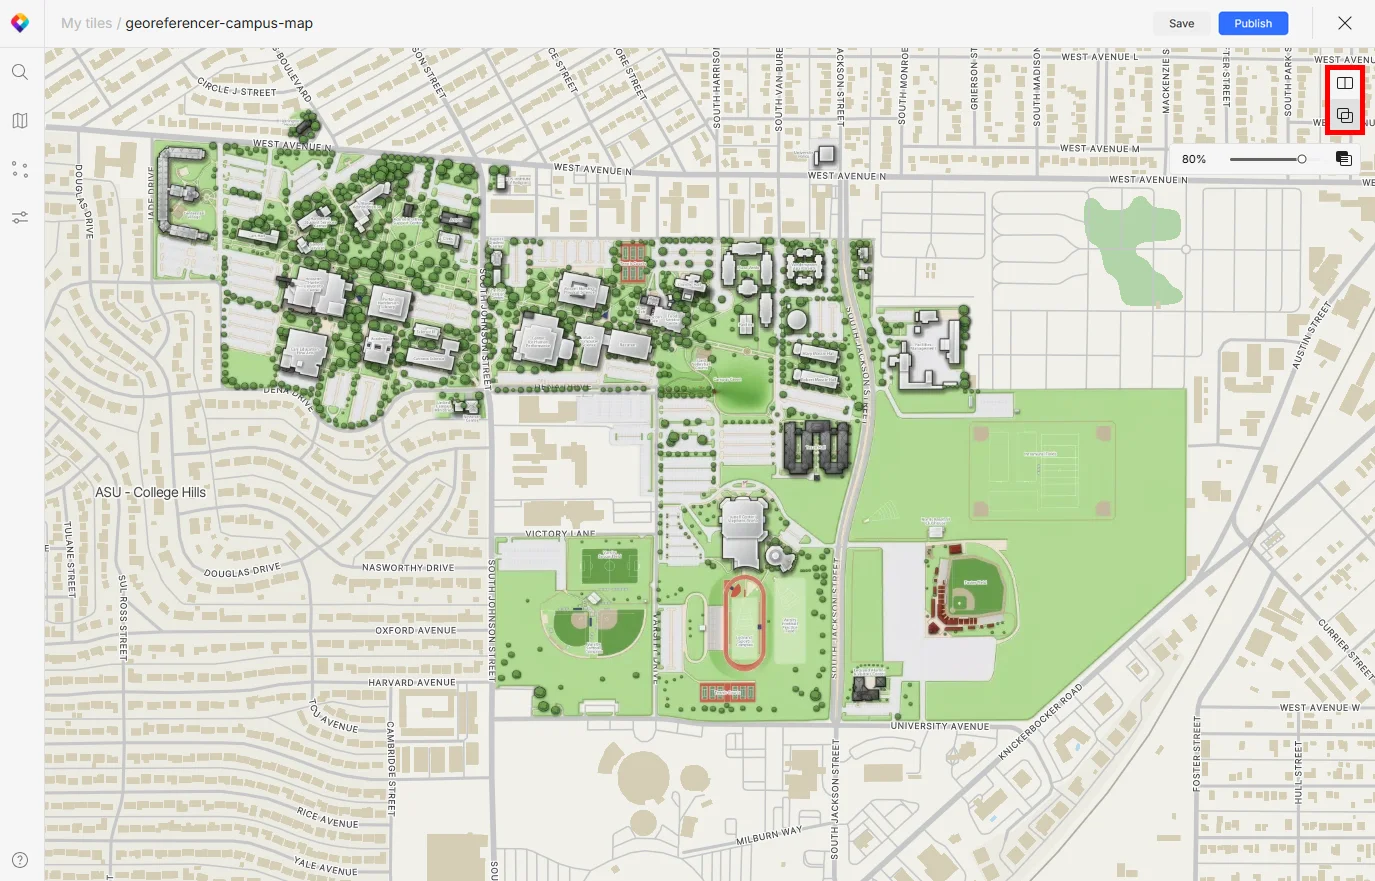
Preview the image on map: Click the Overlay button on the right to see your image placed over the map. If it looks incorrect, go back to the split screen view to fix the points.
-
Save and publish: When done, save your control points and then publish the georeferenced image to make it available via our API.
Note
You have 30 days after publishing to adjust the georeferencing. After that, you’ll need to upload the image again to make new edits.
Next steps
Your image is now processed into a proper georeferenced set of raster map tiles. You can find it in your MapTiler account on page Tiles and use it just like any other raster tileset. 👉 How to add your georeferenced image to a map