Get started with Flutter and MapTiler GL JS
In this tutorial, you’ll learn how to display a map on a mobile device using Flutter and MapTiler GL JS. We will be using webview_flutter to wrap the PWA app created with MapTiler GL JS and run it on a mobile device.
Note
The advantage of using this approach (webview_flutter to wrap a PWA app) is that all MapTiler SDK modules will work, this is especially useful if you want to include weather layers in your applications.
Installation and setting up
- Install and set up Flutter
- (Optional) VS Code Flutter extension
- Prepare the link to your web app built with MapTiler GL JS. In our example we will be using MapTiler demo app.
Each step can be done either via terminal or Visual Studio Code extension. We will cover both.
Create new Flutter project
Open Visual Studio Code and open the command palette (with F1 or Ctrl+Shift+P or Shift+Cmd+P). Select the Flutter: New Project command, select a folder and name your app my_map.
flutter create my_map
Add Dependencies
Add the following to pubspec.yaml:
dependencies:
  flutter:
    sdk: flutter
  webview_flutter: ^4.12.0
flutter pub add webview_flutter
Prepare the App
Replace the content of main.dart with the following and make sure to replace url with your app url:
import 'package:flutter/material.dart';
import 'package:webview_flutter/webview_flutter.dart'; // Import the web view

void main() {
  runApp(const MainApp());
}

// Add the WebView Widget
class MainApp extends StatelessWidget {
  const MainApp({super.key});

  @override
  Widget build(BuildContext context) {
    return MaterialApp(
      home: FullscreenWebView(),
    );
  }
}

// Create Web View Widget
class FullscreenWebView extends StatefulWidget {
  const FullscreenWebView({super.key});

  @override
  FullscreenWebViewState createState() {
    return FullscreenWebViewState();
  }
}

// Create Web View Wrapper
class FullscreenWebViewState extends State<FullscreenWebView> {
  late final WebViewController _controller;
  final String url = "https://maptiler.app"; // Add your app url

  @override
  void initState() {
    super.initState();
    _controller = WebViewController()
      ..setJavaScriptMode(JavaScriptMode.unrestricted)
      ..loadRequest(Uri.parse(url));
  }

  @override
  Widget build(BuildContext context) {
    return Scaffold(
      body: WebViewWidget(controller: _controller),
    );
  }
}
Run the App
Warning
The application must be run on a device that supports webview_flutter. To list any available device emulators, run flutter emulators in a terminal. To run an emulator, run flutter emulators --launch <emulator id>.
Select device from the Flutter extension menu on the left side of the window. Press F5 or fn + F5 to run the app.
cd my_map
flutter run lib/main.dart
Congratulations!, you have displayed a map on a mobile device using Flutter and MapTiler GL JS. If you want to further customize the behavior, update your web app or main.dart file.
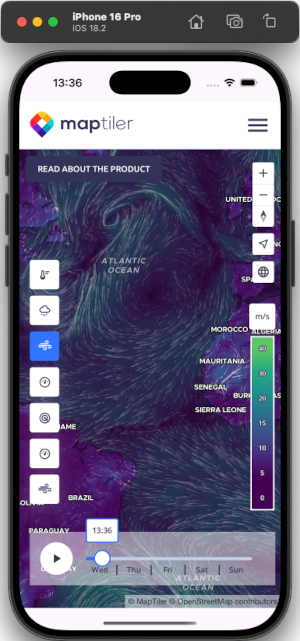
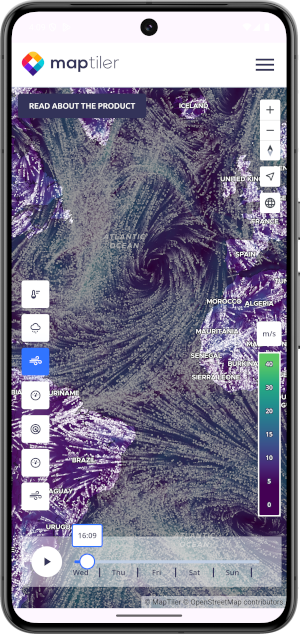
Weather showcase
For weather showcase replace the MapTiler demo app url with Weather map demo url in main.dart and add SafeArea (bear in mind this is web page and not PWA):
Learn more
You can also develop your applications using Flutter and MapLibre GL JS using the flutter-maplibre-gl plugin. With this option, functionality is limited to the options available in flutter-maplibre-gl. MapTiler SDK modules and weather layers will not work.