How to highlight specific country on your map
This page provides a detailed step-by-step tutorial on how to highlight a specific country in any map that you use in MapTiler. The tutorial works with the Dataviz style map and with the MapTiler Countries tileset. This process is also very useful when working with the GEOlayers 3 plugin for Adobe After Effects.
Read more about Countries if you need general information or see schema documentation.
Highlight a specific country on your map
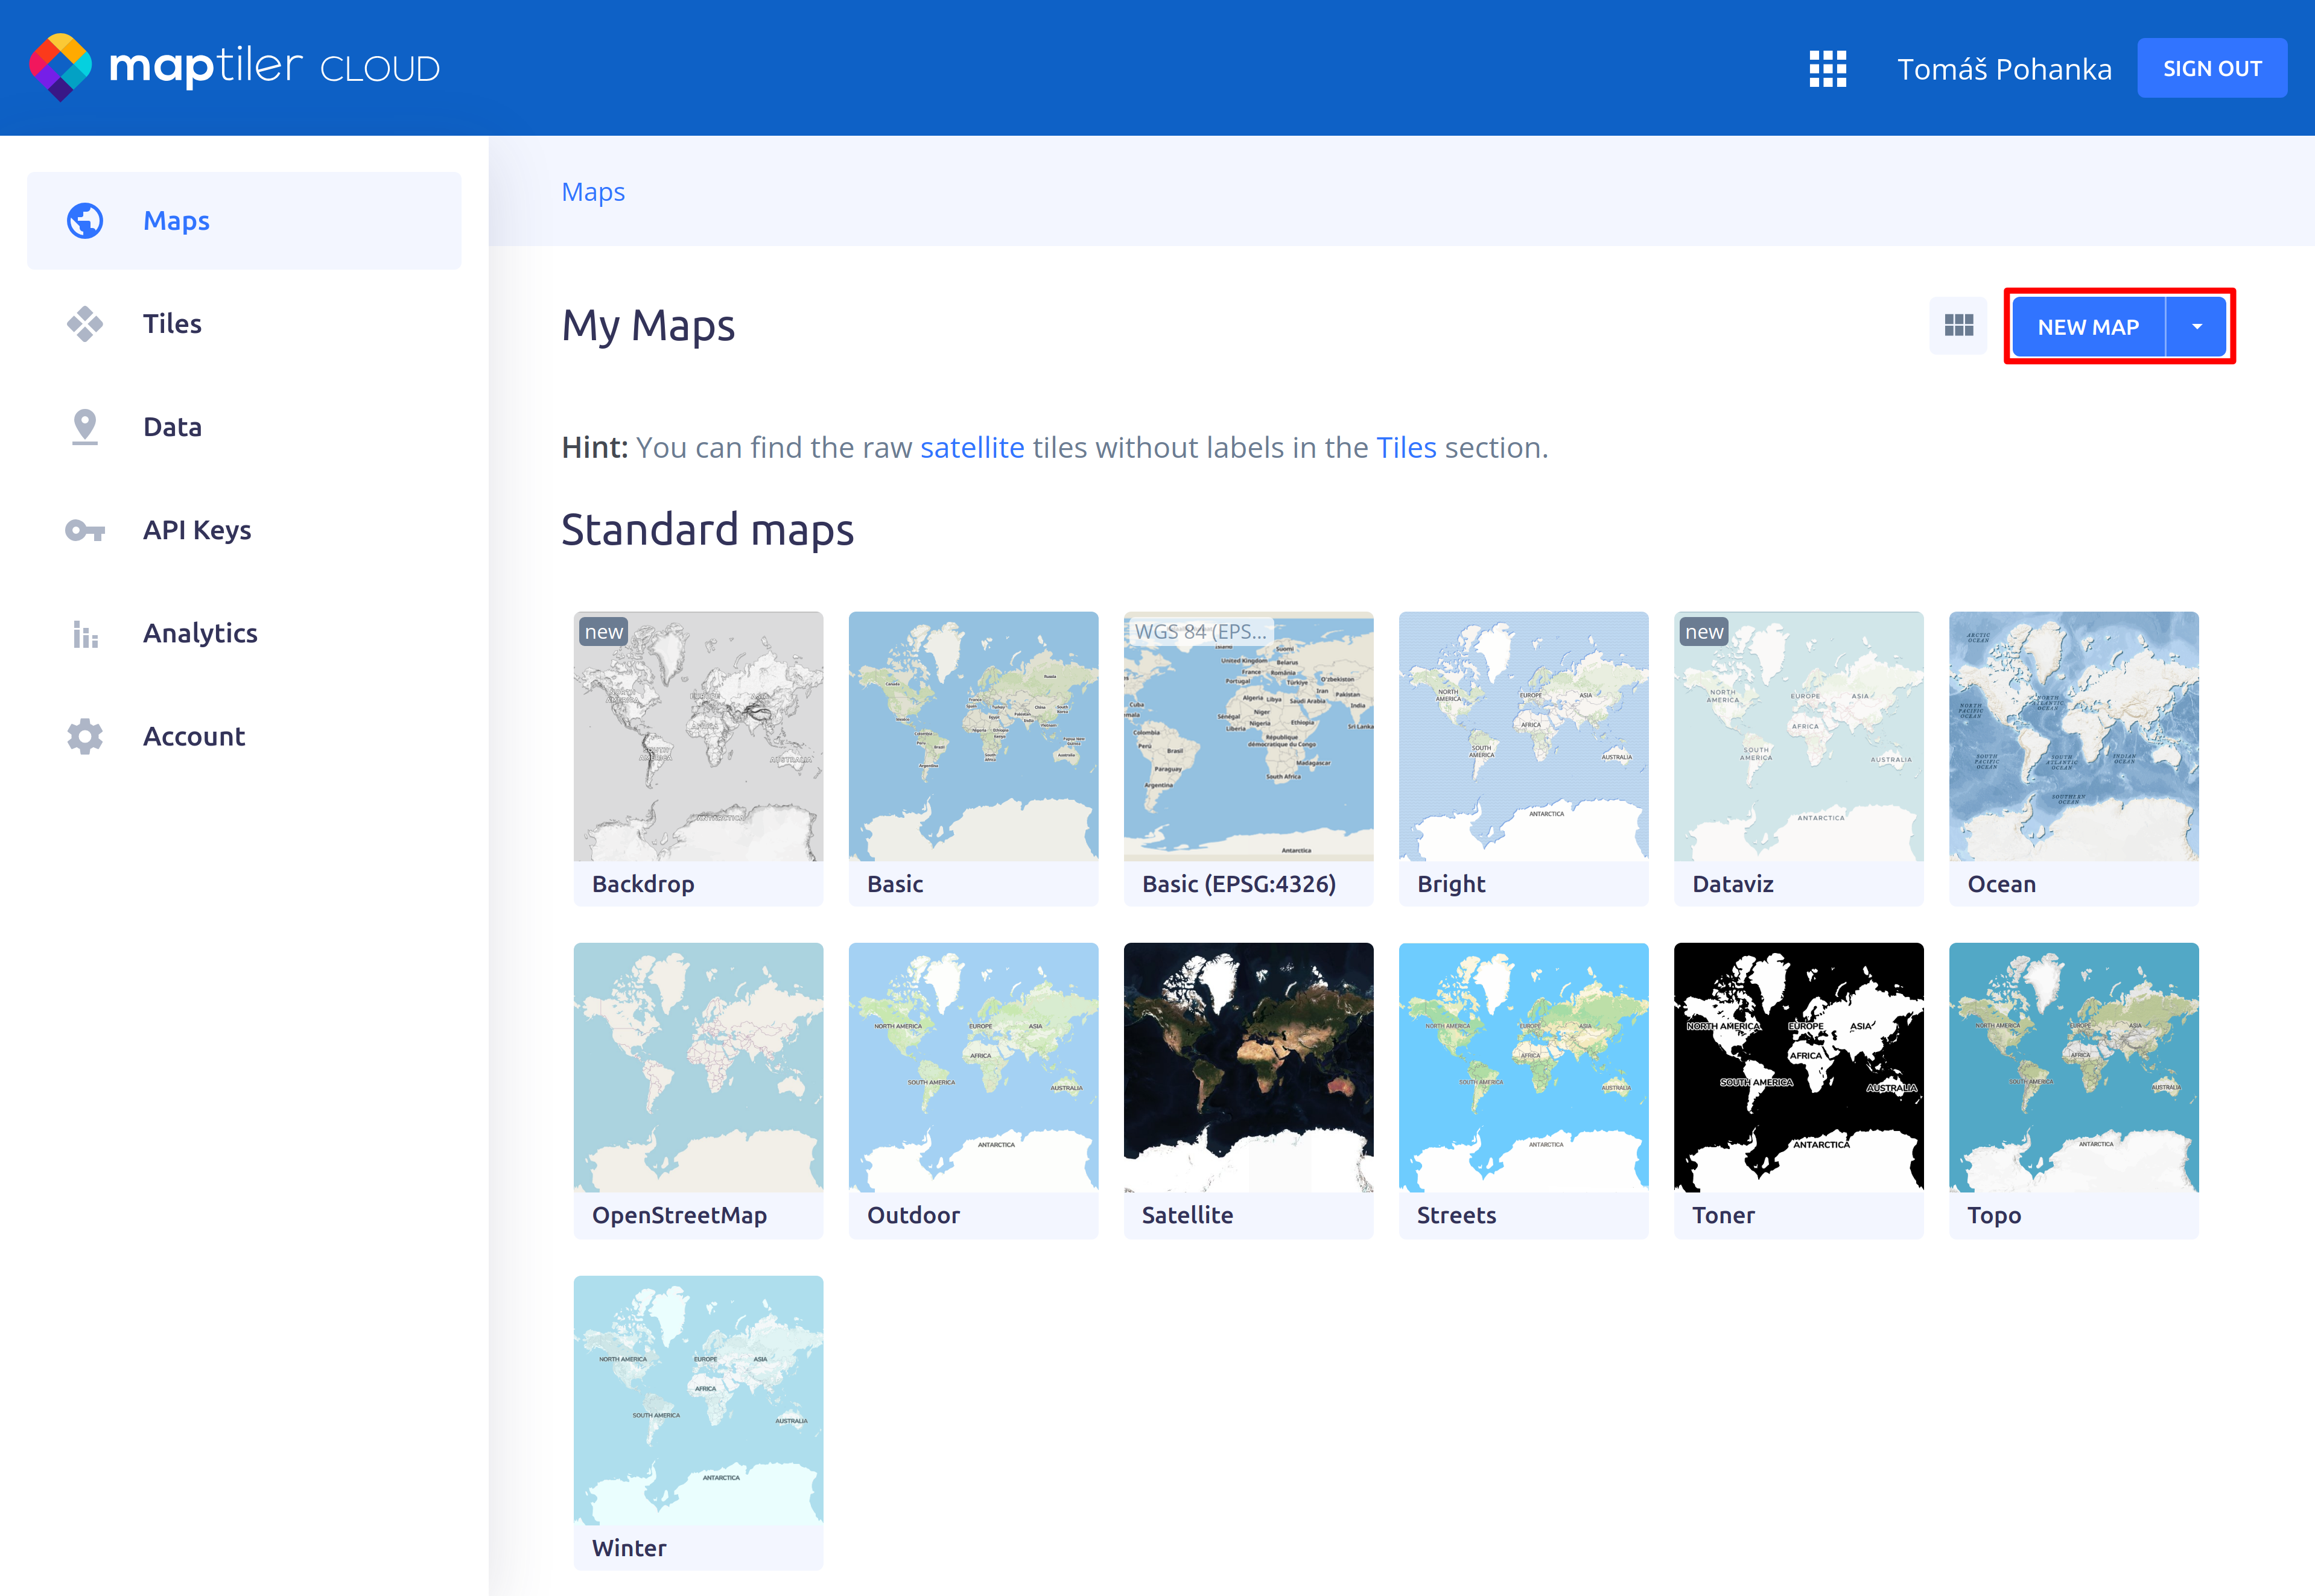
1. Create new map
- Go to MapTiler
- Open the Maps section
- Click on NEW MAP
- Keep in mind that there are also other ways how to edit a map, e.g. you can choose to upload your style or create a new one from scratch (under the drop arrow)
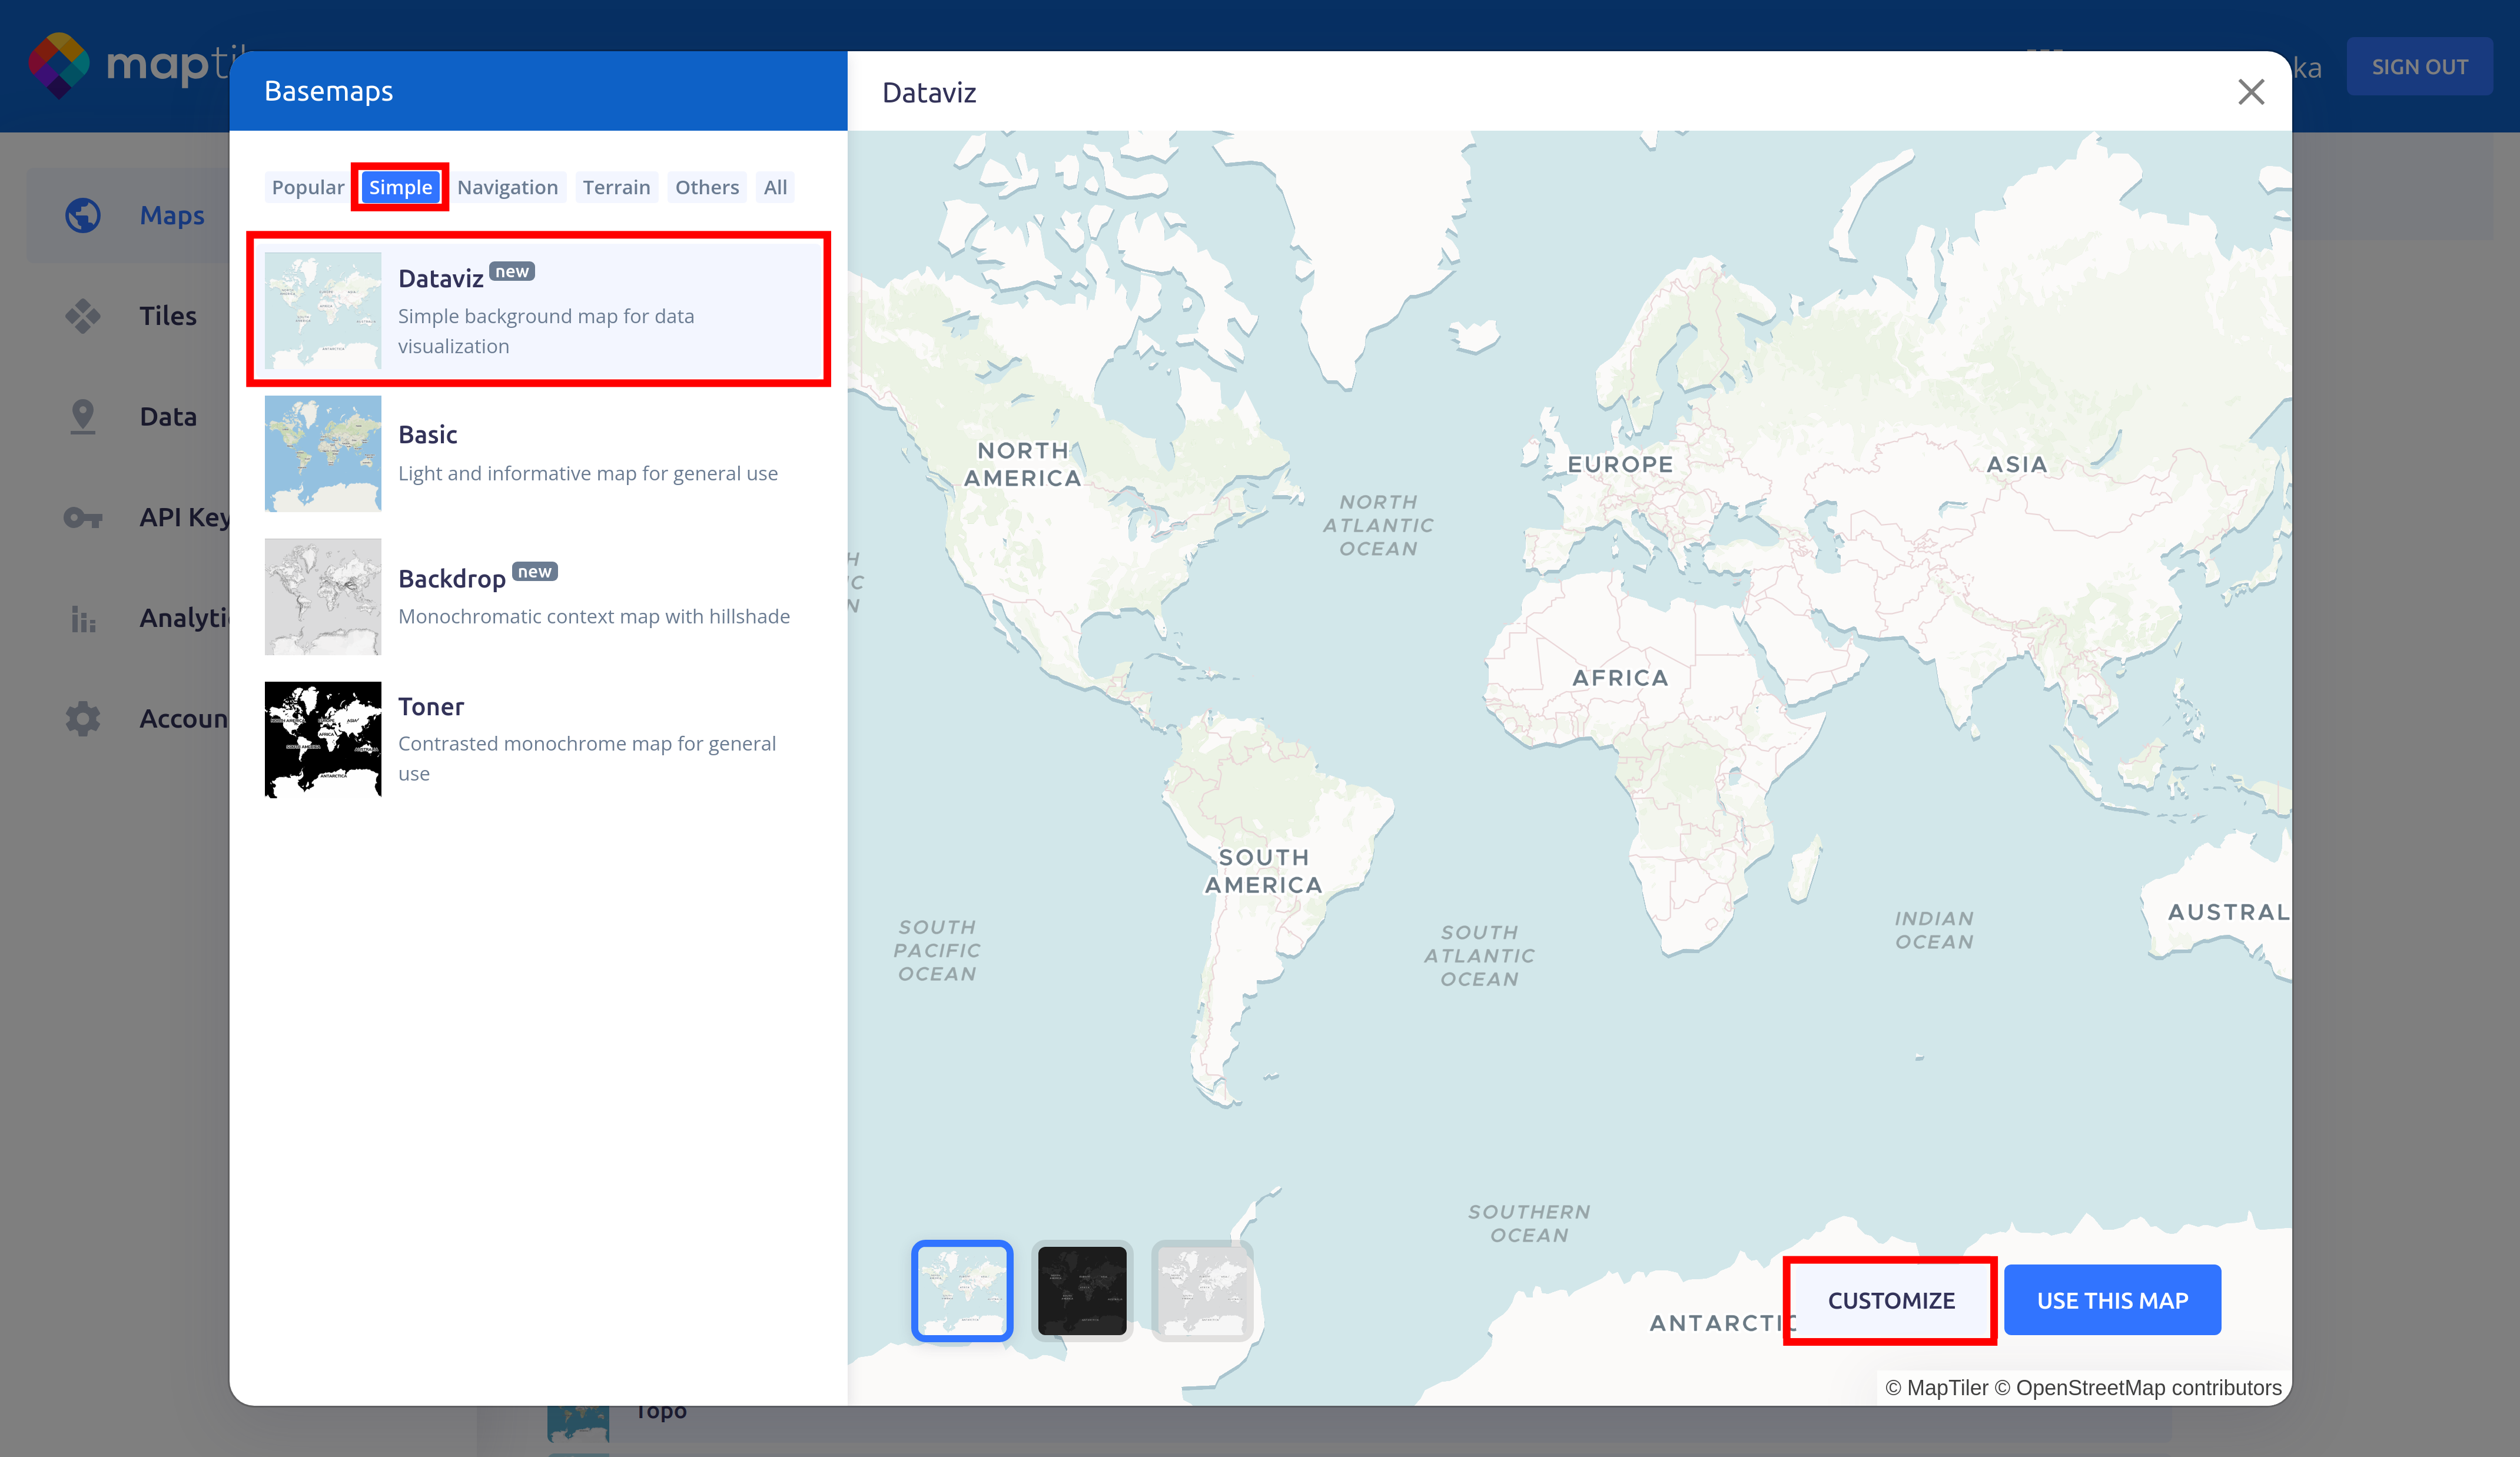
2. Select the base map for the context
- Click on the Simple tab
- Select Dataviz
- Click on Customize
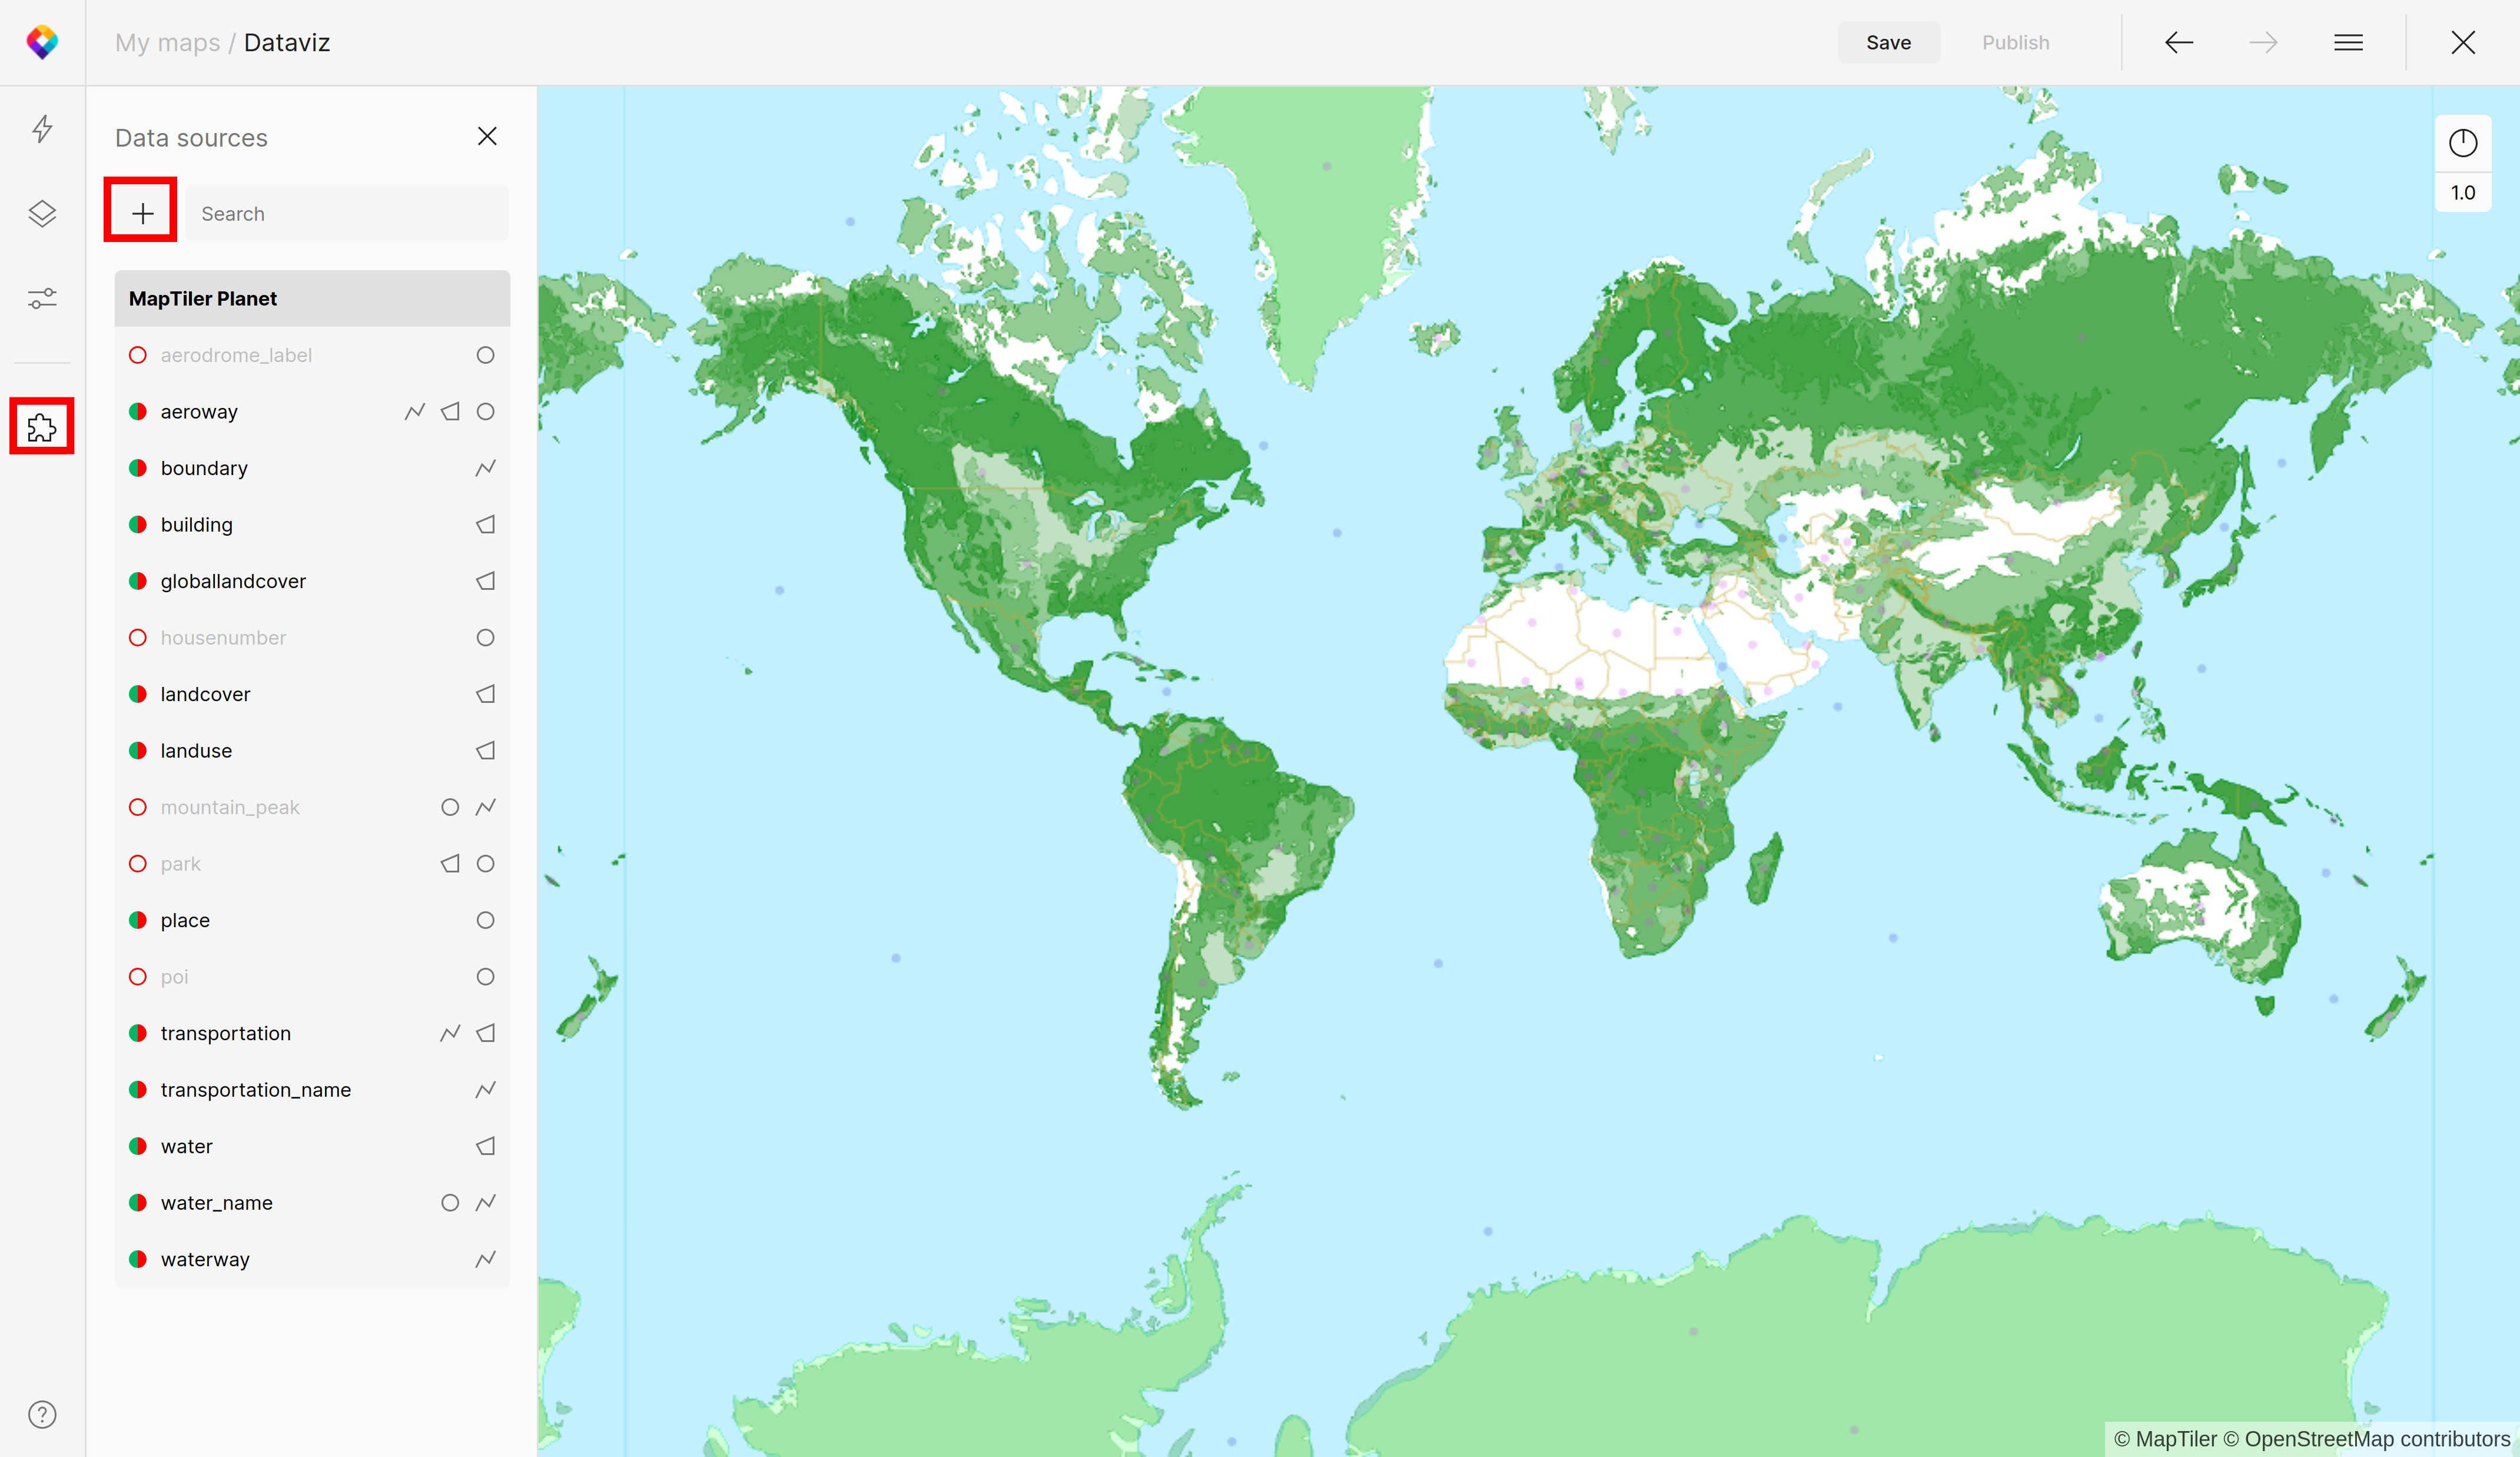
3. Add a new data source to your map
- Click on Data Sources (Alt + D) button on the left panel
- Click on `+` sign (Alt + N)
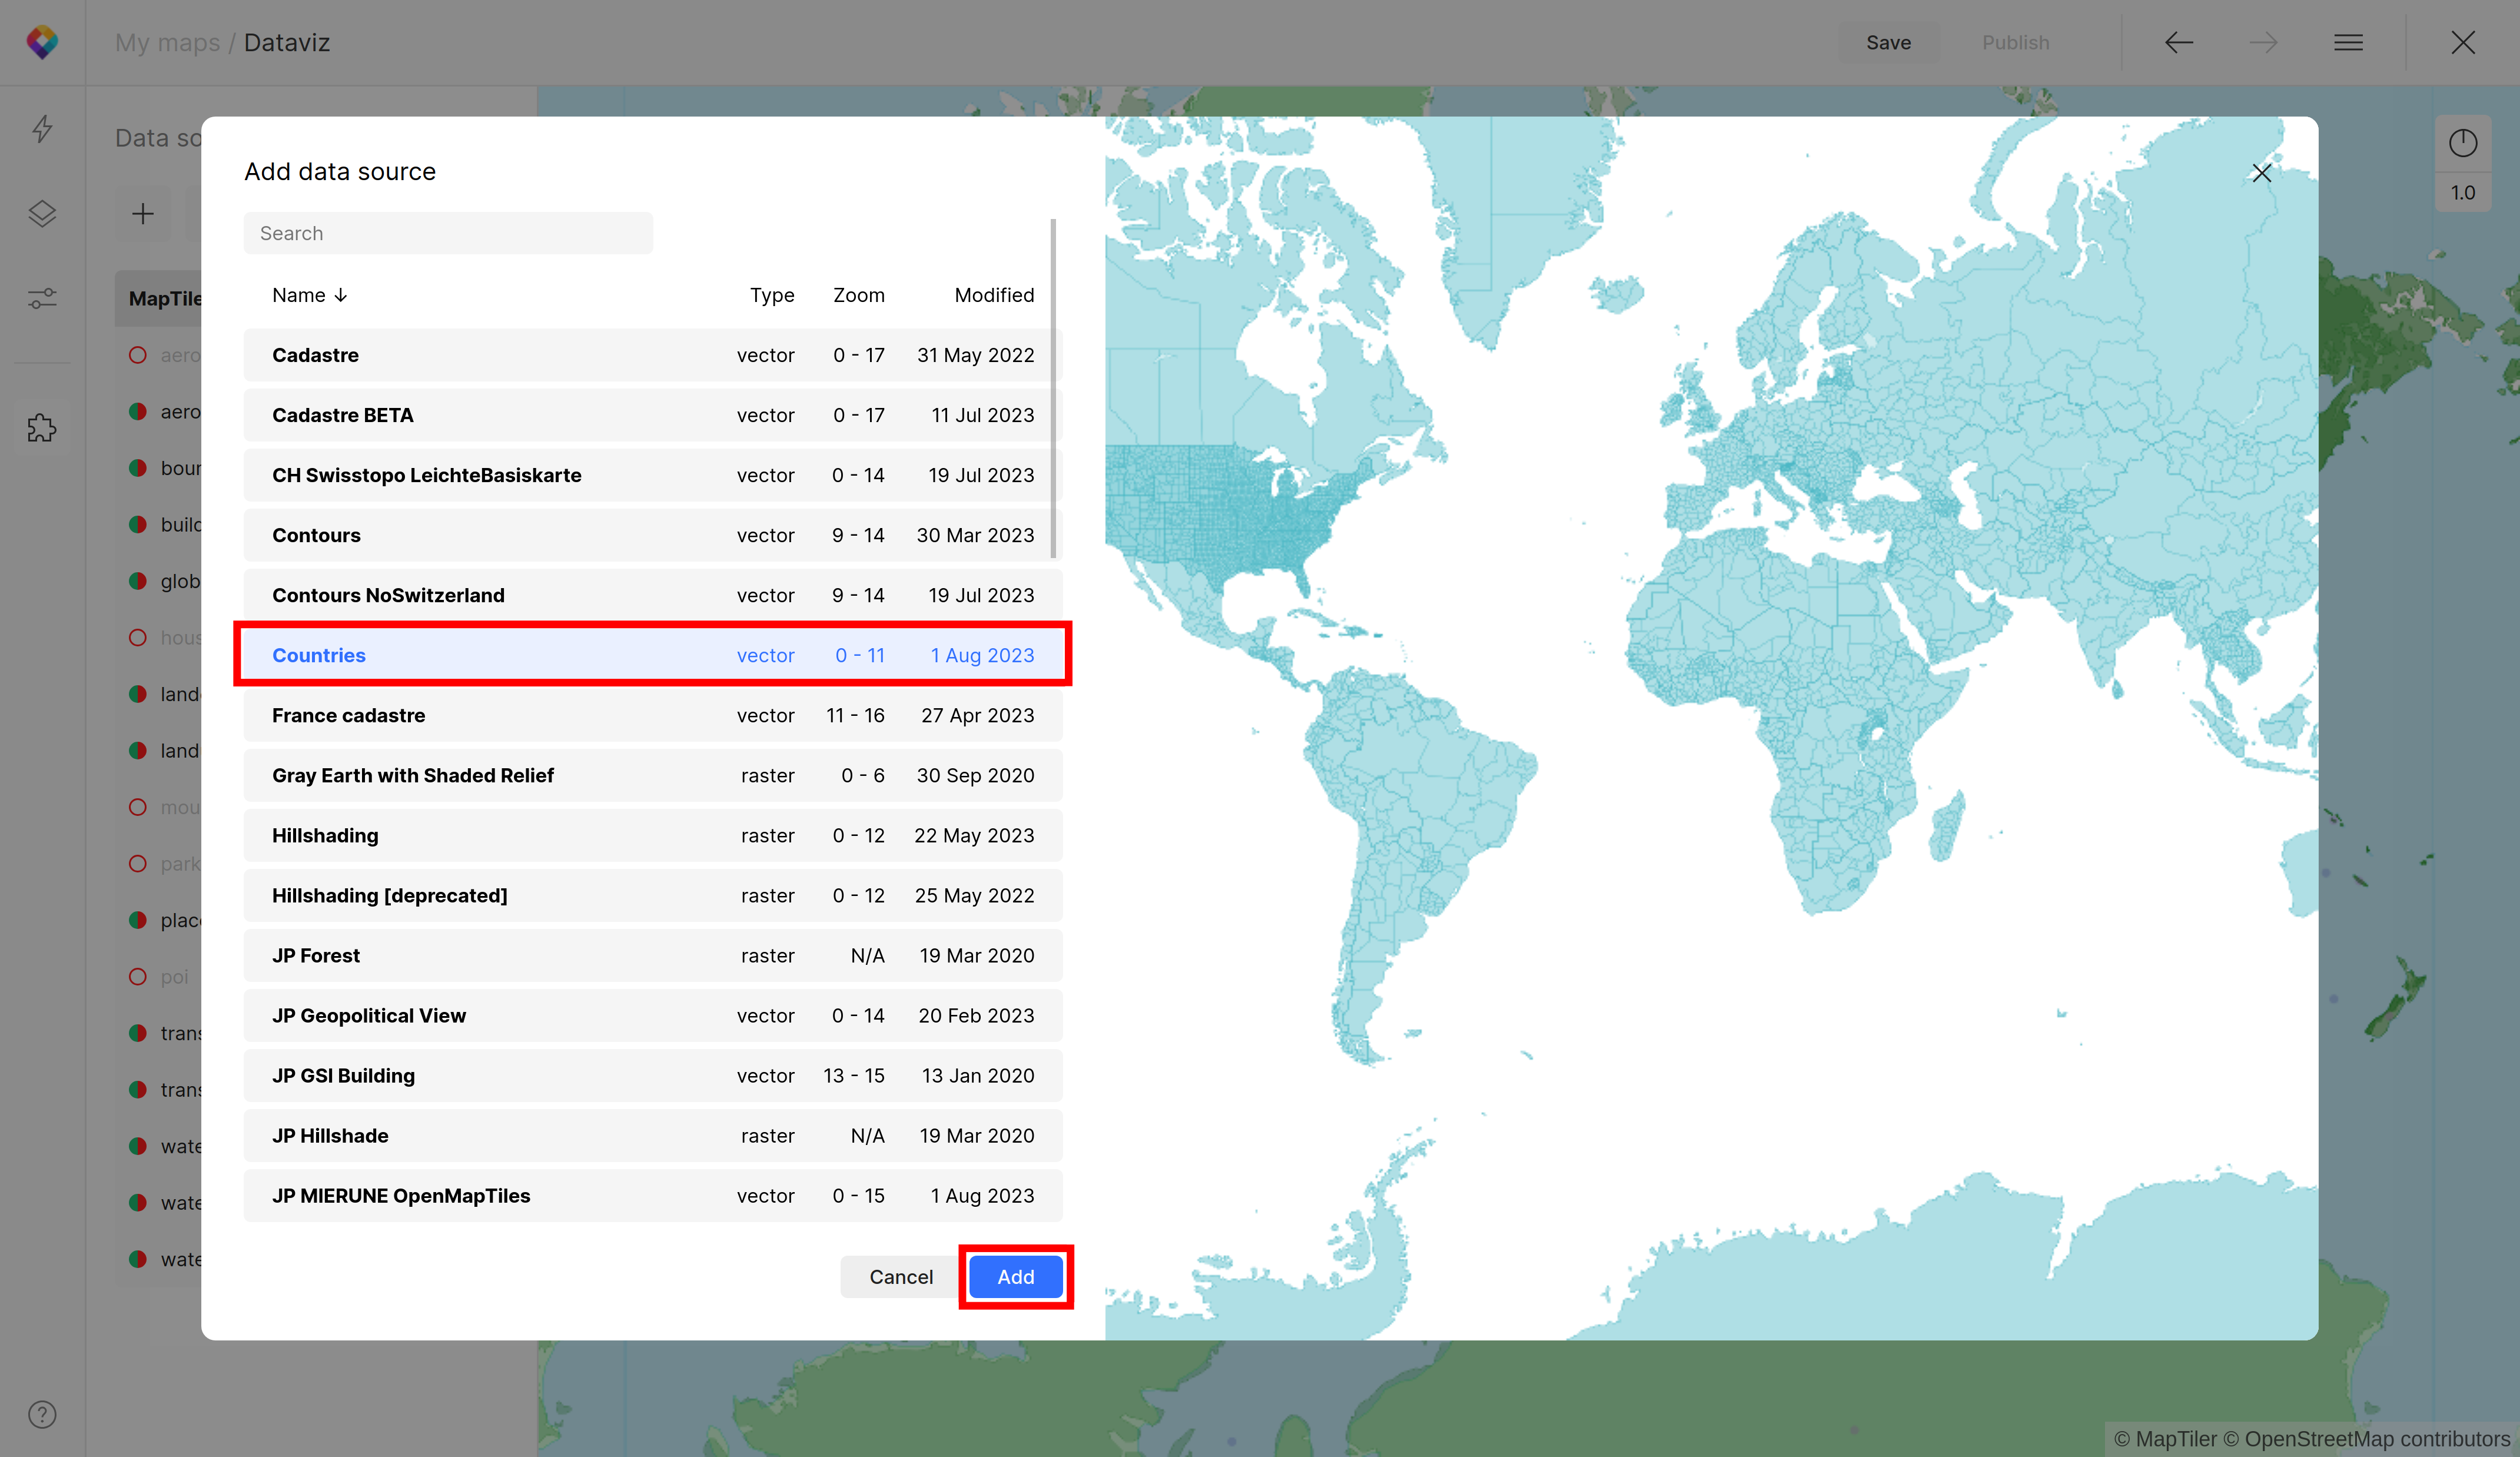
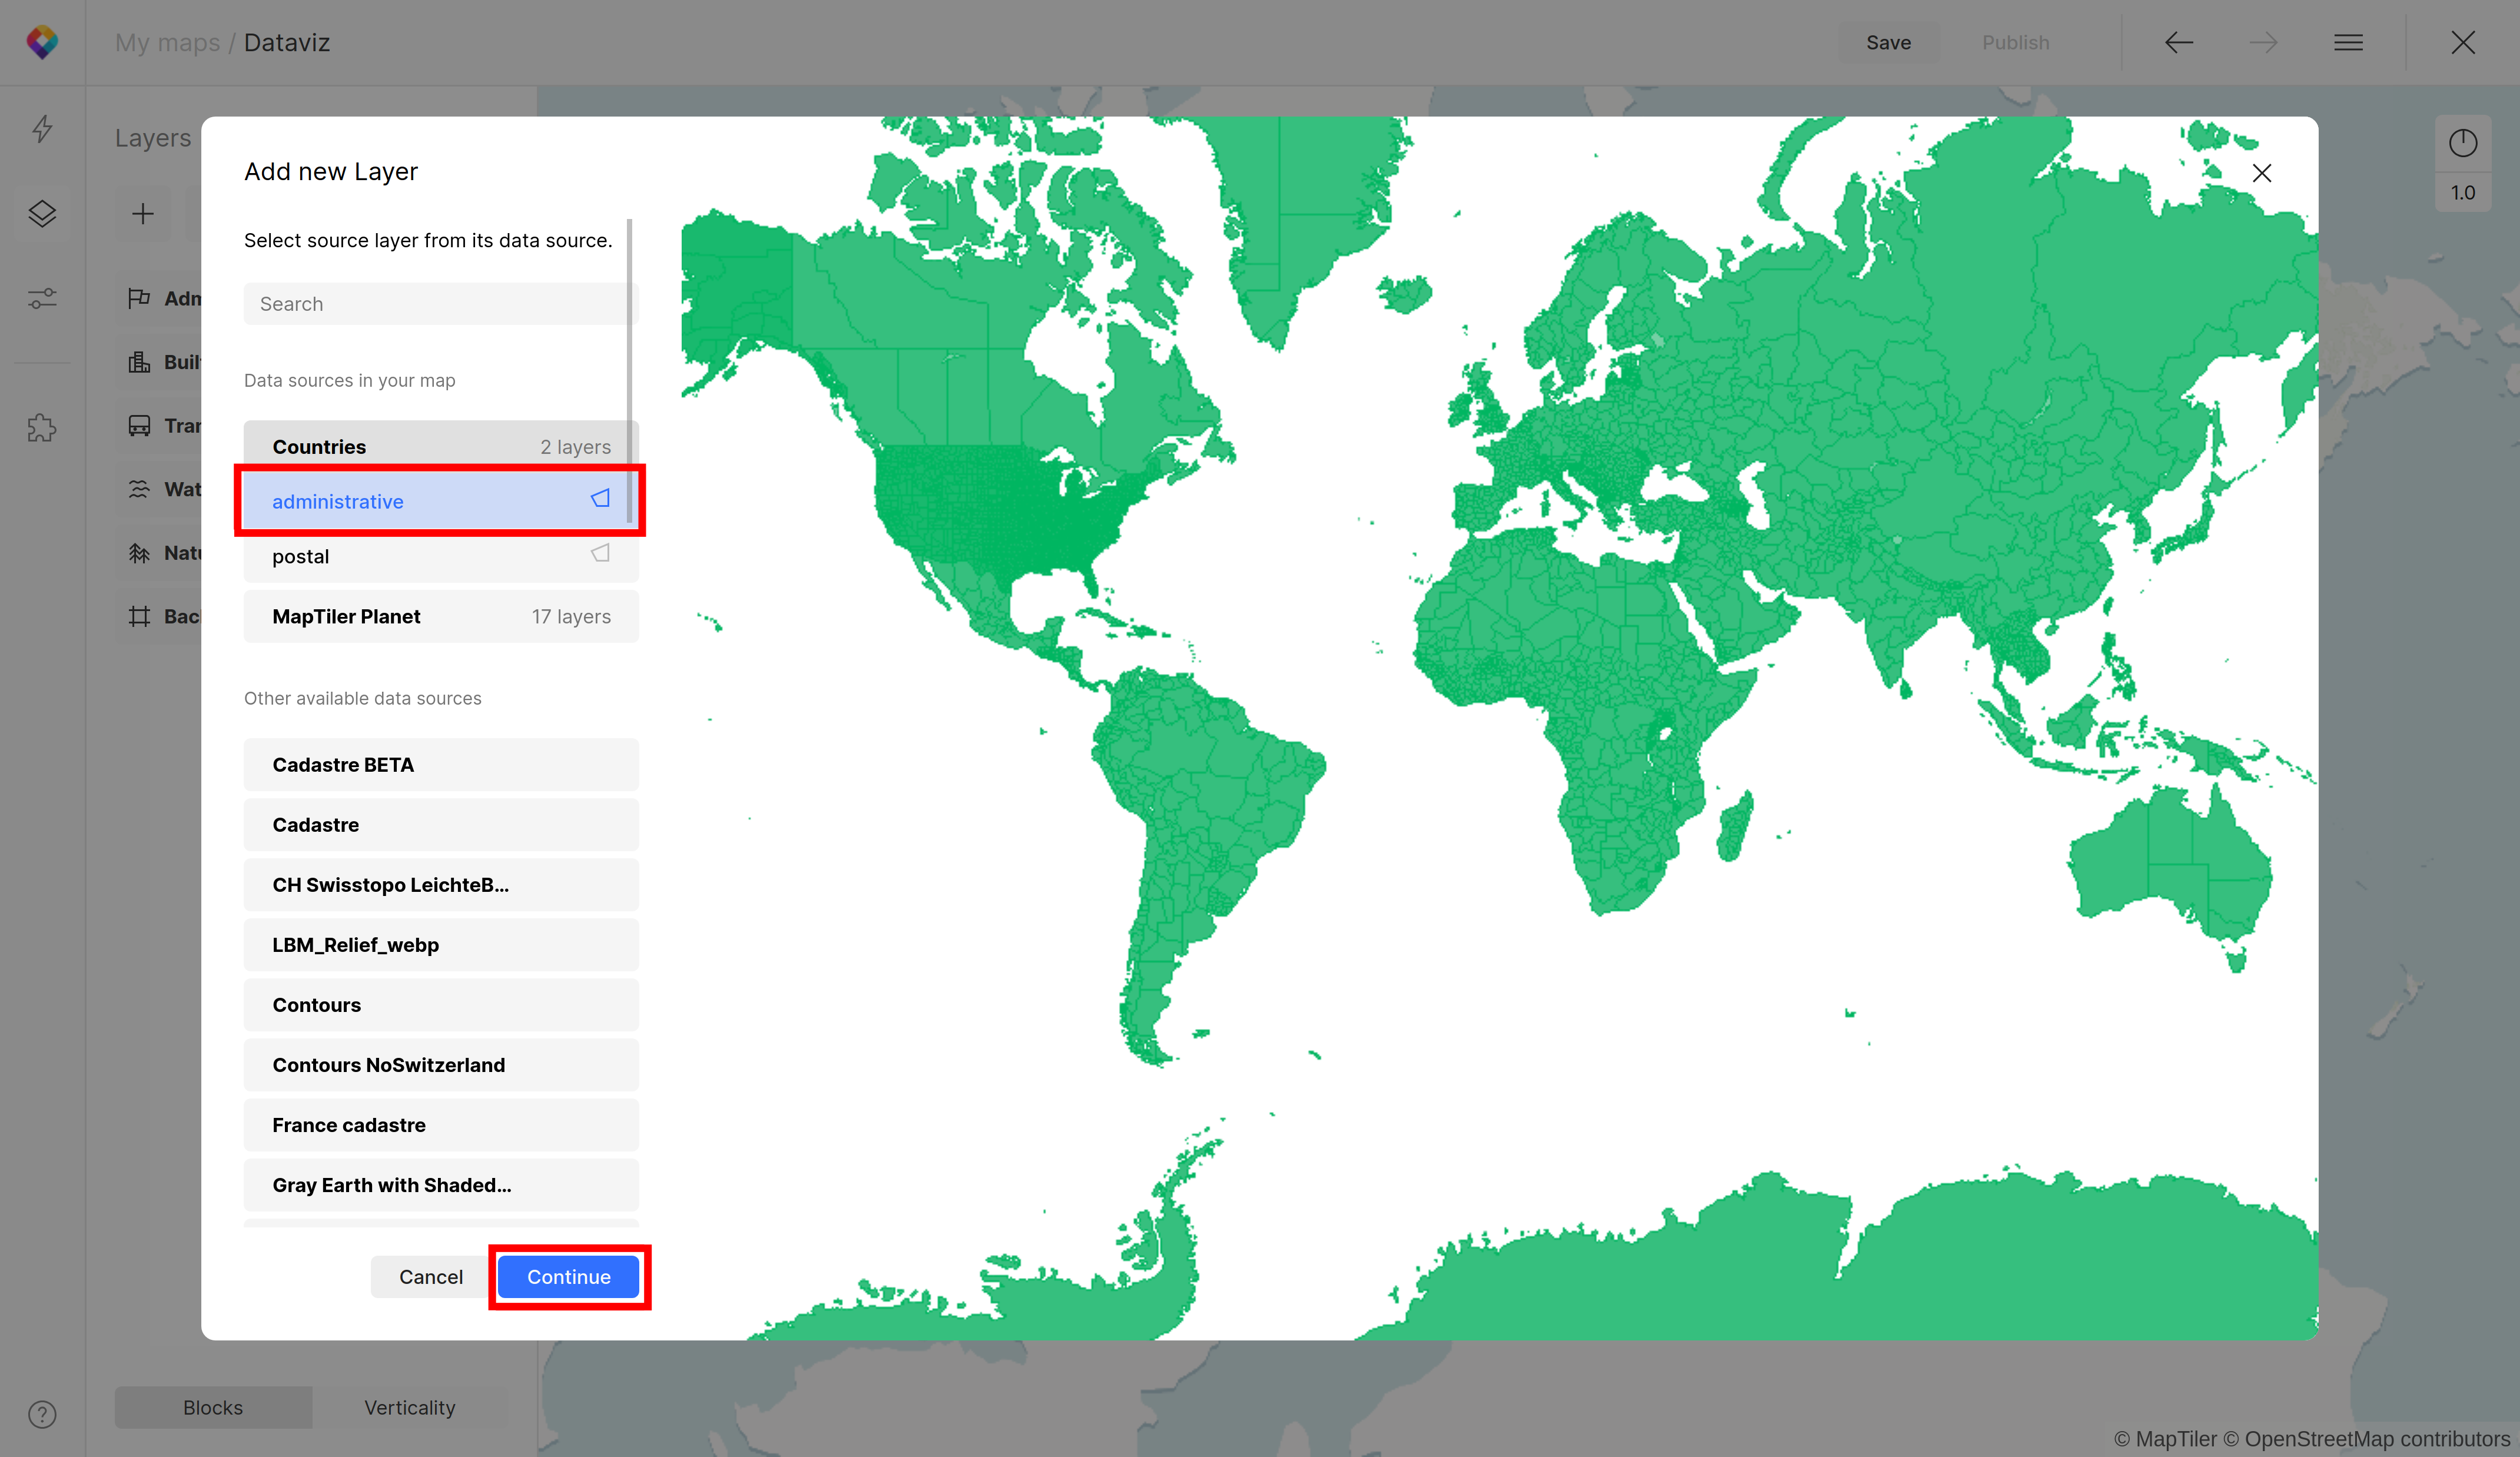
4. Select the Countries tileset from the list
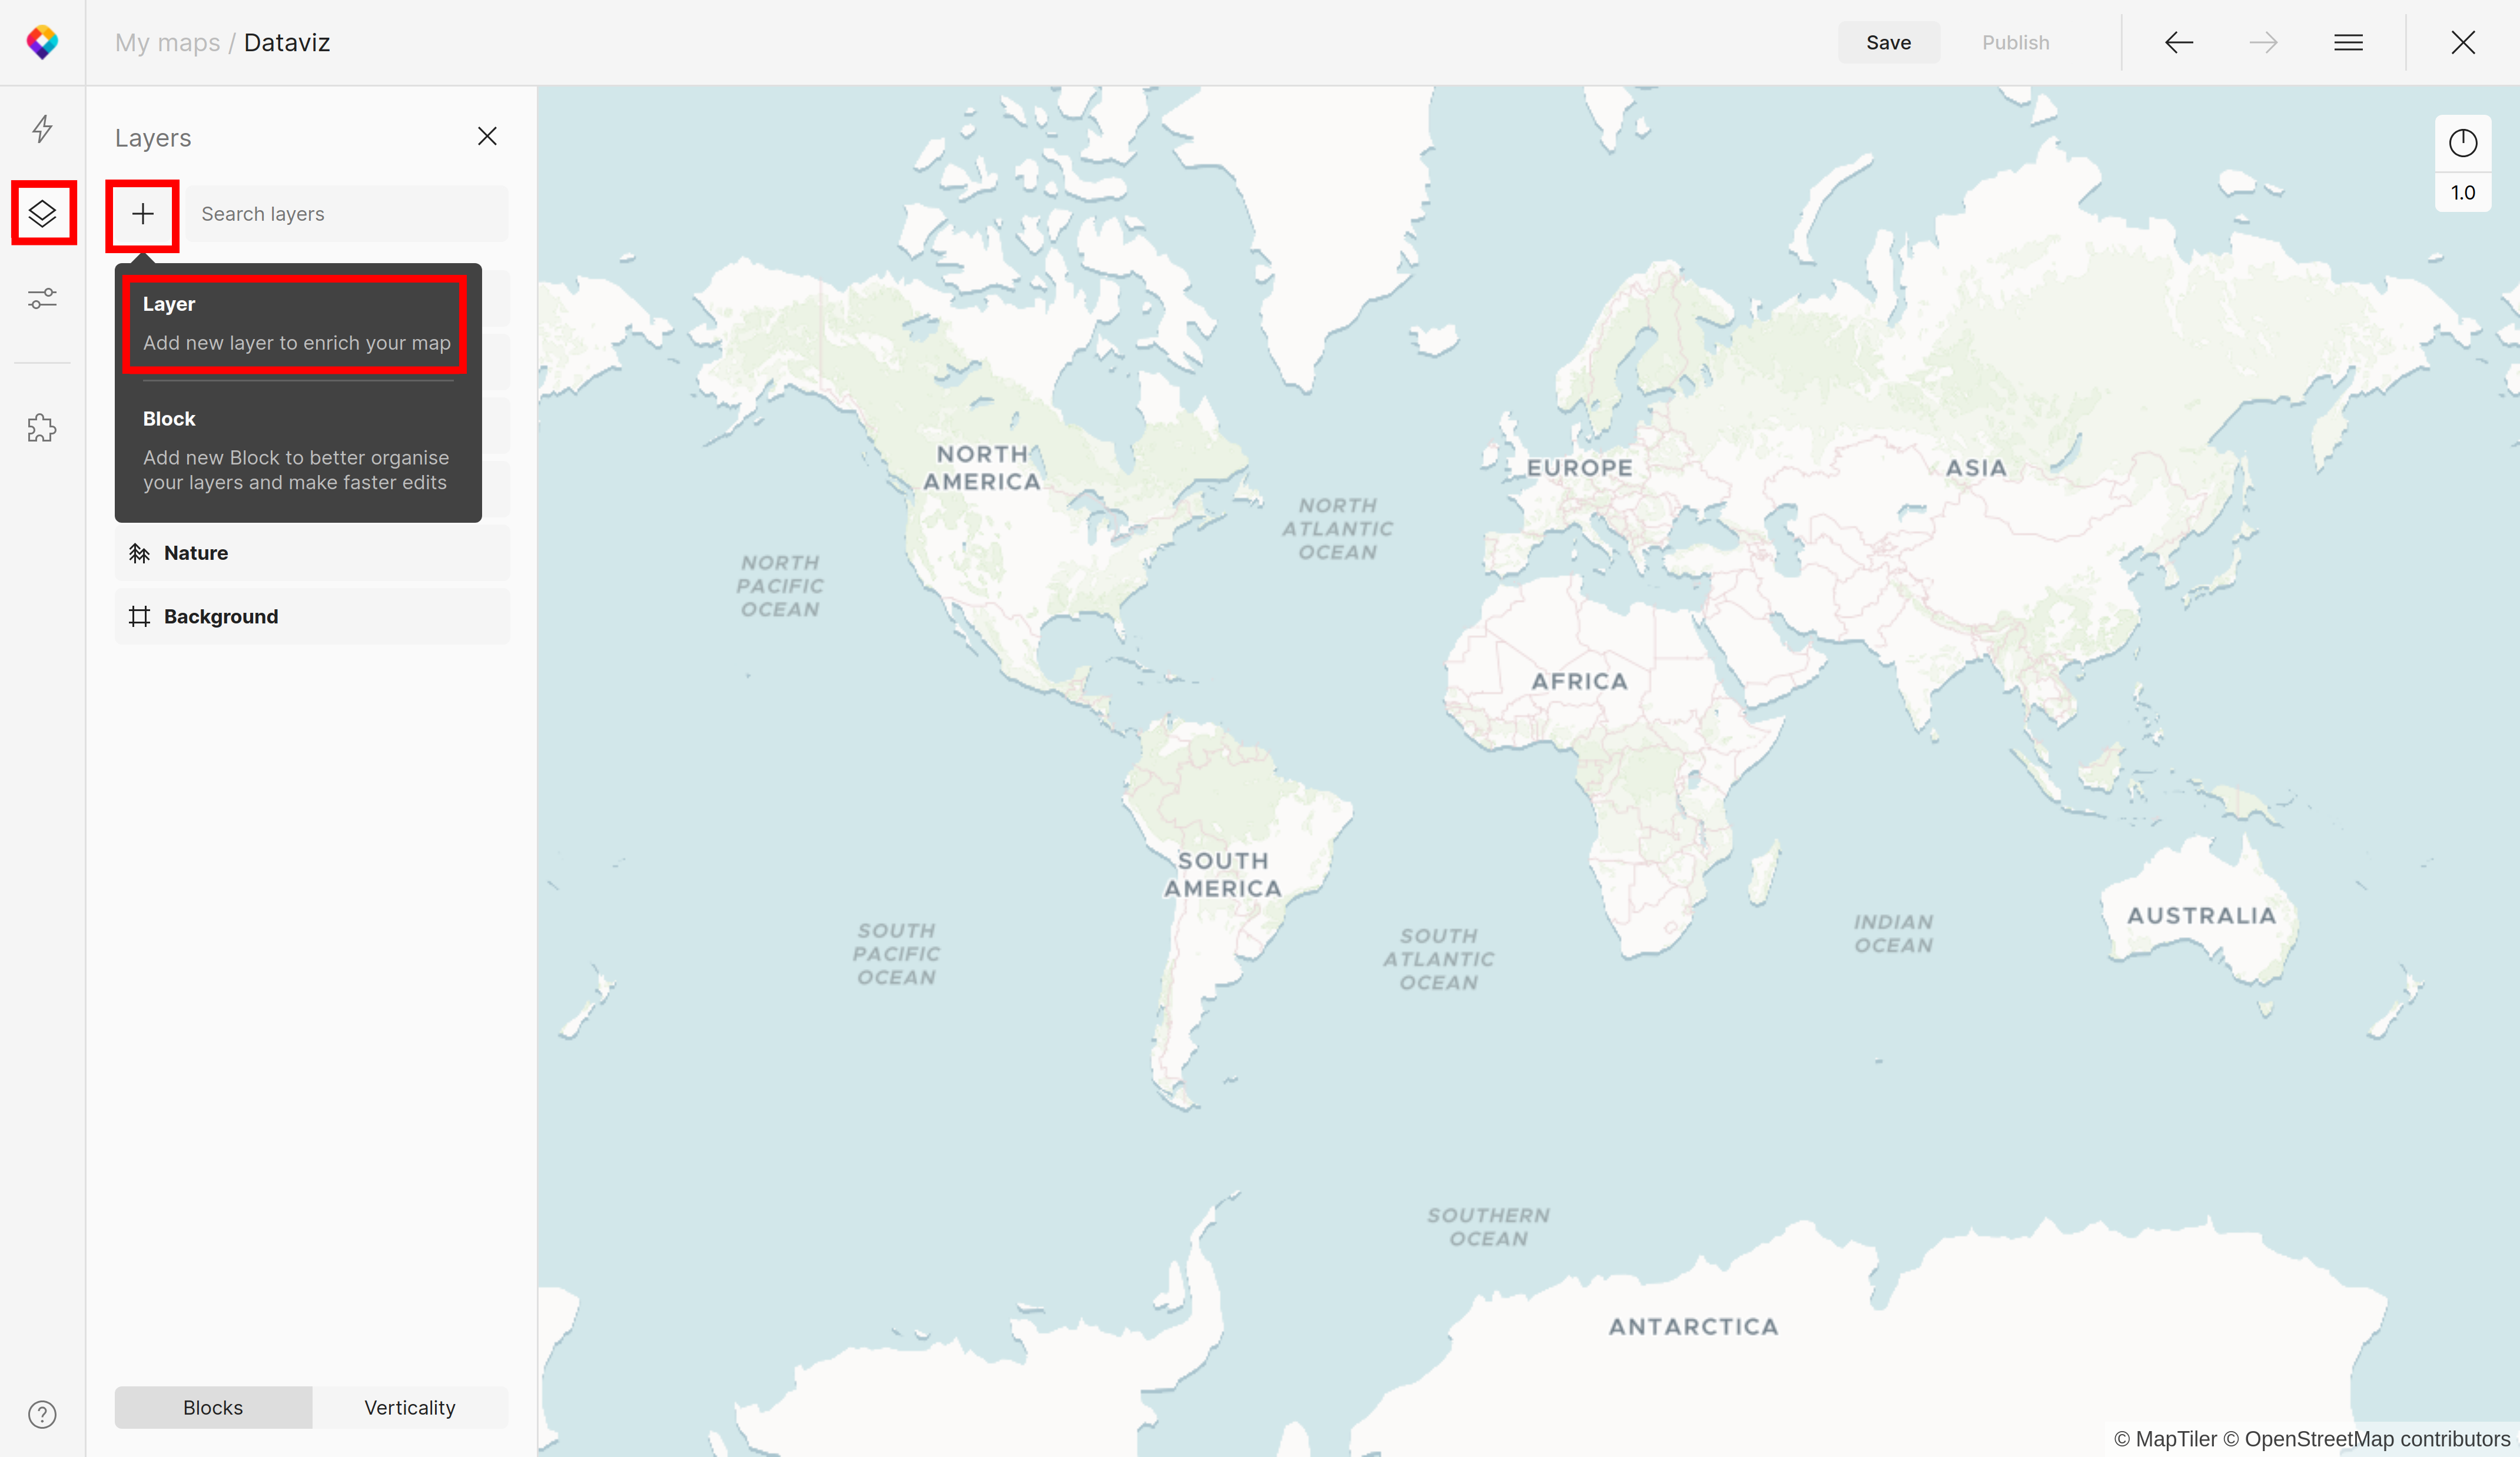
5. Add a new layer
- Click on the Layers (Alt + L) button on the left panel
- Click on `+` sign (Alt + N)
- Select Layer
6. Select the administrative layer under Countries tileset
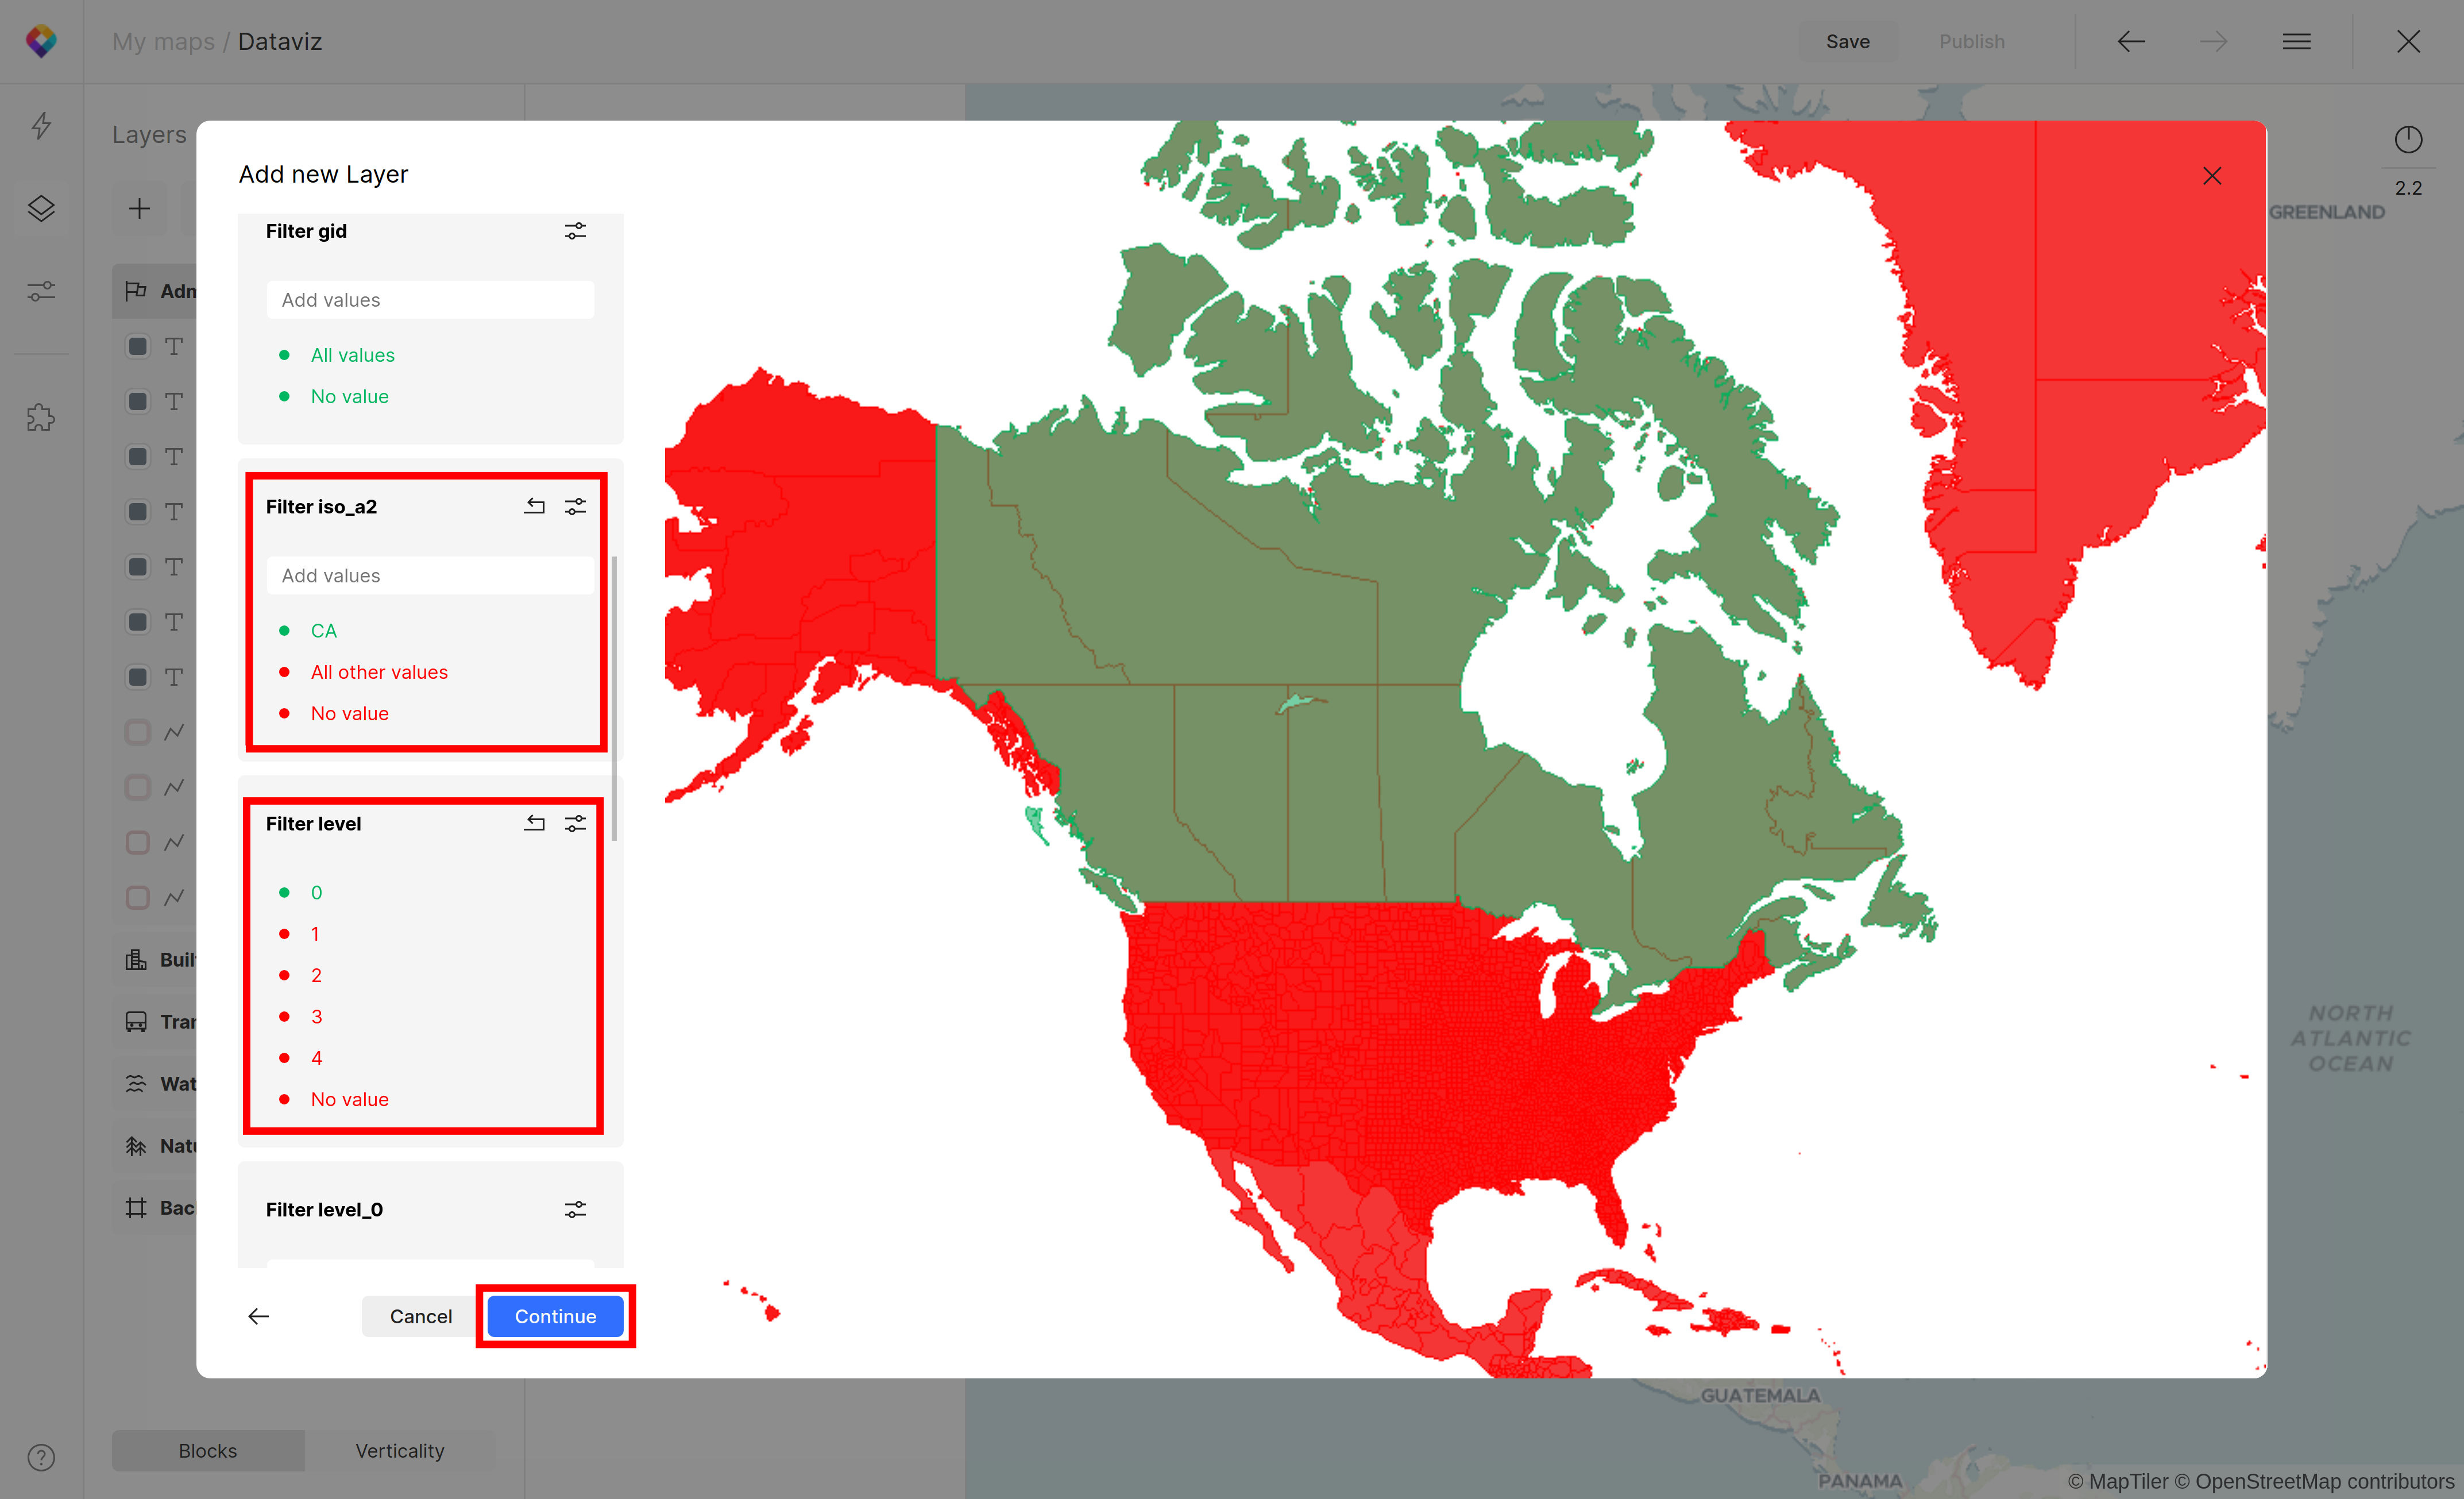
7. Filter Canada
- iso_a2 = CA
- iso_a2 attribute contains official ISO 3166 Alpha-2 codes of the countries
- level = 0
- level attribute contains the hierarchical order of the administrative divisions (0 stands for country)
- Filters could be changed in the future
- See the schema documentation
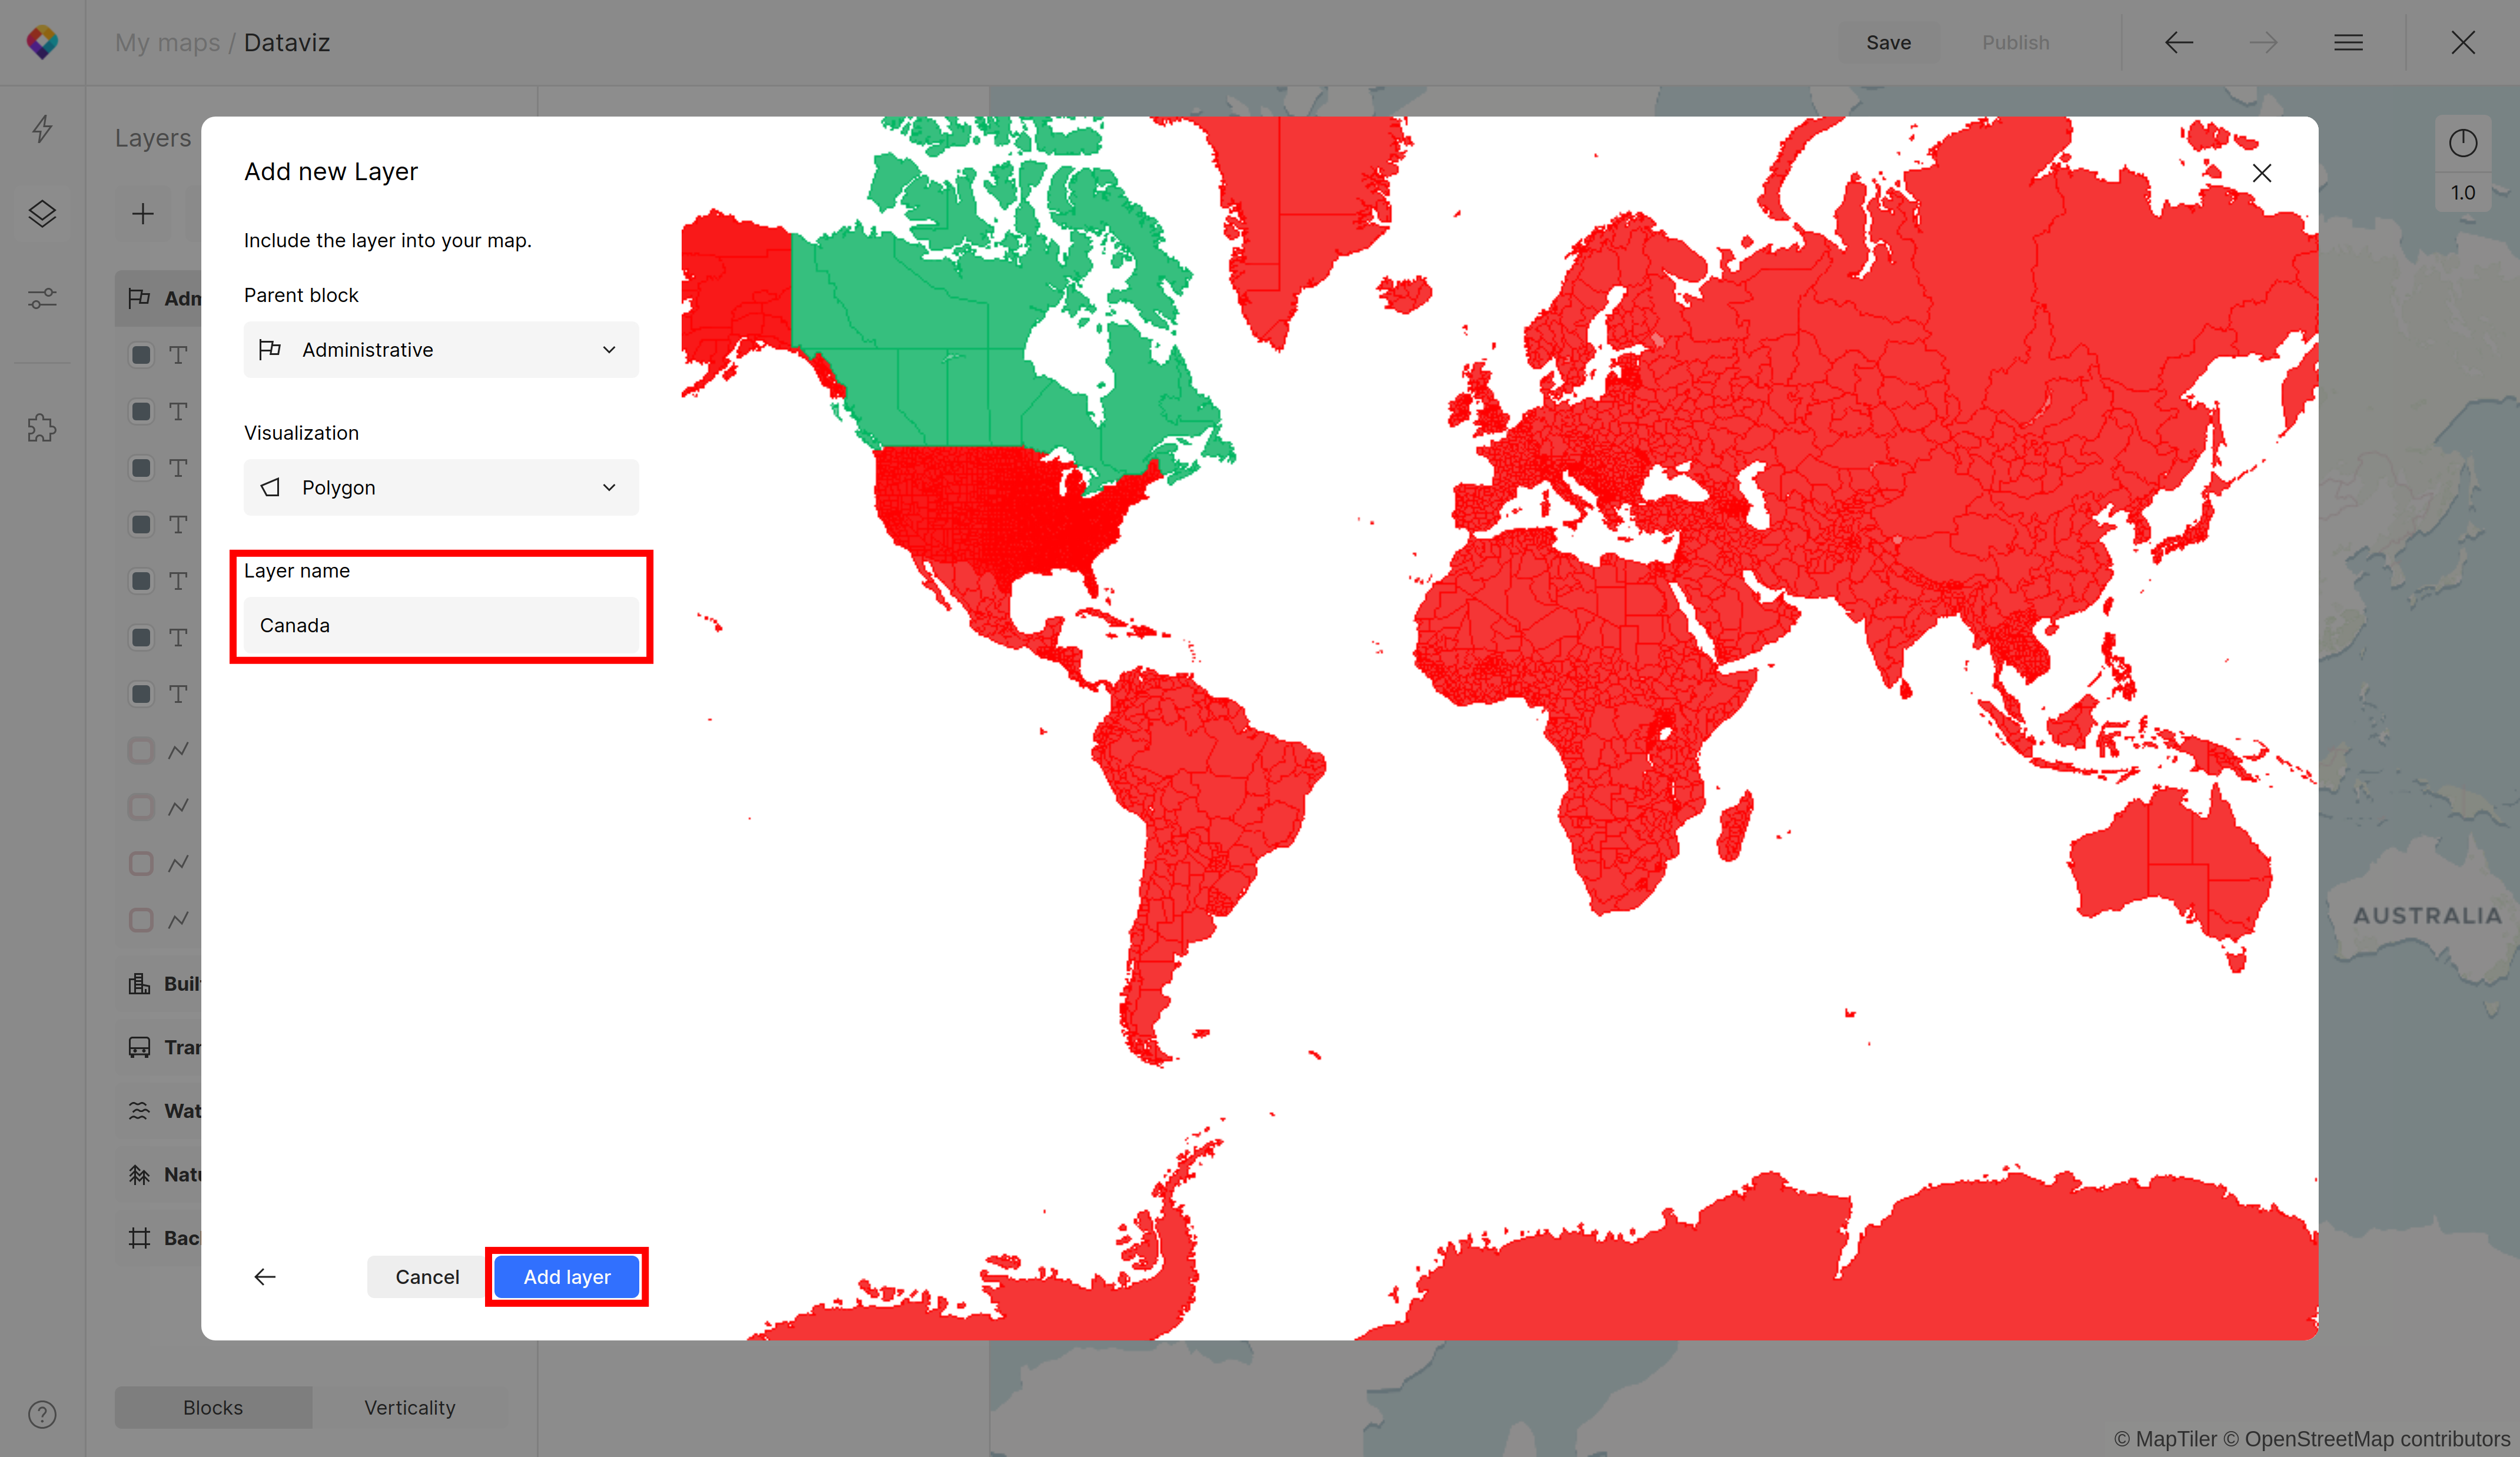
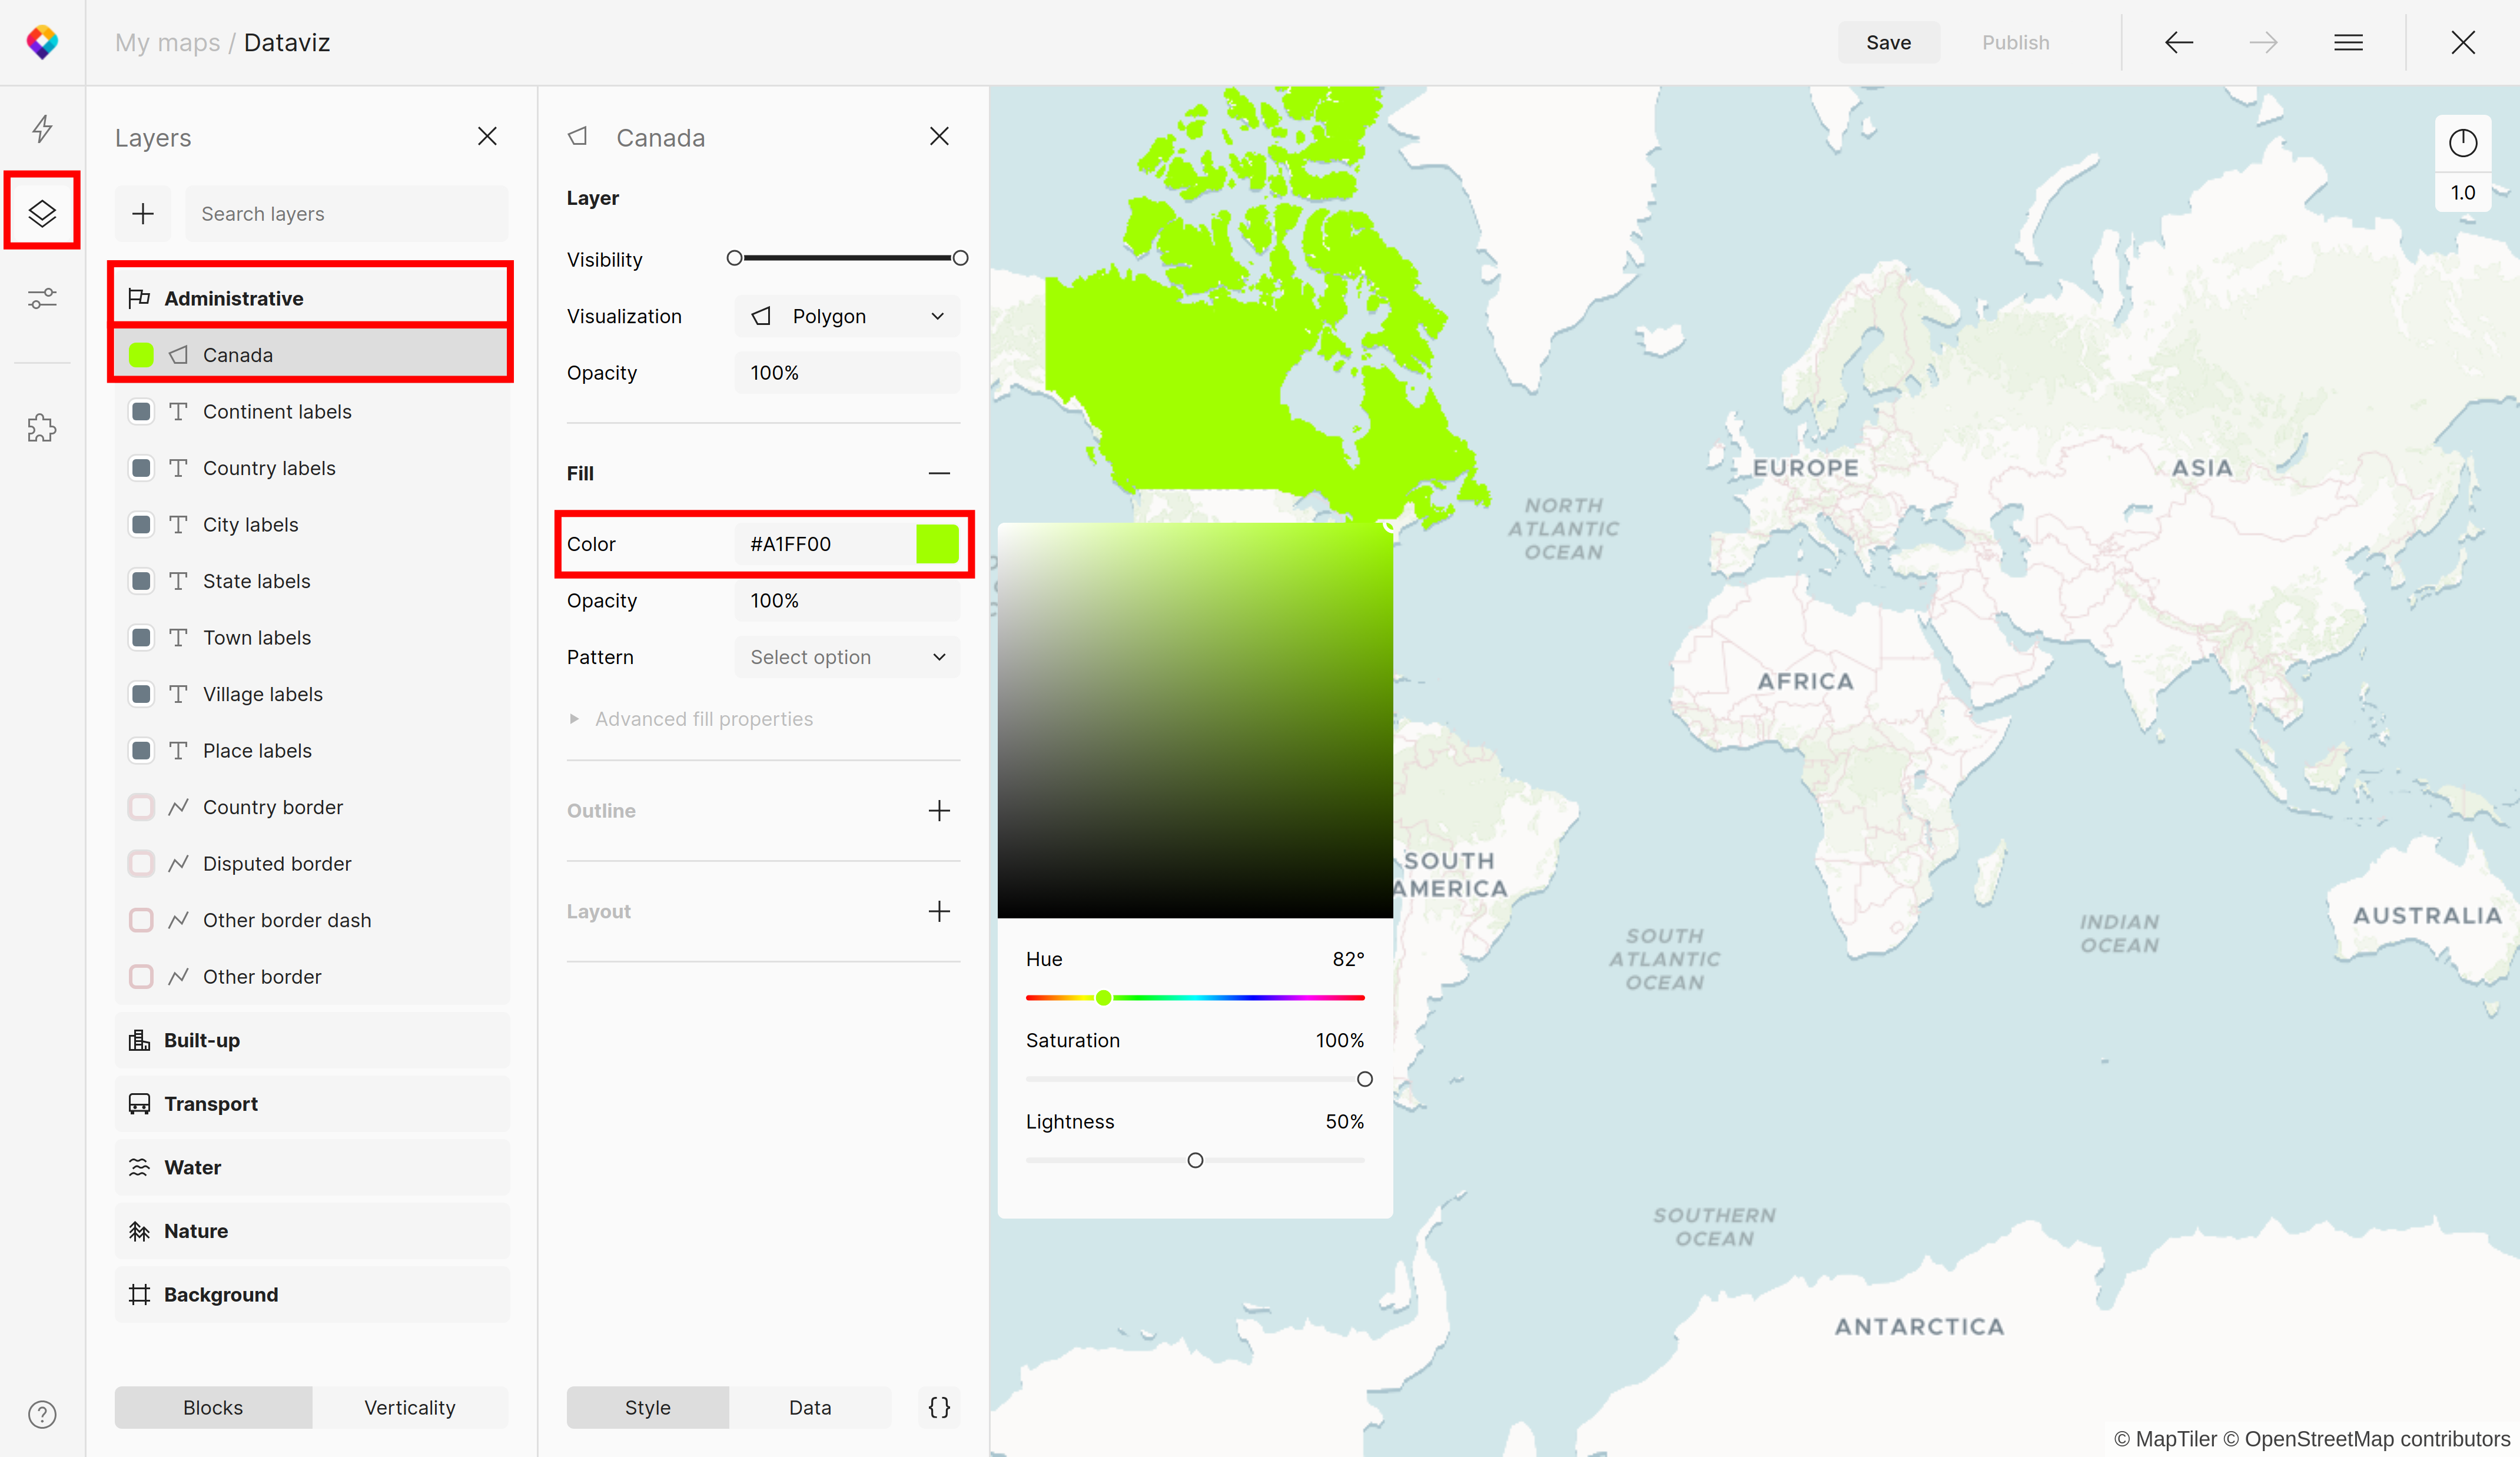
8. Name your new layer
For example Canada
9. Change the color of layer Canada
- Find the Canada layer under the Administrative block
- Change the color on #A1FF00
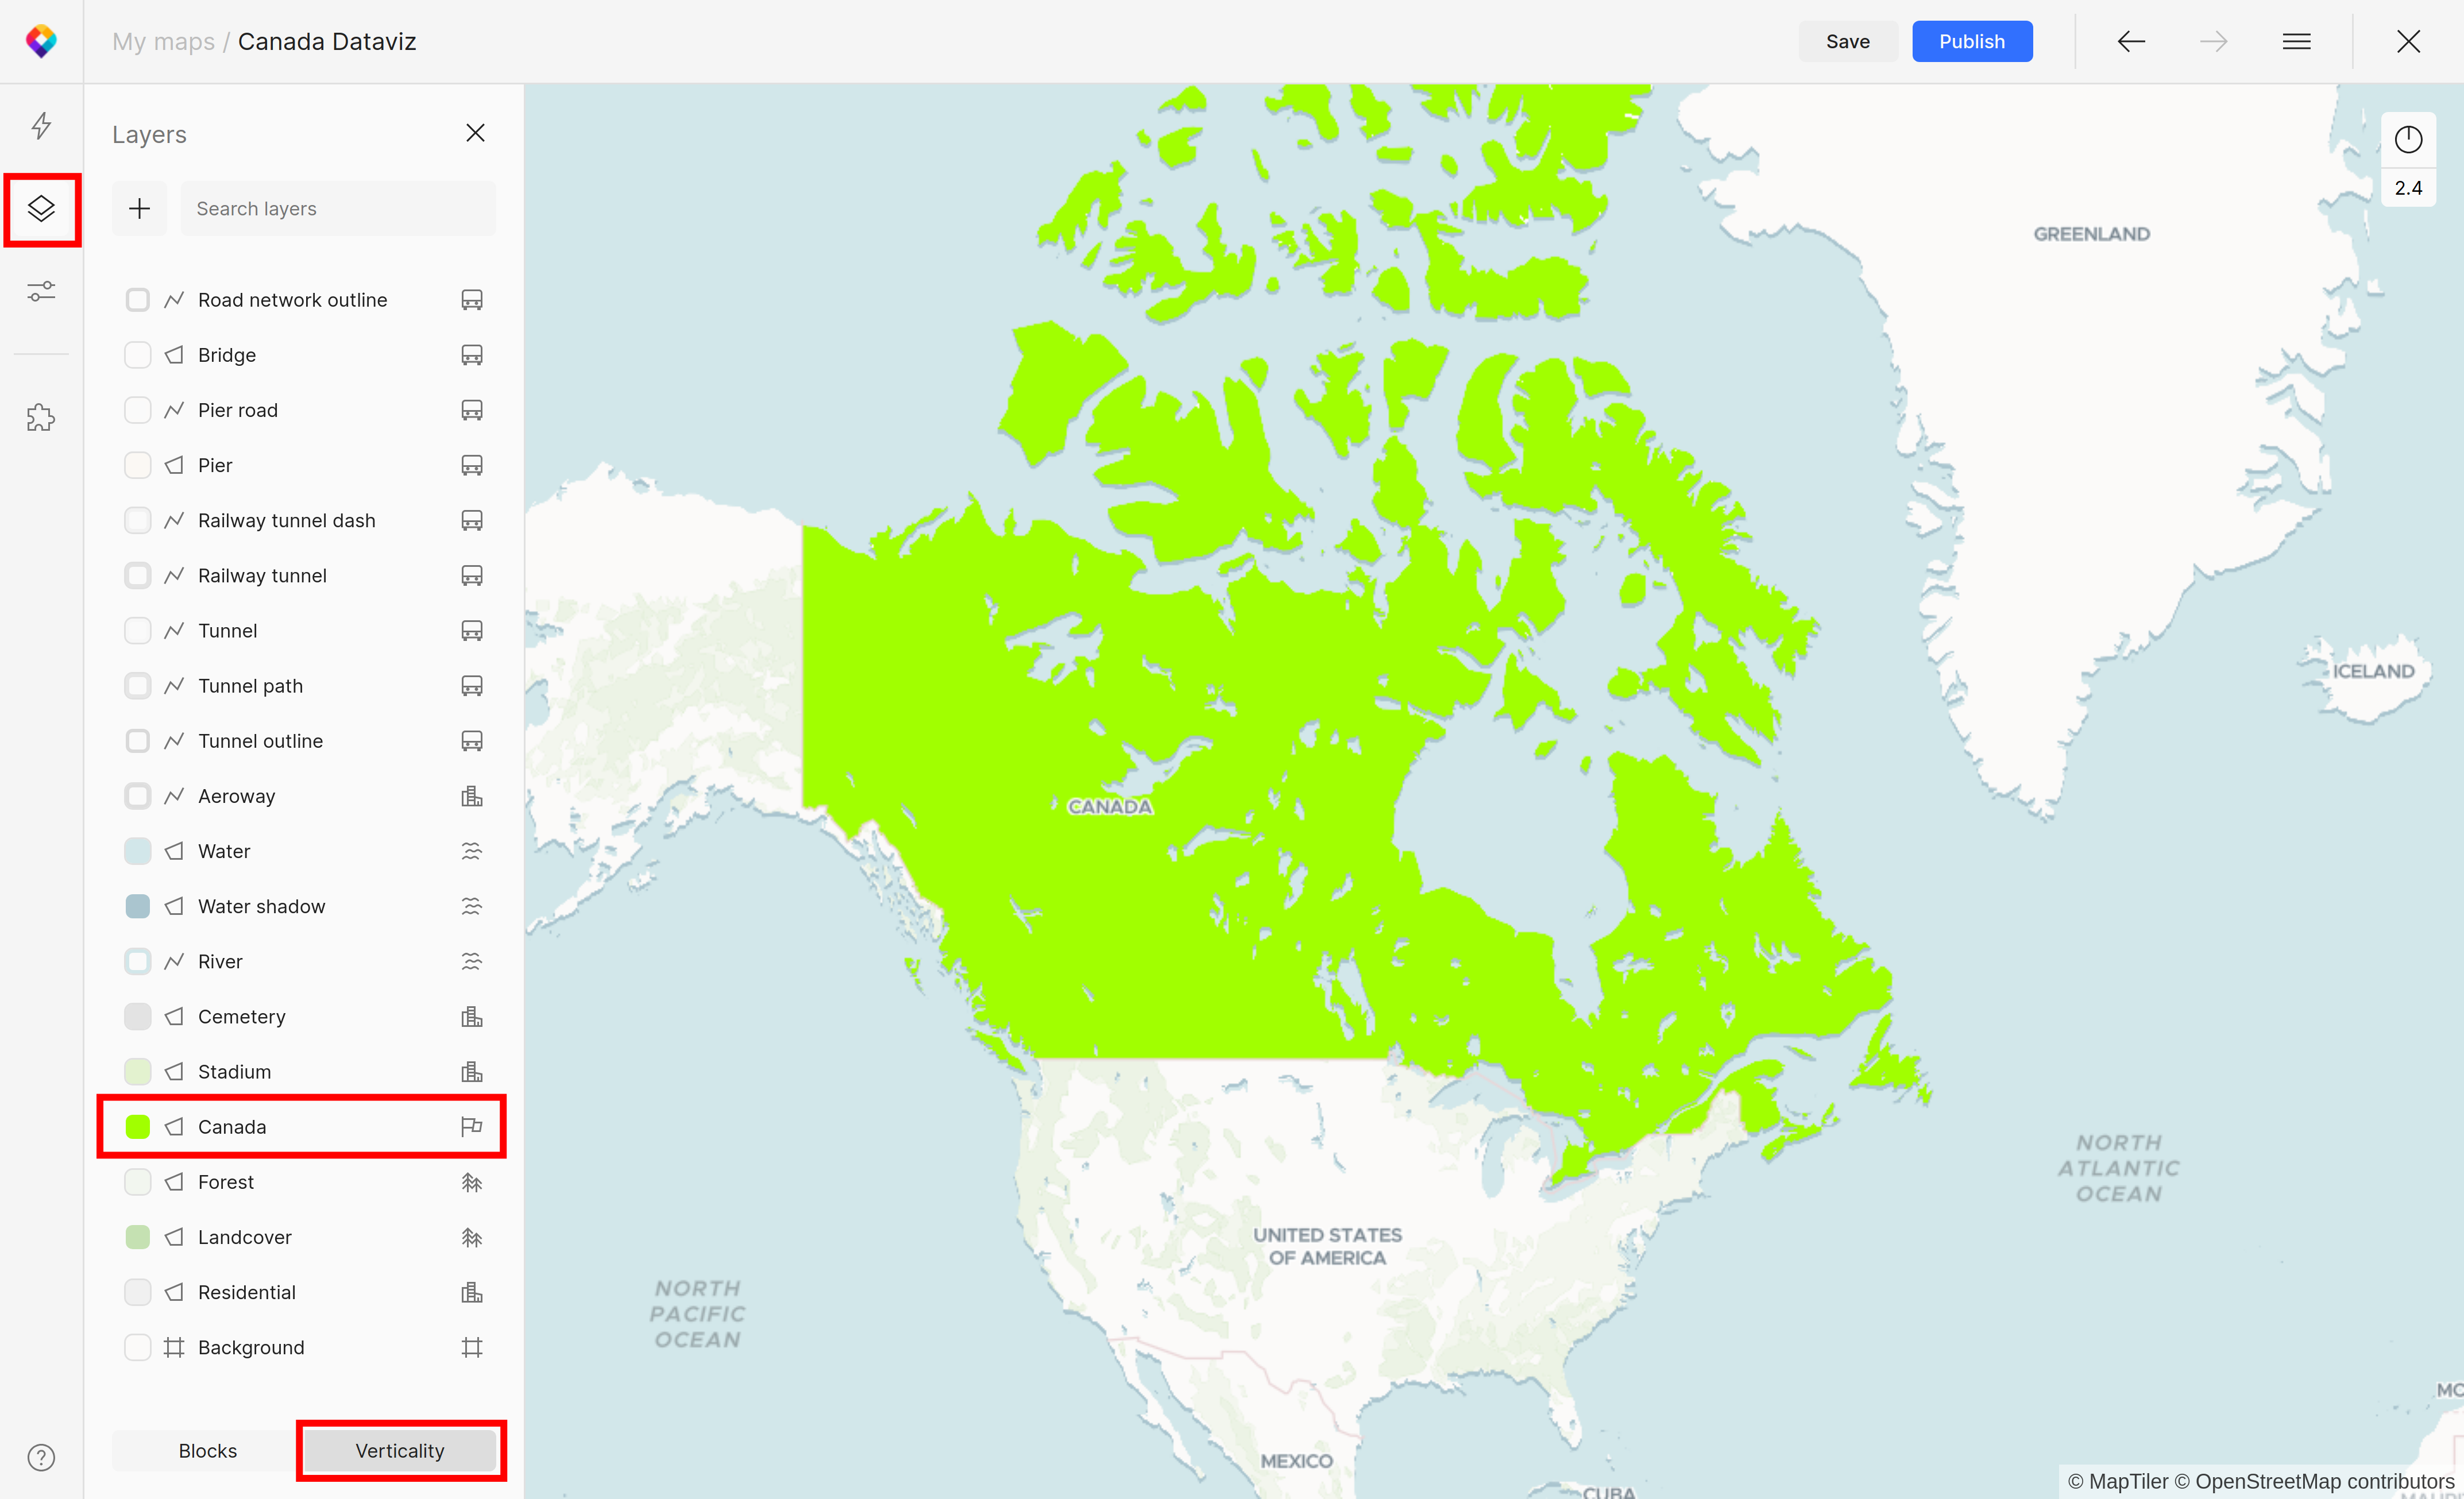
10. Move the Canada layer e.g. under the Stadium layer
- Under the Layer (Alt + L) button at the left panel
- Click on the Verticality tab at the bottom
- Drag the Canada layer and drop it on desired place
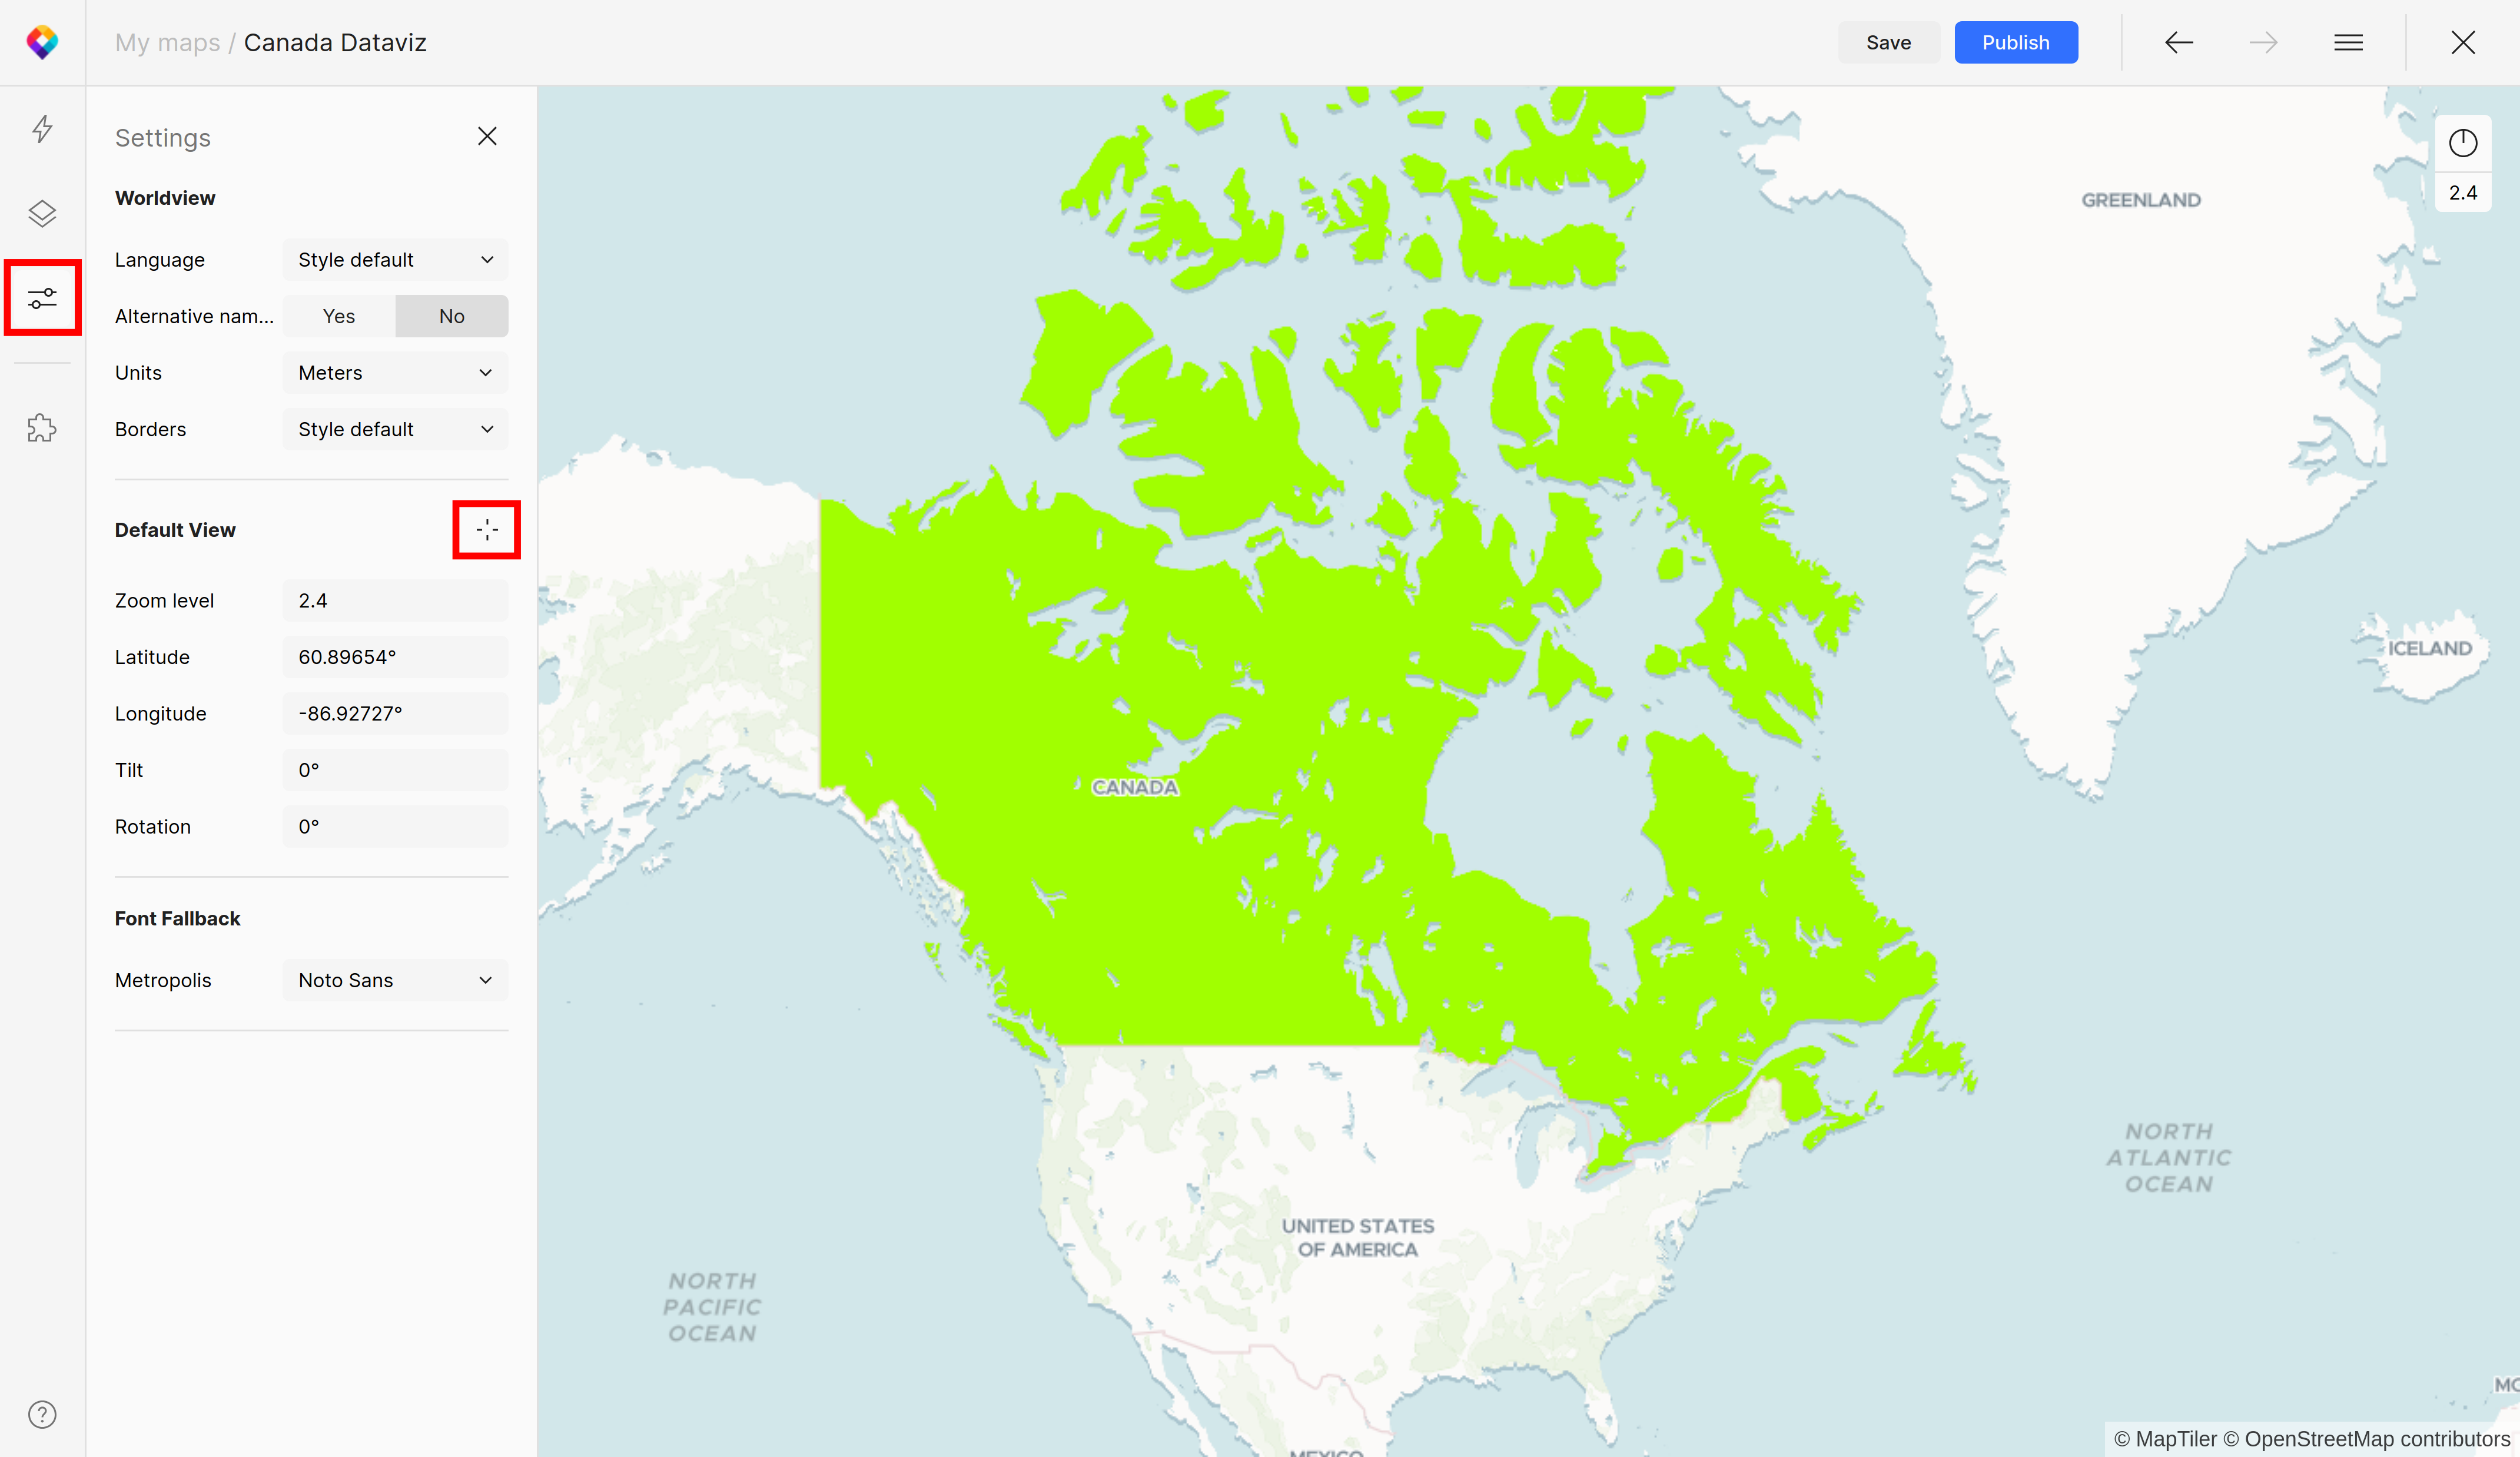
11. Save the default view of the map
- Under Settings (Alt + S) button at the left panel
- Click on Set current View button
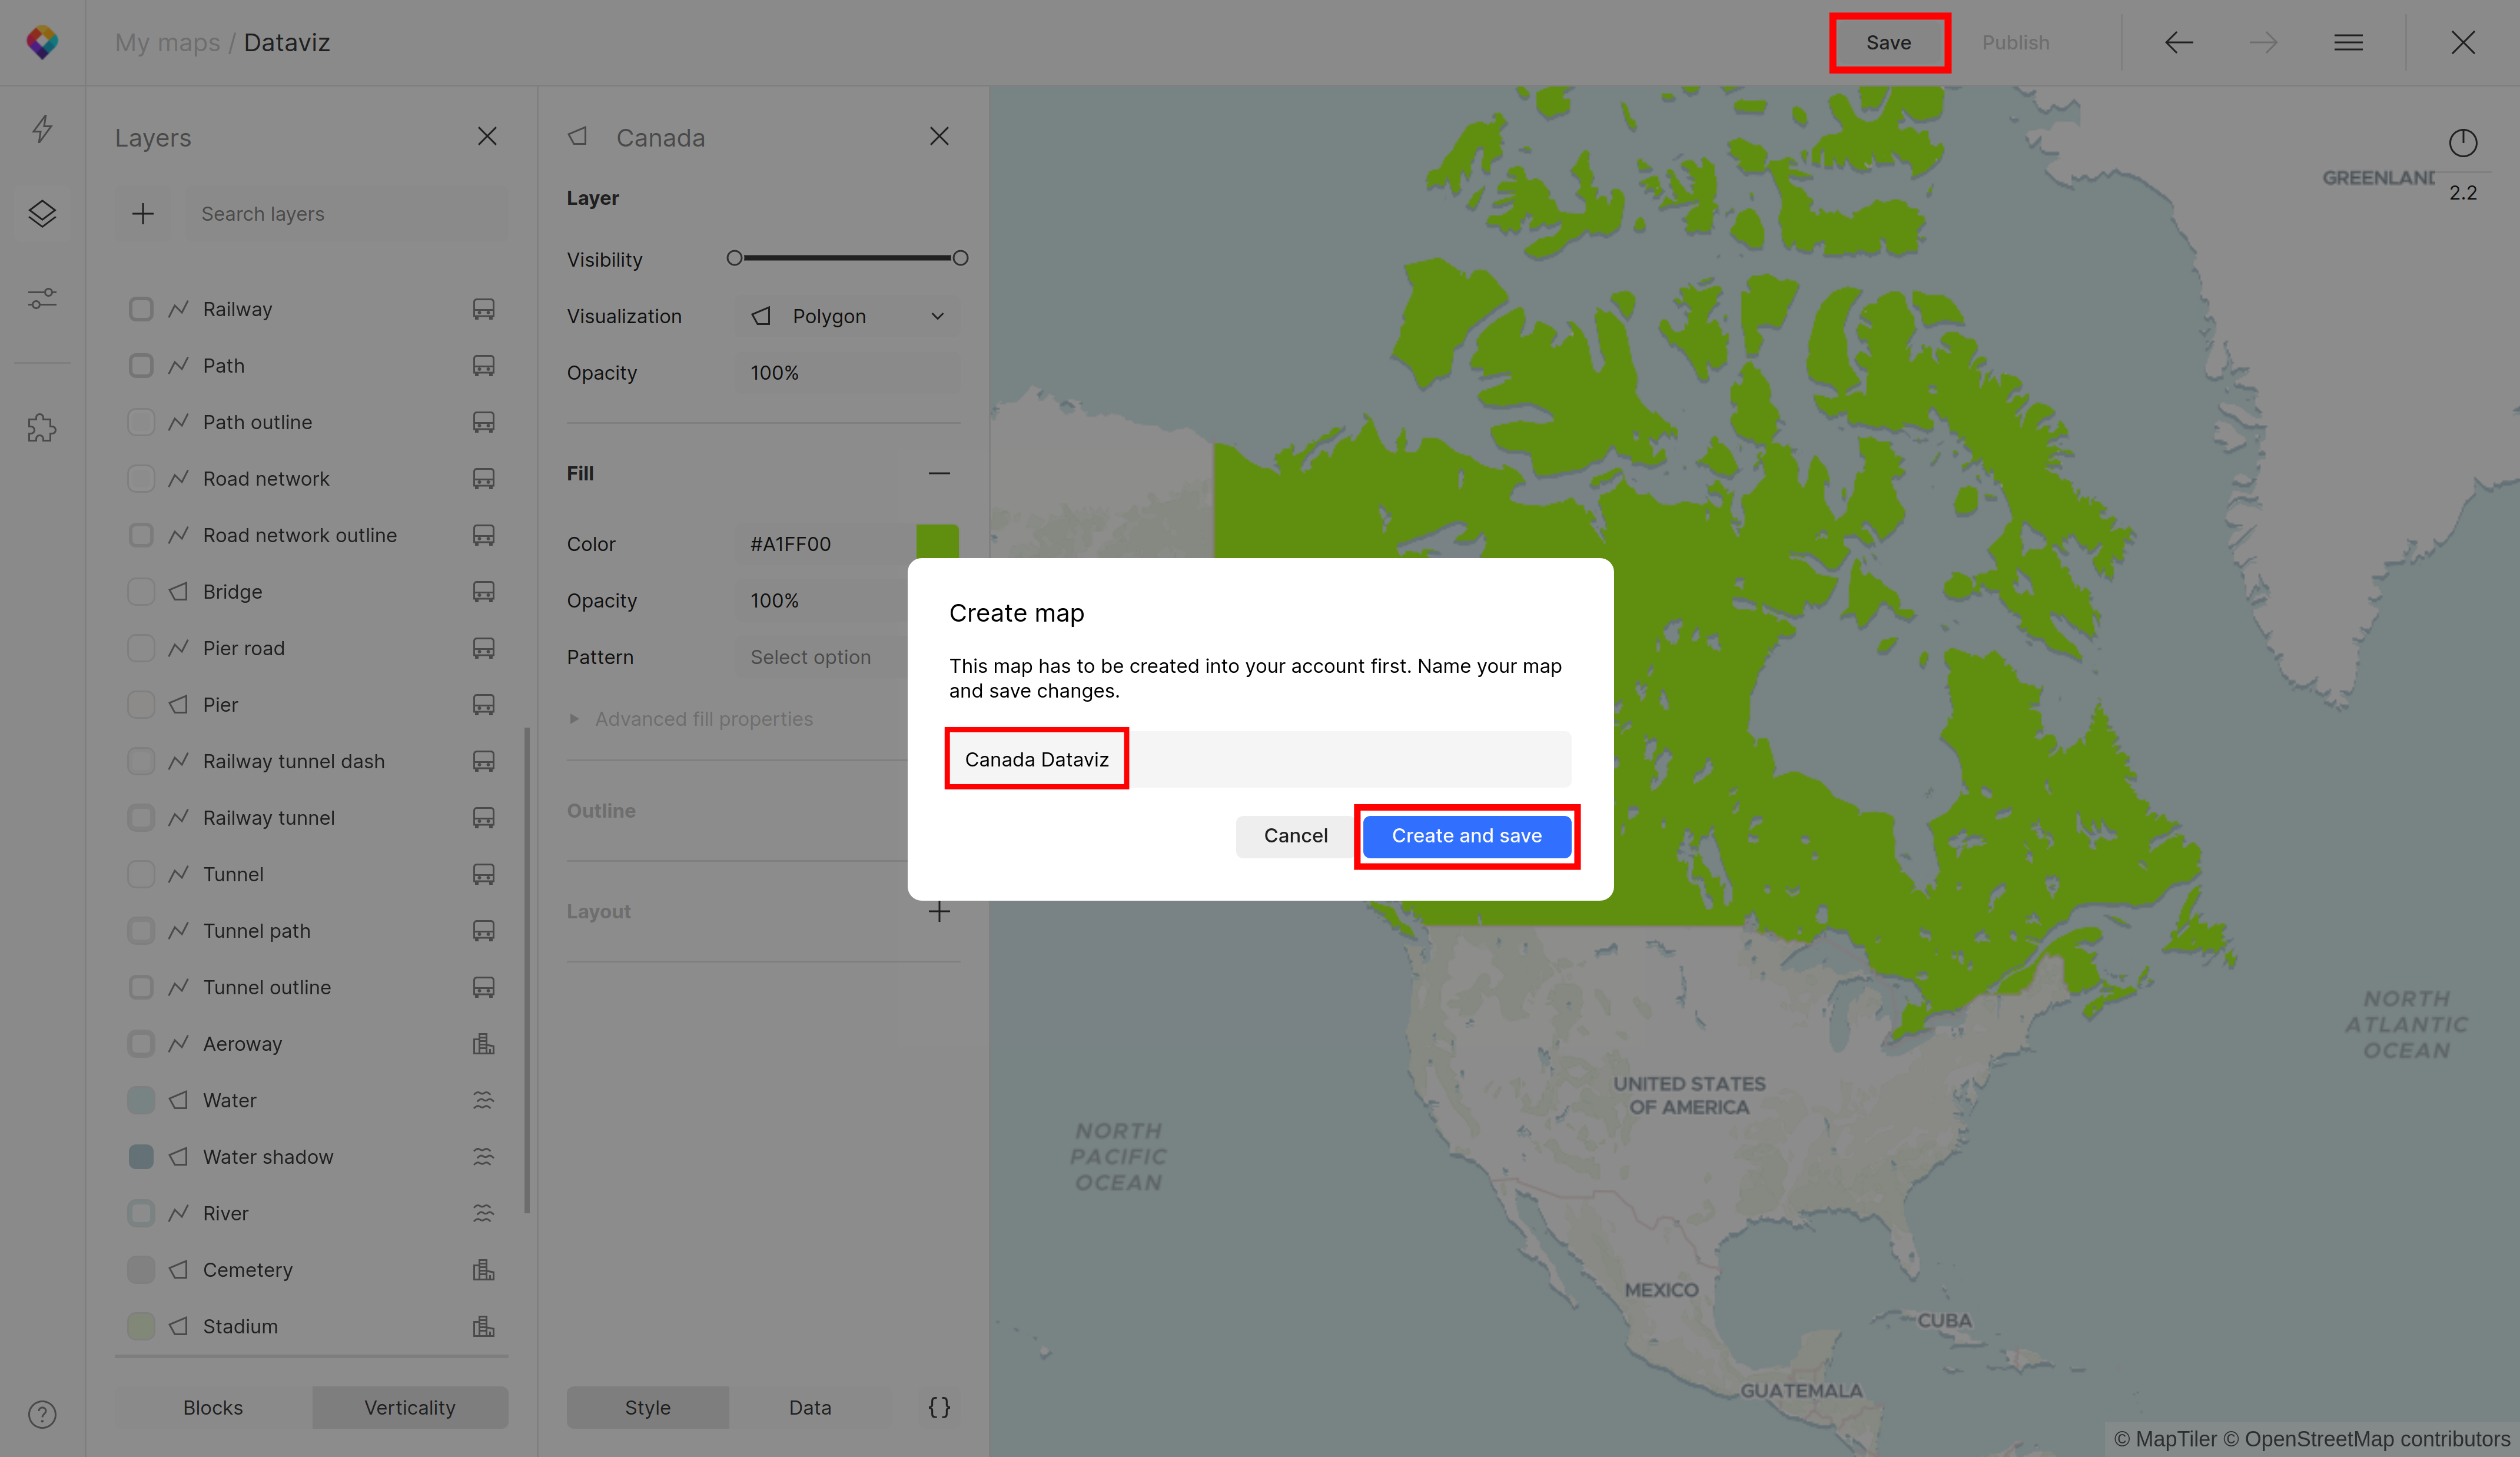
12. Save the map to your account
Set the name on Canada Dataviz
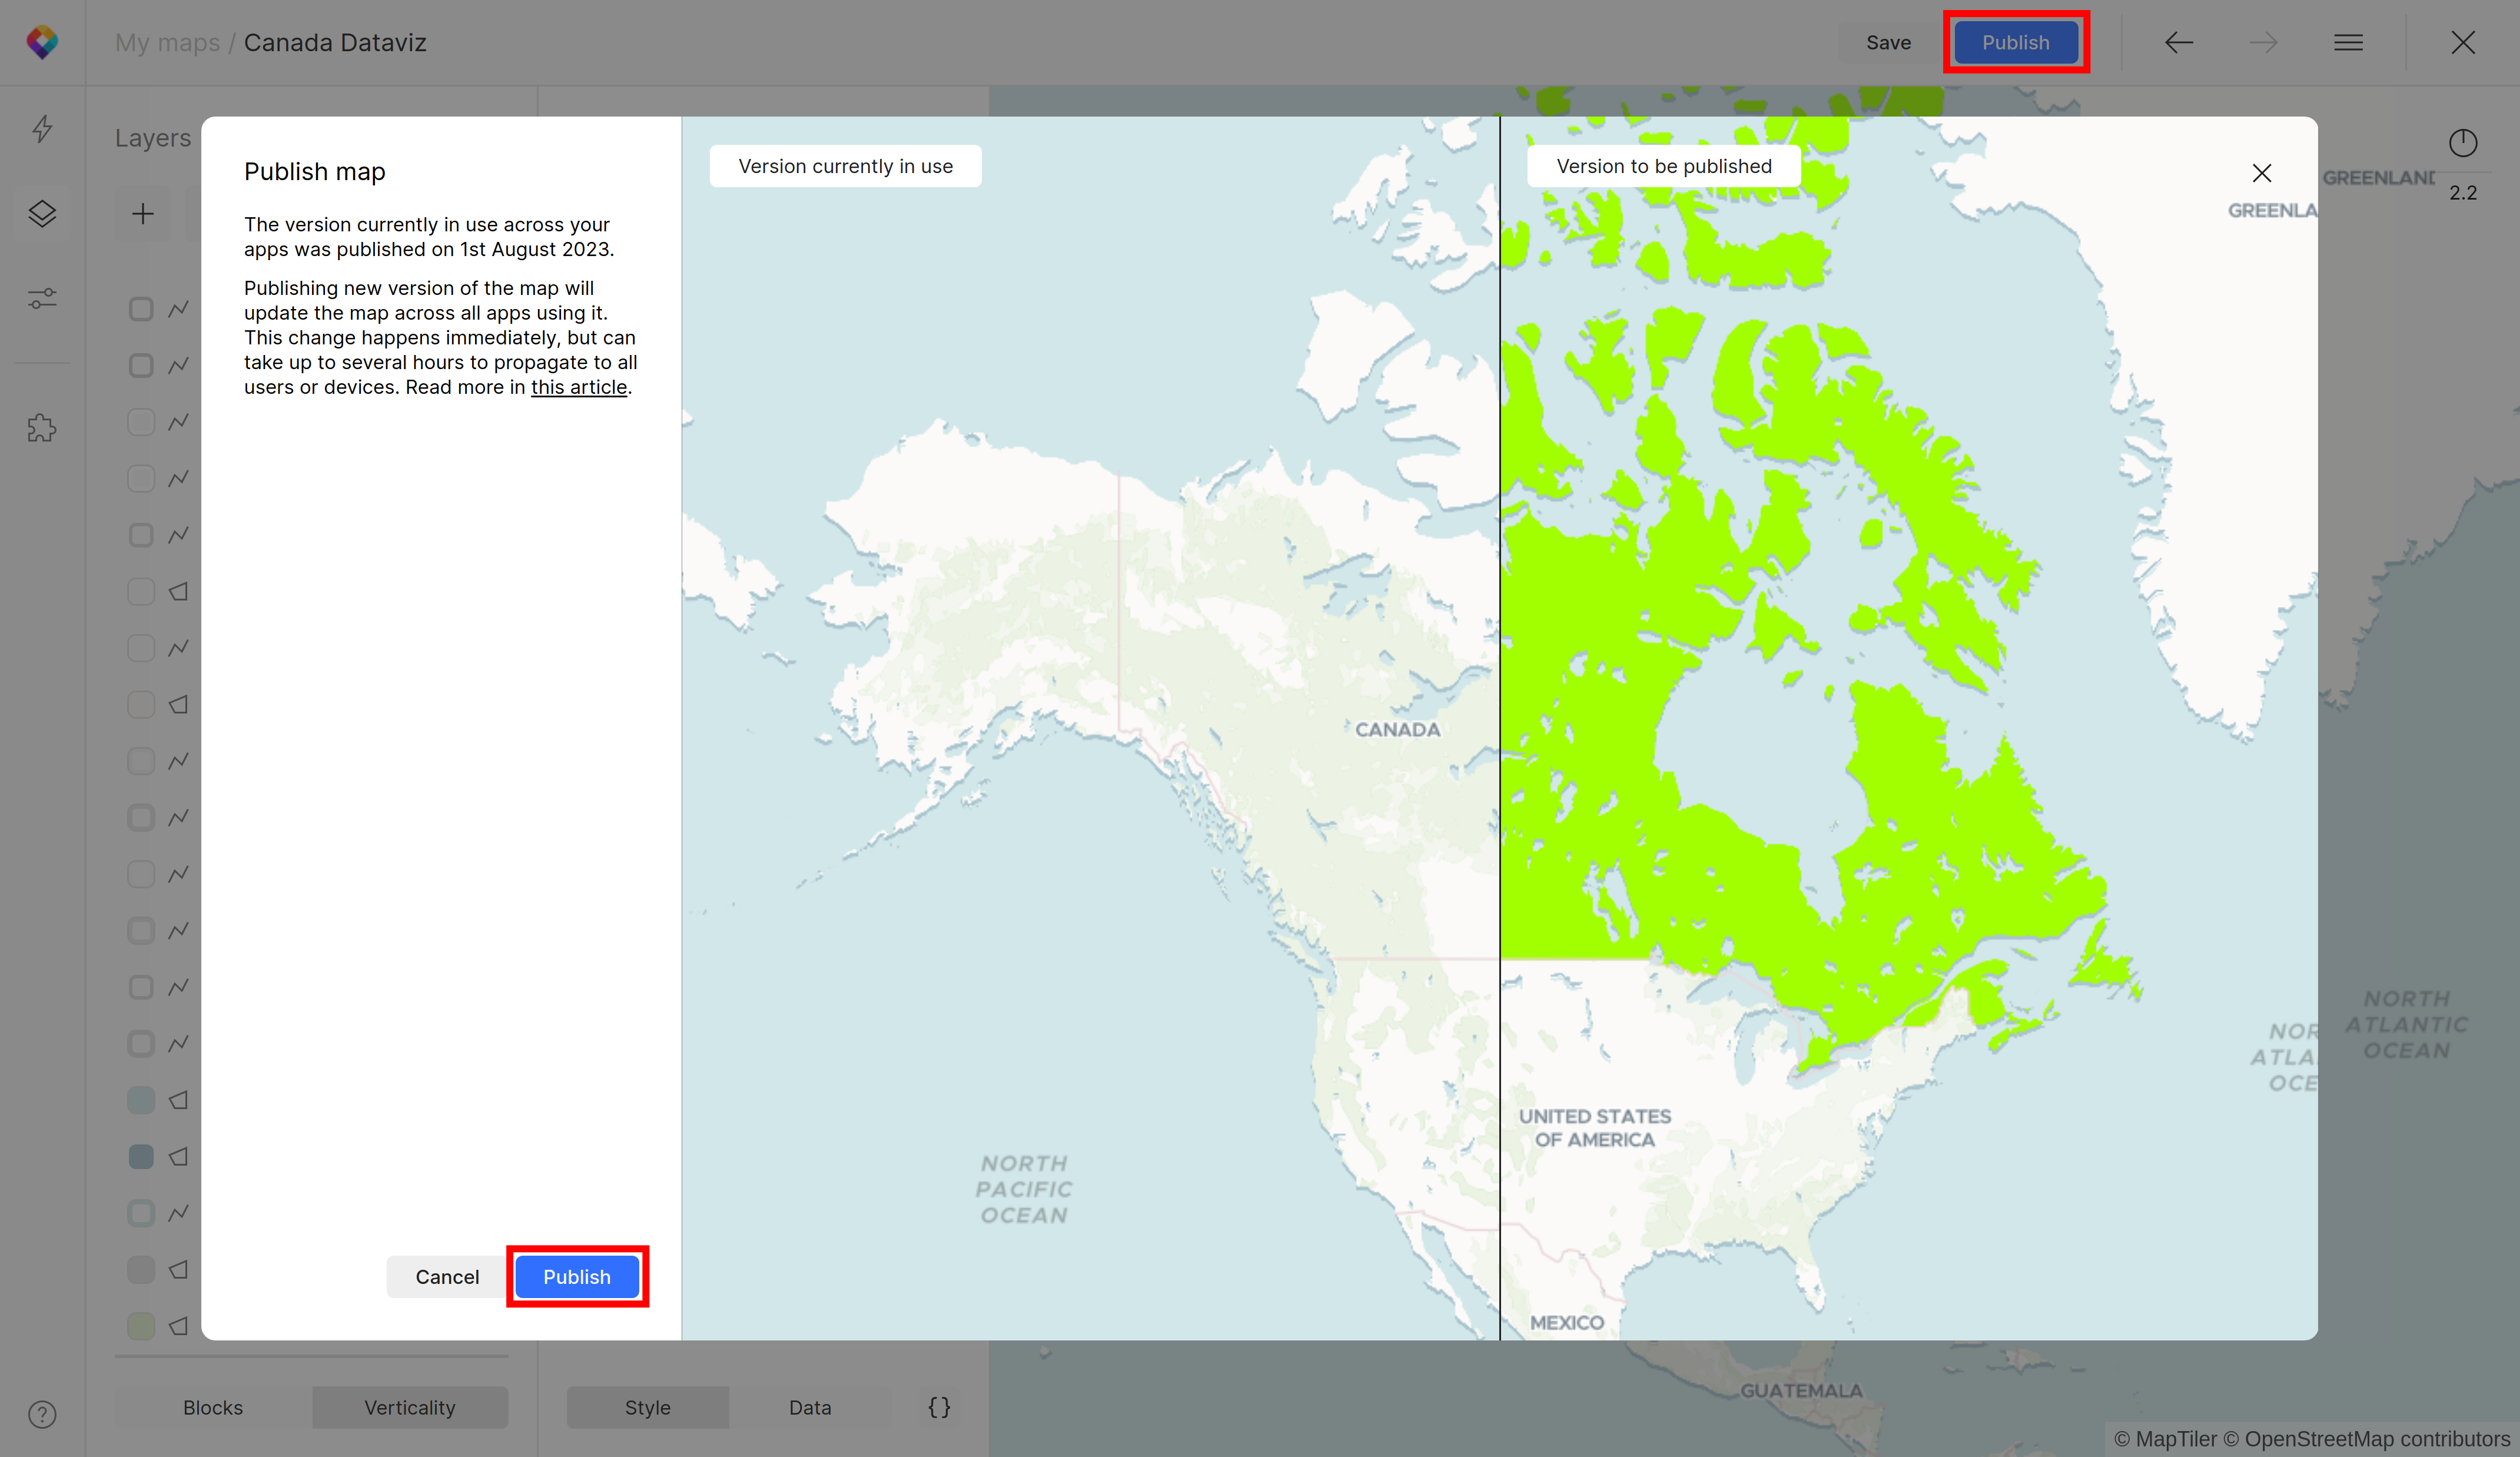
13. Publish the map
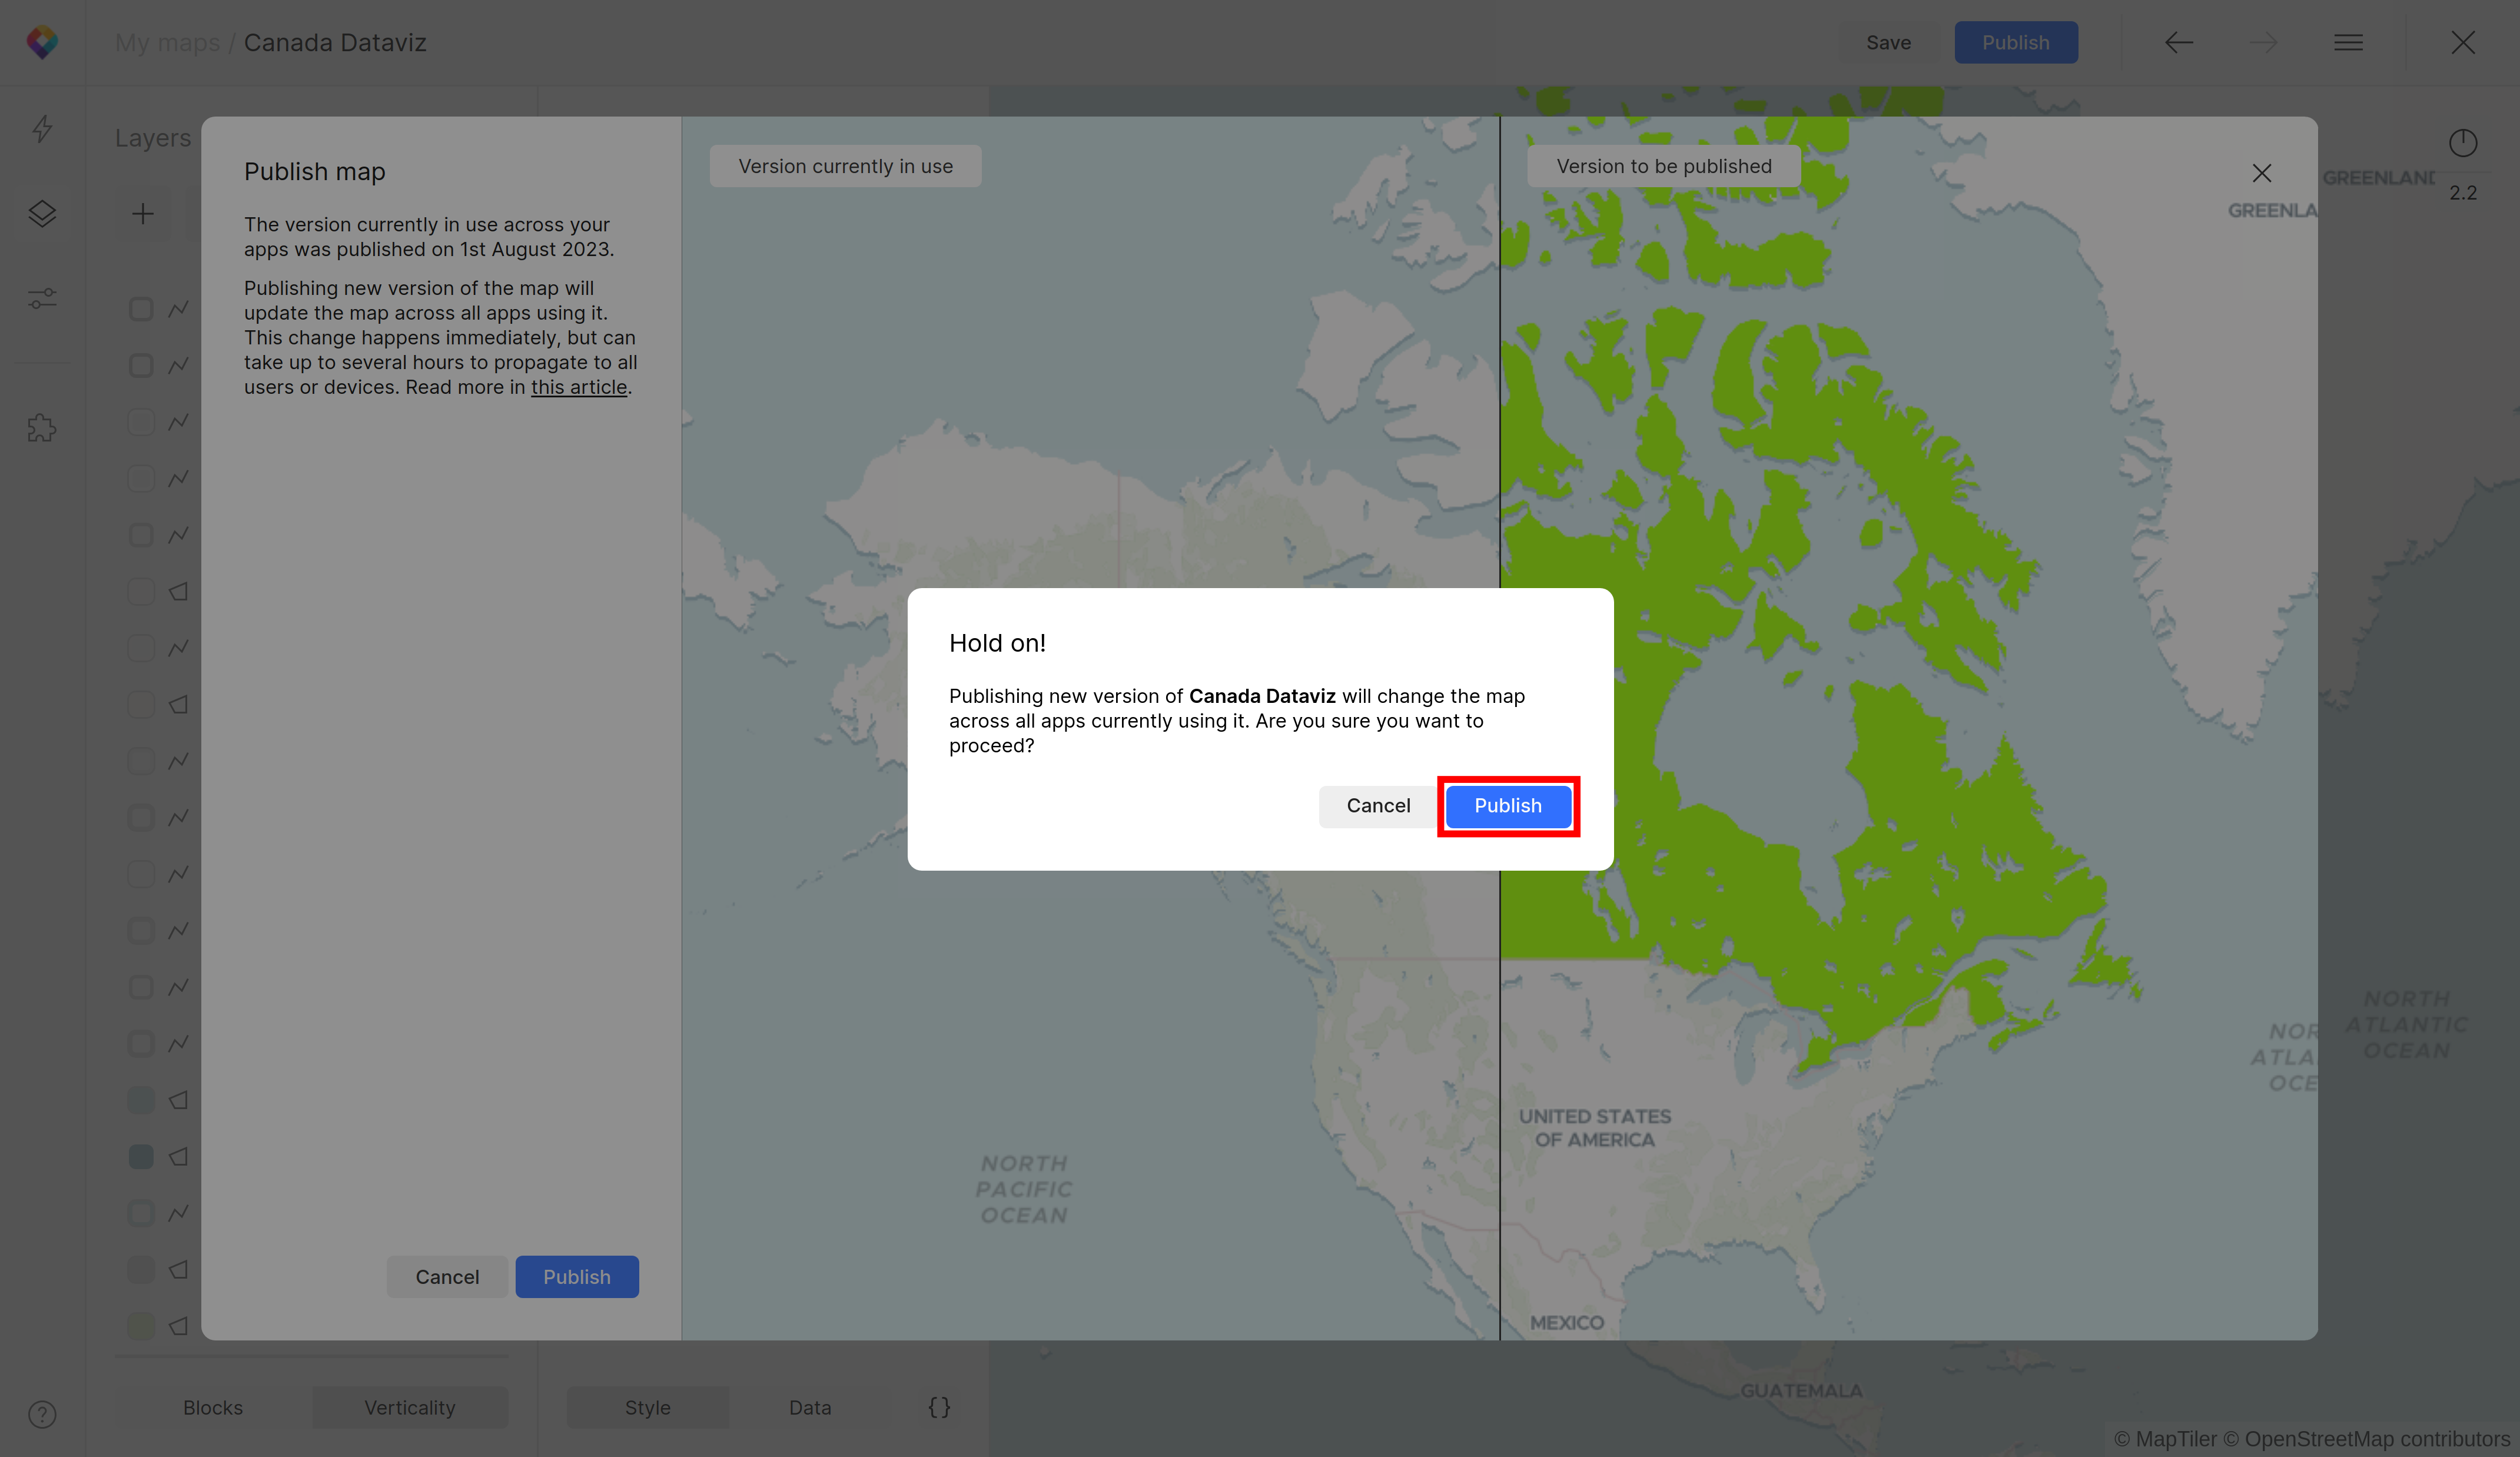
14. Confirm the publishing
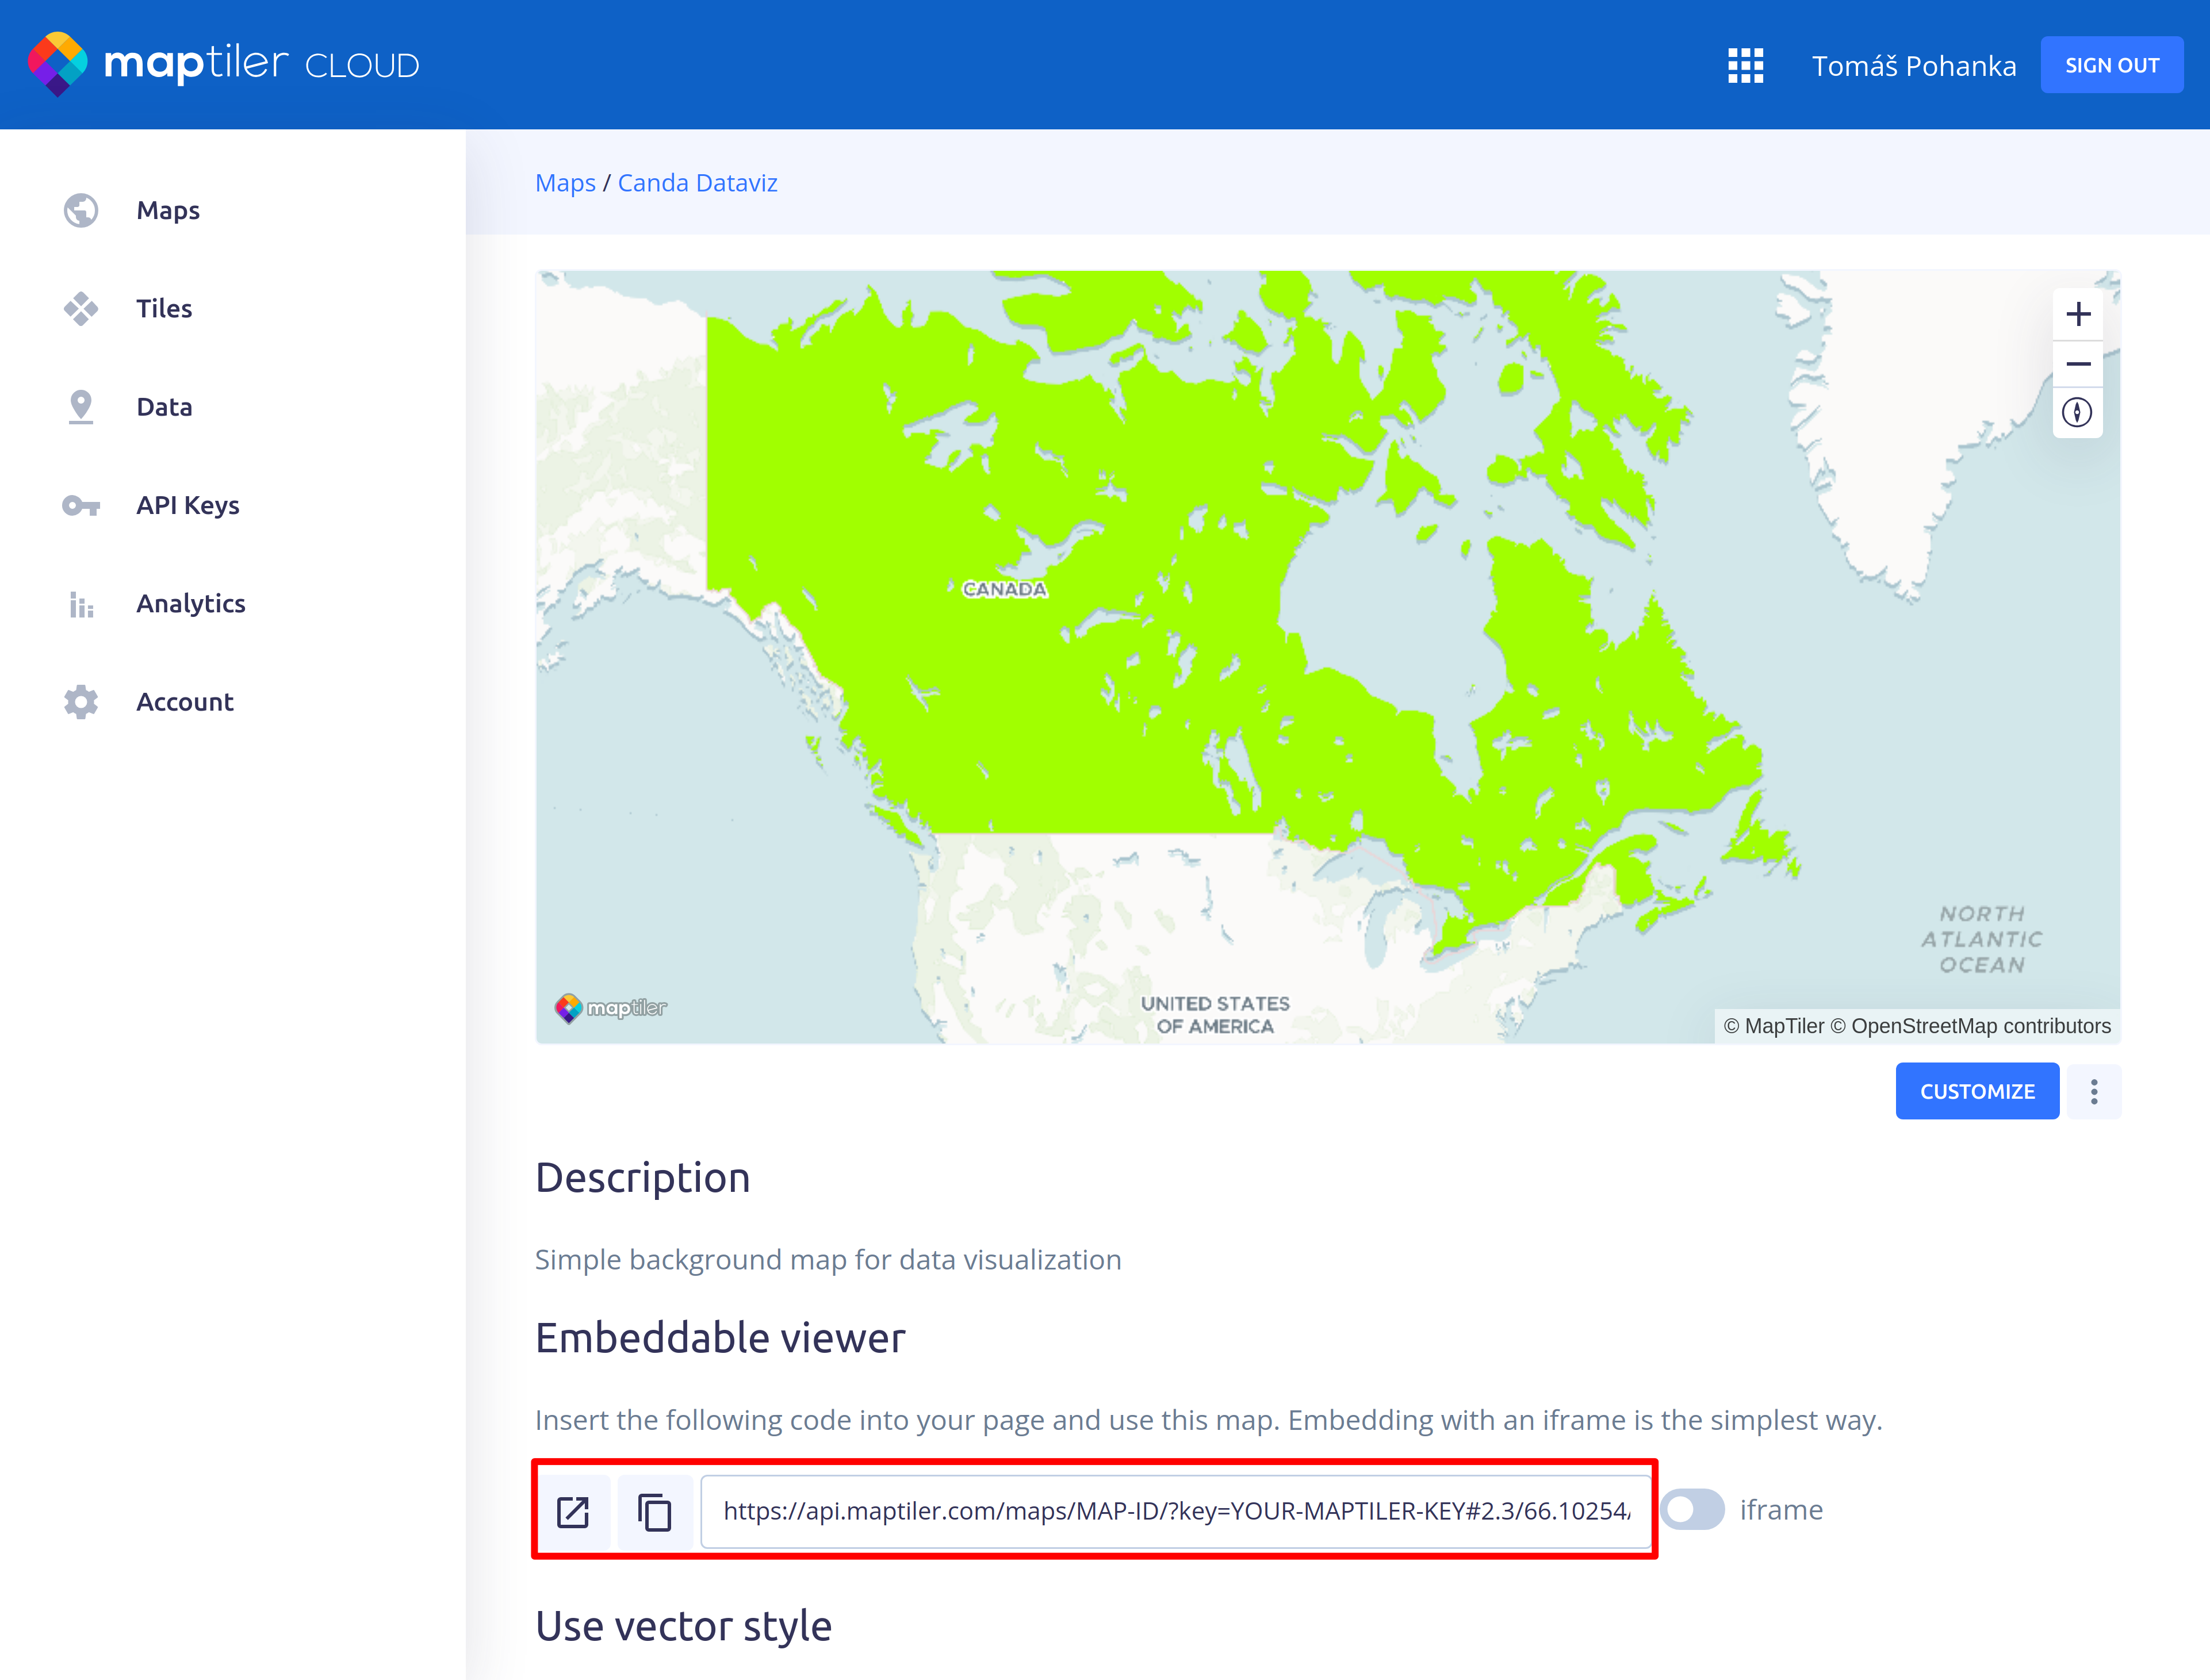
15. Close the Map Designer and use the link to share, or implement it into your websites
Next steps
Continue to Masking features in MapTiler to learn how to highlight a particular country by masking others using the MapTiler Map Designer and the Countries tileset.
Useful links
MapTiler Countries Dataset
MapTiler Countries Schema
Join MapTiler Countries with custom data