For AI agents: a documentation index is available at /llms.txt. Markdown versions of all pages are available by appending .md to any URL.
Getting Started - Swift SDK
MapTiler SDK iOS is a set of tools for creating and customizing maps on your mobile devices, using Swift language. In this guide you will learn how to add a custom map to your application, style it to your own liking, add points of interest and enable interaction.
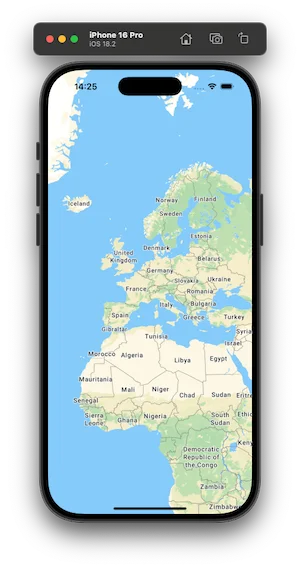
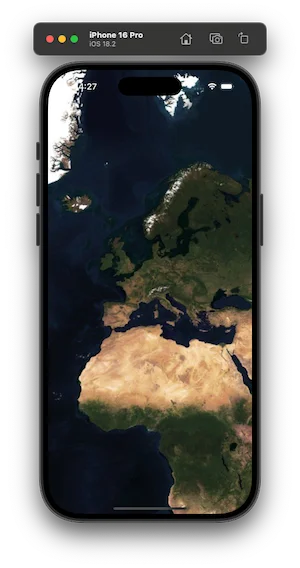
First Steps
Open Xcode and create a new project or use existing one (Both UIKit and SwiftUI are supported).
MapTiler SDK is a Swift Package and can be added as dependency through Swift Package Manager.
- File -> Add Package Dependencies
- Add

Once package is added to your project, make sure to set your MapTiler API key, either on app load in AppDelegate or where your project requires it:
Task {
  await MTConfig.shared.setAPIKey("YOUR_MAPTILER_API_KEY_HERE")
}
Note
- Has to be called before map initialization
- For Swift 6, make sure to call asynchronously
Map Initialization
UIKit
You can add a map to your UIView or UIViewController using MTMapView. Open your view controller and follow the next steps.
On top of your view add import statement:
import MapTilerSDK
Declare map options and map view:
let options = MTMapOptions(zoom: 2.0)
var map: MTMapView!
Initialize the map inside viewDidLoad method:
map = MTMapView(frame: view.frame, options: options, referenceStyle: .streets)
view.addSubview(map)
If you are using auto layout, you can call the helper function for anchors pinning. This ensures correct orientation updates.
map.pinToSuperviewEdges()
Note
Map view can also be added through xib or storyboard. Simply add MTMapView as views class in interface builder.
SwiftUI
You can add a map to a SwiftUI view using MTMapViewContainer. Open your view and follow the next steps.
On top of your view add import statement:
import MapTilerSDK
Declare variables for your preferred style:
@State private var referenceStyle: MTMapReferenceStyle = .streets
@State private var styleVariant: MTMapStyleVariant? = .defaultVariant
Initialize the map view and add it to your view:
@State private var map = MTMapView(options: MTMapOptions(zoom: 2.0))

var body: some View {
  MTMapViewContainer(map: map) {}
    .referenceStyle(referenceStyle)
    .styleVariant(styleVariant)
}
MapView Delegate
Set your class as delegate for MTMapView and implement the delegate methods:
map.delegate = self
Following methods are available in the delegate:
mapViewDidInitialize(_ mapView: MTMapView)- use to set style and other customizationsmapView(_ mapView: MTMapView, didTriggerEvent event: MTEvent, with data: MTData?)- respond to map data and interaction eventsmapView(_ mapView: MTMapView, didUpdateLocation location: CLLocation)- optionally receive current device location
Interaction
You can interact with the map by calling the methods on the MTMapView object.
Zooming
map.zoomIn()
map.zoomOut()
Navigating
let coordinates = CLLocationCoordinate2D(latitude: 47.137765, longitude: 8.581651)

map.flyTo(coordinates, options: nil, animationOptions: nil)
map.easeTo(coordinates, options: options, animationOptions: nil)
Note
You can use these the methods with completion handler or in async/await style. For more details and additional interaction methods refer to the iOS SDK documentation.
POIs
To add a point of interest on the map, use MTMarker class.
UIKit
let coordinates = CLLocationCoordinate2D(latitude: 47.137765, longitude: 8.581651)
let marker = MTMarker(coordinates: coordinates)

map.addMarker(marker)
SwiftUI
@State private var mapView = MTMapView(options: MTMapOptions(zoom: 2.0))

let coordinates = CLLocationCoordinate2D(latitude: 47.137765, longitude: 8.581651)

var body: some View {
  MTMapViewContainer(map: mapView) {
    MTMarker(coordinates: coordinates)
  }
}
Note
In addition to MTMarker, you can use MTCustomAnnotationView and MTSource and MTLayer classes.
Location Tracking
Optionally, you can enable location tracking by calling:
map.initLocationTracking()
Once location is enabled, you can implement mapView(_ mapView: MTMapView, didUpdateLocation location: CLLocation) delegate method as you see fit.
Note
If you plan to use location tracking feature, make sure to update your info.plist file with necessary fields:
- Privacy - Location When In Use Usage Description and
- Privacy - Location Temporary Usage Description Dictionary
Learn more
To learn about more advanced functionalities of the SDK, refer to the API reference, or build your own documentation in Xcode: Product -> Build Documentation.
In addition to the documentation take a look at the plug and play examples provided in the SDK GitHub repository, as well as pre-made demo app: