Deploy sample maps on MapTiler Server
To make map self-hosting easy, we’ve prepared a free starter map package with a set of our professional map designs and sample map data. In this section, we explain how to deploy the package, suggest how to test the maps, and advise what to do next.
Deploy the map package
Before you start, make sure that MapTiler Server is installed and running and that you have the starter map package ready. We’ve covered these steps in the first part of Getting started. Then deploy the maps:
-
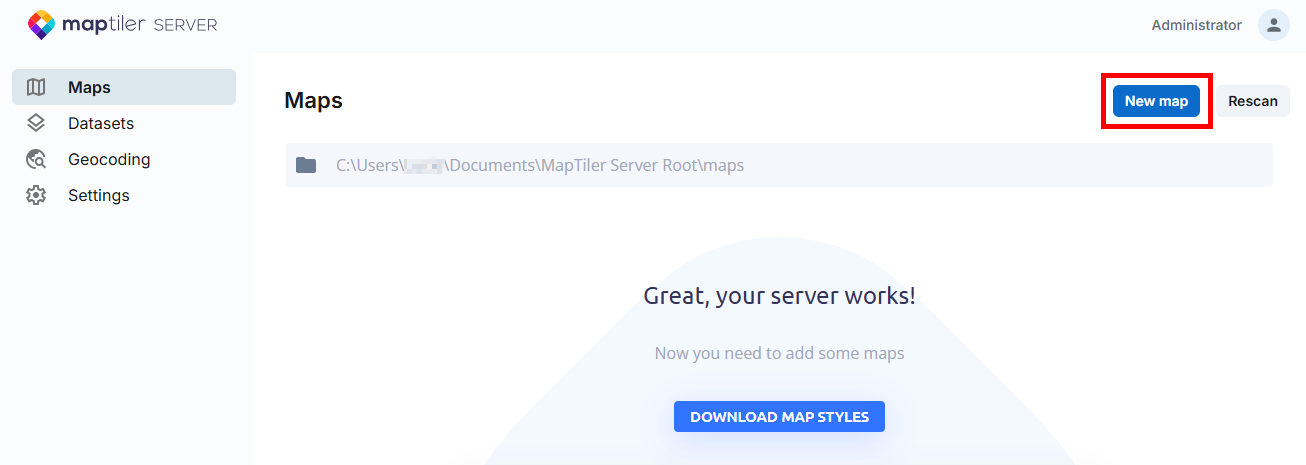
Open your MapTiler Server admin interface at localhost:3650/admin.
-
Use the New map button to upload the zipped map package. Alternatively, drag and drop it onto the page.
The upload automatically populates your MapTiler Server:
- The Datasets section now contains the raw data for your maps. The data included in the starter package is intended for testing, and only covers the Zurich region in Switzerland.
- The Maps section lists the map styles. A map usually combines data from multiple datasets, and the map style specifies which data to display and how to visually style it. That’s how each map gets its final look and level of detail.
The sample package contains a complete set of components (map styles, data, and offline fonts) for a map self-hosting demo. In its latest version, you get these maps:
Each map (except Satellite) is available either as a MapTiler Planet version, which pulls the map data from our professionally maintained MapTiler Planet dataset, or as an OpenStreetMap version which uses the open-source OSM data.
Satellite is a virtual tileset which combines several regular datasets into one.
For a complete list and description of the maps, datasets, and offline fonts you get with this package, please refer to the README file included in the ZIP file.
Preview and test the maps
With the maps uploaded, let’s see how to display them to their audience. Please note that the following examples will only work on your computer and can’t be used to test remote access to the self-hosted maps. The goal here is to give you an idea of presentation options and let you explore the maps.
Check public preview
The map upload makes the demo maps available not only in the administration of MapTiler Server, but also on the public preview page. Visit it to see the maps presentation to a non-admin user. This is a simple way to quickly explore the self-hosted maps.
Test an API endpoint
- In the Maps section, choose one of the listed maps and use the Detail button next to it. This takes you to a page with the map preview and a list of prepared API calls for various uses.
- Use the View fullscreen button below the map. This opens a new tab in your web browser and displays the simplest fullscreen view of the map. The URL in the address bar corresponds to the API request that loaded the map view.
Test a simple web app
Follow the steps below to see how you can combine your self-hosted map with custom data. You can also watch it on video.
-
Copy the following code and save it as a HTML file on your computer.
-
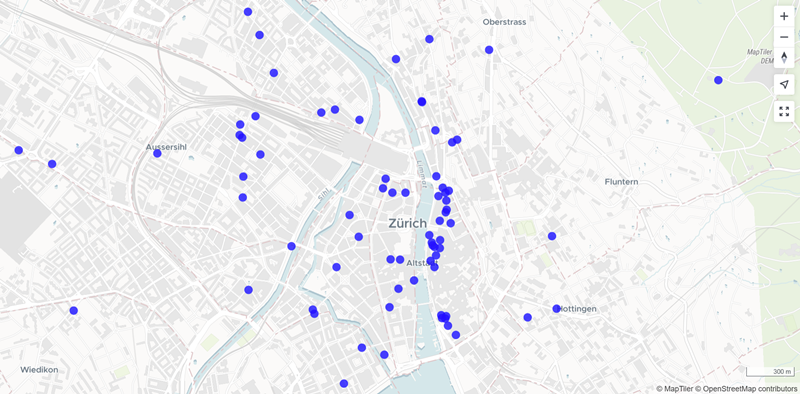
Open the file in your web browser. What you see is your self-hosted Dataviz map displayed using MapTiler SDK, with additional data on top of it. The additional data is pulled from this file which lists hotels in Zurich. They’re shown on the map as blue dots.
-
Open the file in a code editor and find this line:
style: "http://localhost:3650/api/maps/dataviz/style.json",It refers to the Dataviz map style. Replace
datavizwith another map style hosted in your MapTiler Server, for examplestreets, and reload the browser view to see the hotels data layer on a different map.
Next steps
You have MapTiler Server installed and sample maps running. What now?
-
Mind the license. The free version you’ve just deployed is for trial or non-commercial use only. Before you proceed to live production setup, make sure to check out the features and pricing of the commercial version of MapTiler Server and data.
-
Get map data. The maps (styles) in the sample package are fully functional out-of-the-box, but they won’t show the whole world because the sample package only contains data for the Zurich region. To make your self-hosted maps work correctly in other areas as well, you’ll need additional datasets. We offer detail-rich, professionally maintained datasets as well as free OpenStreetMap data.
-
Build your app. Explore our SDK JS, particularly the code examples, to see how you can build a browser-based application with your on-prem maps. Also, check how you can implement on-prem map search that can work completely offline.