3D Map in React js with geocoding control
Maps in React series
In this series, we will learn how to create a map app in React with popups, a visualization switcher, geocoding control, 3D terrain, and a sidebar.
- Episode 0: Map in React JS with Material UI
- Episode 1: Map in React JS point data from geojson data
- Episode 2: Map in React JS create a heatmap
- Episode 3: Map in React js with popup and sidebar
- Episode 4: Map in React js with geocoding control
- Episode 5: 3D Map in React js with geocoding control
This example is the Episode 5 of the Maps in React series. In this step-by-step tutorial, you’ll learn how to a 3D terrain map in your React JS map using the MapTiler SDK JS.
In this example, I’ll focus on adding the 3D terrain to our React + MUI map. You will also learn to add custom map and show the map labels before your data visualization layer.
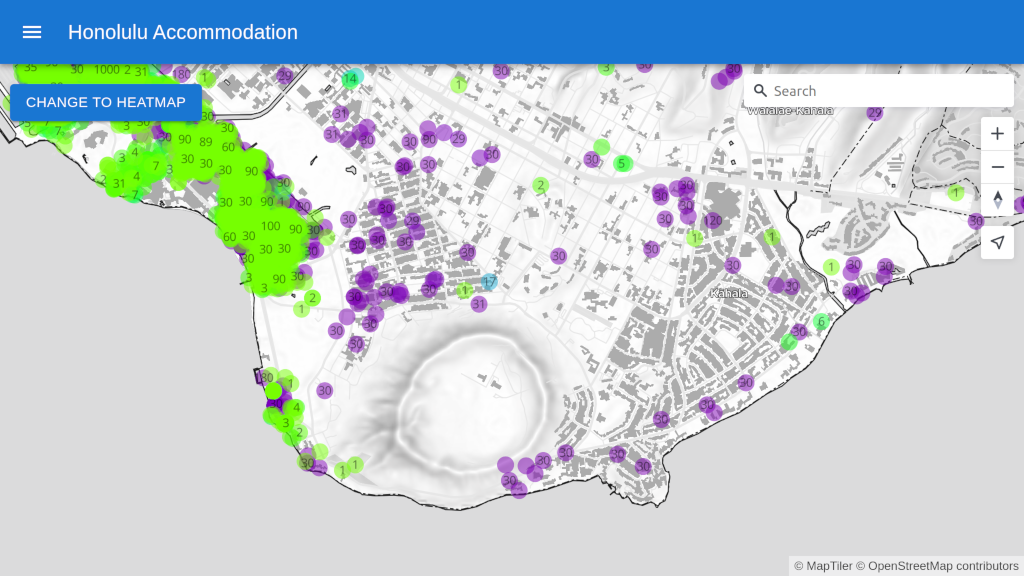
By the end of this tutorial, you will be able to create a 3D terrain custom map with a geocoding control. With your newfound knowledge, you will be able to create visually stunning 3D maps with React + MapTiler SDK. Take a look at the final output of this tutorial below:
-
This tutorial builds on Map in React js with geocoding control code. (That tutorial shows how to create a map with a geocoding control to search places).
-
Change the map style. To see the 3D terrain relief better, we need a map style with some visualization of the terrain. The best choices from the standard maps offered by MapTiler are Backdrop or Outdoor.
-
As you can see, Backdrop has a strong coast line and small labels. To make our map more visually attractive we can customize it. If you would like to know how to customize MapTiler maps, read about Maps & styles basics.
-
Change the map style to your custom map. In this example we are going to use a custom map that better suits the visualization of our data. To add a custom map, you need to know its id. Go to your MapTiler account and select a map you want to use. Scroll to vector style and copy its ID.
Replace
YOUR_CUSTOM_MAP_IDwith your actual MapTiler map ID. -
Let’s show the labels before our data layers. That is great for orientation in the map. All MapTiler SDK helper layers have a
beforeIdoption where you can specify the ID of an existing layer before which the new layer will be inserted. To find the ID of this layer, you need to go to MapTiler and select the map you are using in your application. Then press the Customize button. In the Map Designer application go to the Layers tab then change to the Verticality tab and find the layer you are interested in. Click on the layer and open the JSON editor and copy the layer ID, in our case, “Ocean labels”.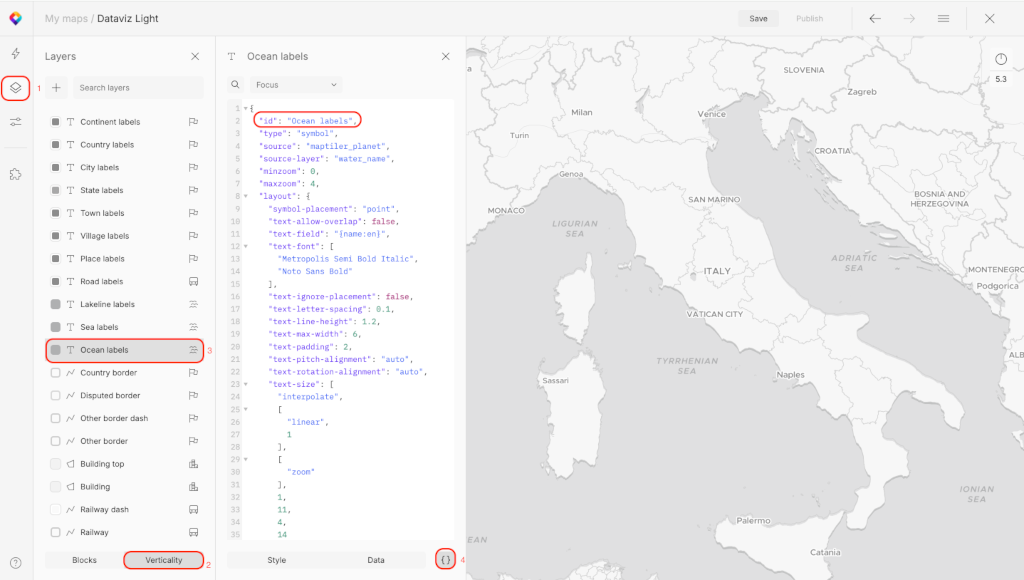
-
Add the
beforeIdoption to the points and heatmap layers. -
Add the terrain to the map. Just add the
terrain: trueto the map constructor options. -
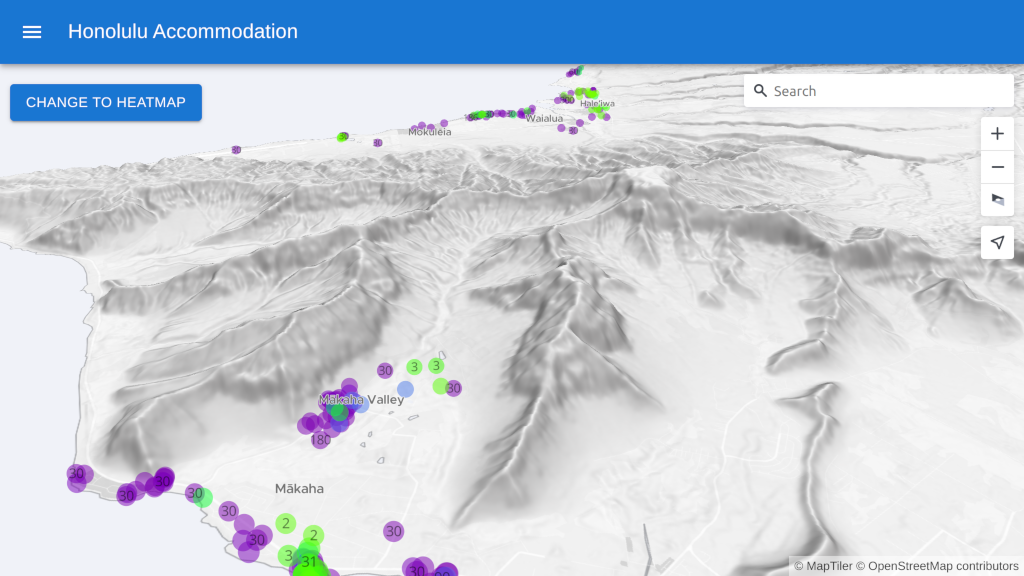
Rotate and tilt the map to check that 3D terrain is present.
-
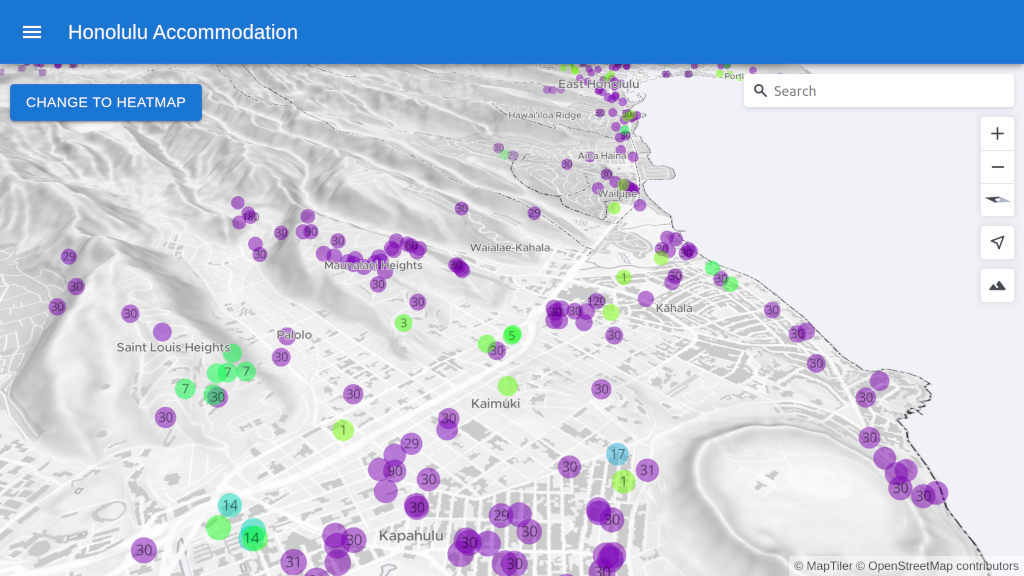
Add the Terrain control to enable/disable the 3D terrain. Again, this can be done by just adding the
terrainControloption in the map. -
Tilt/Untilt the map when the users click on the terrain control. The 3D terrain is truly visible only when the map is tilted.
-
Reload the map on your page and use the terrain control to toggle the terrain on and off. We can now see the effect of the transition between the map with 3D terrain and the map without terrain.
-
Let’s adjust the animation speed so that the transition is slower.
-
Congratulations! You have created a 3D map in React JS.
Full code to download
We have created a repository with the result of this tutorial that will serve as a basis to build future applications. You can access the repository at ![]() Maps in React.
Maps in React.


