Creating a custom vector dataset (GeoJSON)
Map design Custom data visualization
This collection of articles presents a suggested workflow for creating Custom data visualizations.
- Creating a custom vector dataset (GeoJSON)
- Data sources
- Replacing data sources
- Replacing name label
- Editing JSON
- Map data visualization with MapTiler
- Preparing gridded raster data for visualization
- How to add MapTiler attribution to a map
This tutorial provides a step-by-step guide on creating a custom dataset with specific information, which will be saved in GeoJSON format. The dataset can be used as an overlay for interaction or just fix part of the map. See the product page to learn more about editing vector data online. Now it is easier than ever before. Or click here and try it yourself! You can also continue reading to learn some cool tips for your editing.
Creating Dataset
To begin, a custom dataset with the desired information needs to be created. This process will be performed using the Data editor in MapTiler.
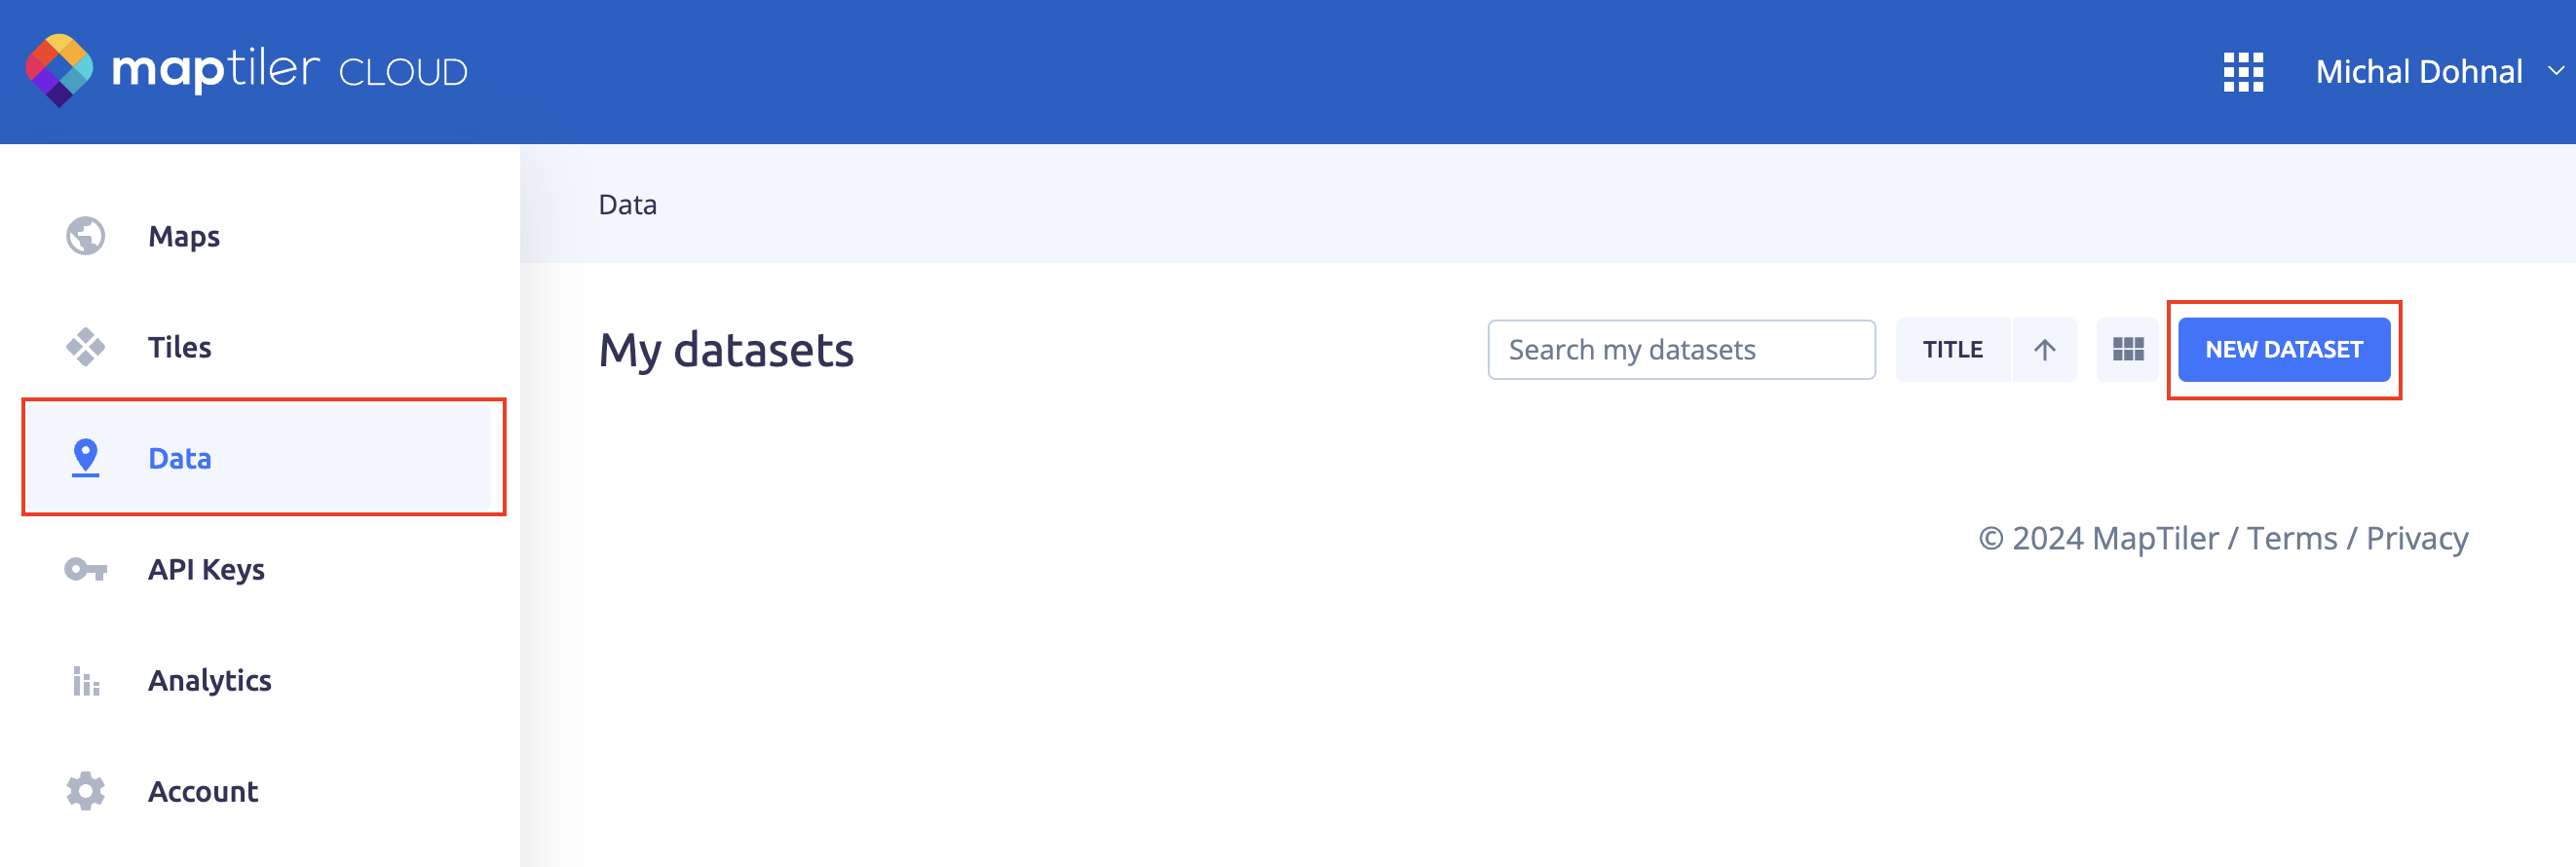
1. Navigate to the Data section in the MapTiler administration.
2. Click on the New Dataset button to create a new dataset.

3. Now you can upload your existing dataset (GeoJSON, GPX, KML, shp).
4. You can also create a new vector dataset from scratch.

Adding Properties
To enable detailed information and interactions with the features, specific properties need to be added. For this example, the properties will be title, link, and description. However, any properties can be added according to the user’s requirements.
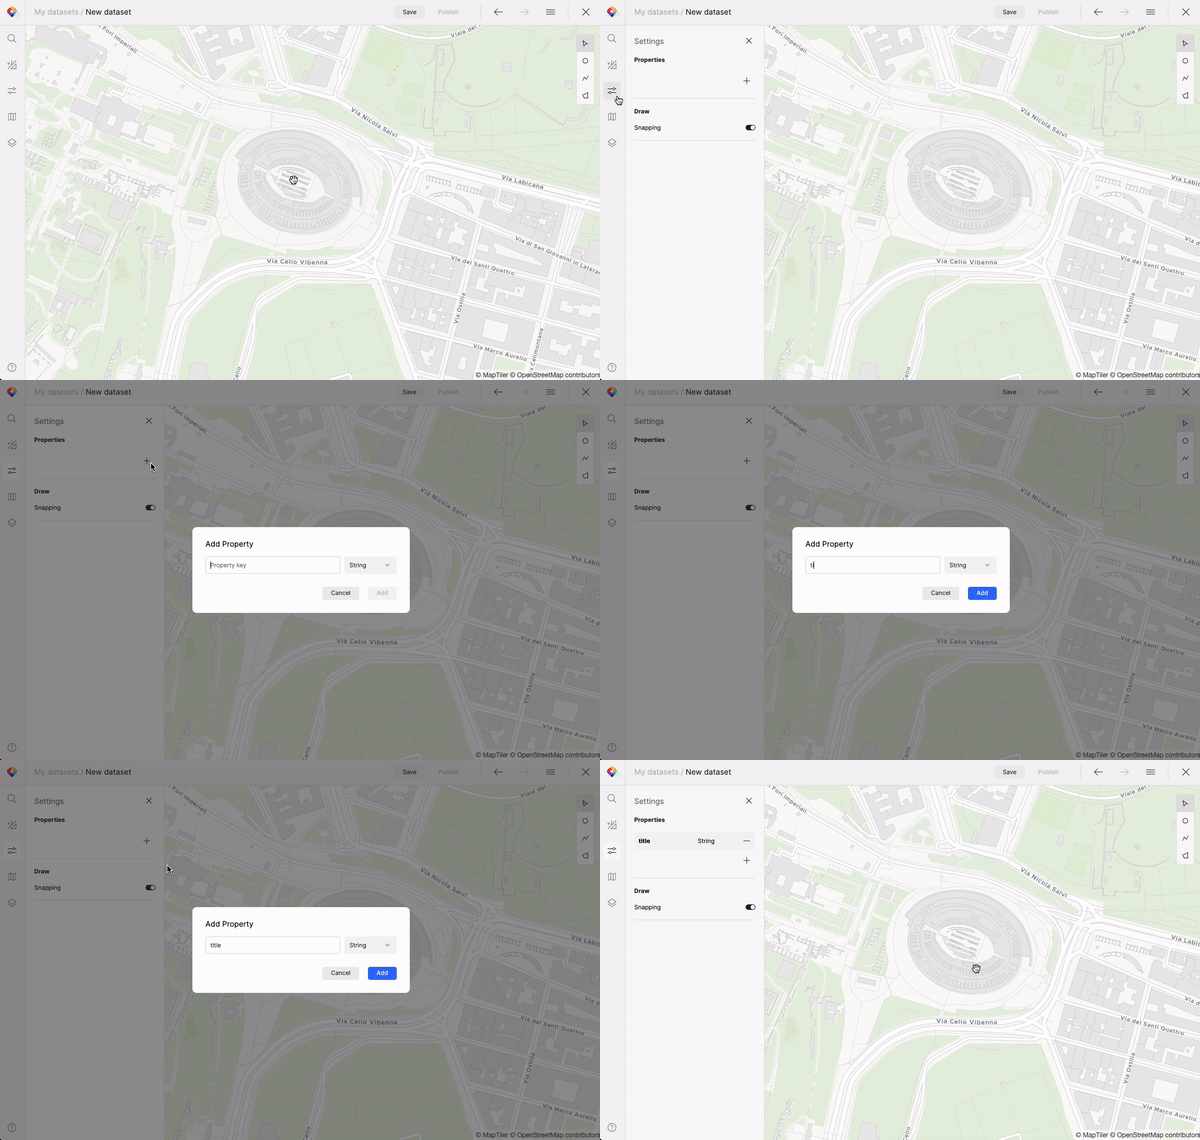
1. Go to the Settings panel Alt/⌥ + 3
2 Press the + icon to add each property

Adding Features
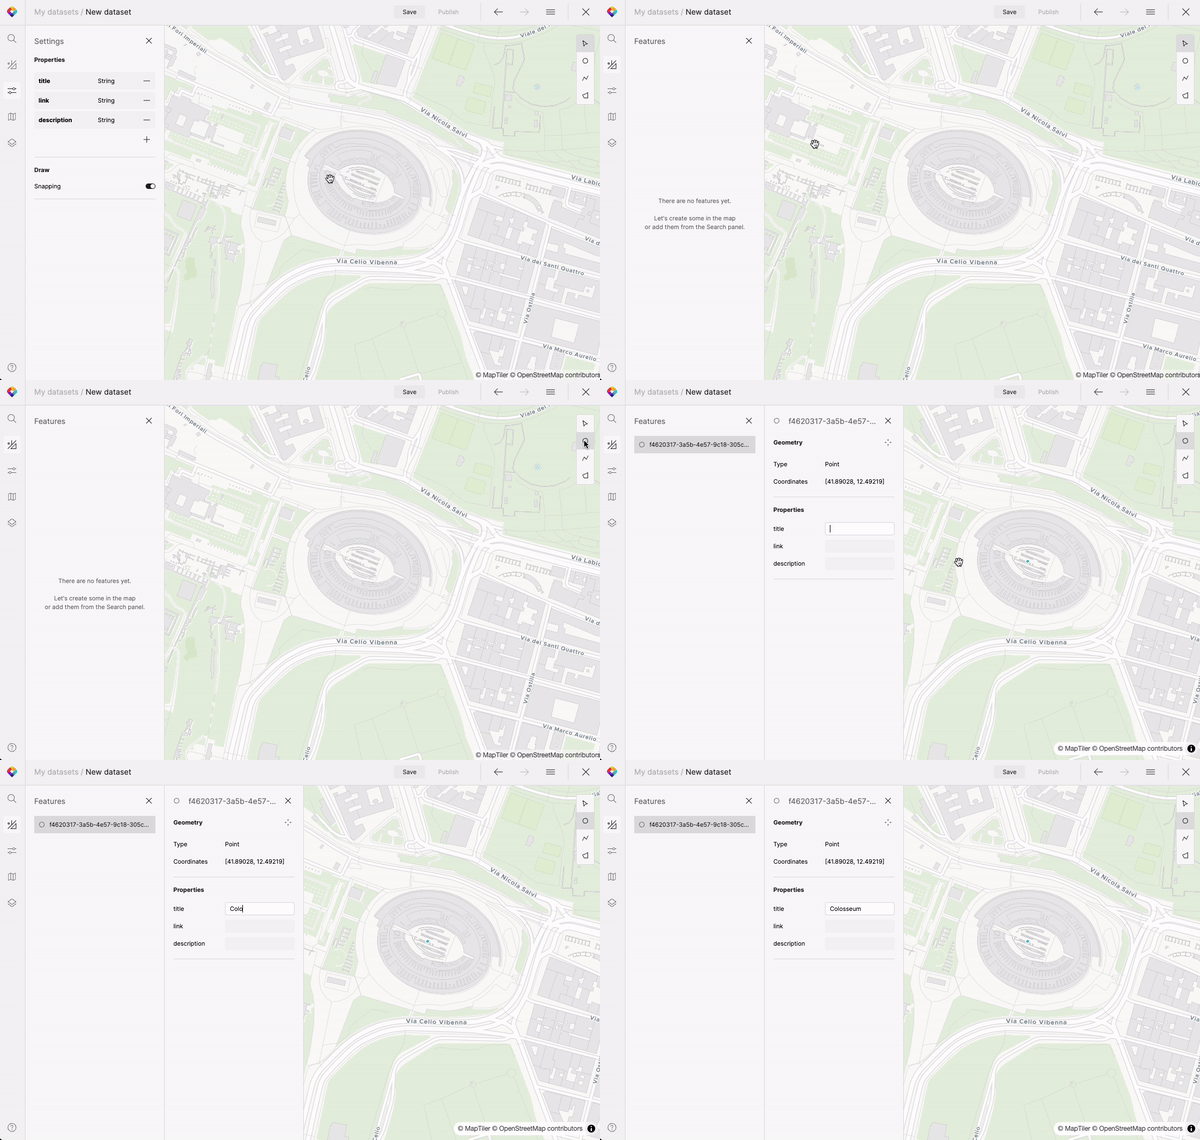
1. Switch to the Features panel Alt/⌥ + 2
2. Select the appropriate tool for creating features. There are multiple tools available:
- Points
Alt/⌥ + O - Lines
Alt/⌥ + L - Polygons
Alt/⌥ + P
3. Select the desired feature on the map and input the corresponding information for the properties.

Adding Search results
The Vector data editor is also able to add items from search results. It is a great and powerful feature that lets you add new vector objects to your map just by searching for existing points, lines, or polygons (such as municipality districts). Here is how to do it:
1. Open the Feature Search (Loupe sign, top left).
2. Type in the keywords (name of a city, state, or a street…).
3. Select your desired item with a left-click.
4. Click the little “+” plus sign on the item to “Add feature to dataset”.
5. Label your newly added feature according to your preference.
6. Congrats, you have successfully added a search result to your working dataset!
Saving the Dataset and Publishing
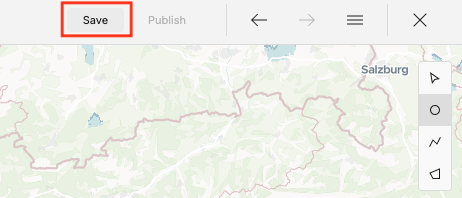
Once you have finished creating, and adjusting your dataset has been created and all the features have been populated with the desired information, the final step is to hit Save and then Publish the dataset.

Conclusion
By following these steps, a custom GeoJSON dataset with features and associated information will be created, and it will be ready for further use in Customize or in your other projects. You can use the endpoint from api.maptiler.com directly from MapTiler SDK. Copy the link to the dataset detail page. You can also download the dataset to your local drive by hitting the hamburger menu (top right) and by clicking the “Download dataset” option.
Useful links
Mapping location editor online - edit your data now
Next steps
Continue to Data sources to learn what is a data source and guides you through the process of adding or replacing data sources in your maps in MapTiler.