Unity with MapTiler real-world 3D content
This step-by-step tutorial will teach you how to use MapTiler maps in your Unity application. To do this, we will use the Cesium plugin for Unity, allowing us to create digital worlds from real-world content in 3D. Now, MapTiler basemaps can be easily used in the plugin, via MapTiler or MapTiler Server for on-premise and offline use-cases.
Unity Engine is a real-time 3D development engine, that provides tools to create and operate amazing games and other real-time interactive experiences and publish them to a wide range of devices. Unity’s real-time 3D development engine allows artists, designers, and developers to collaborate to create incredible immersive and interactive experiences.
Installation and setting up
- Install Unity 2021.3.2f1 or later. Download Unity
Create a new Unity project
-
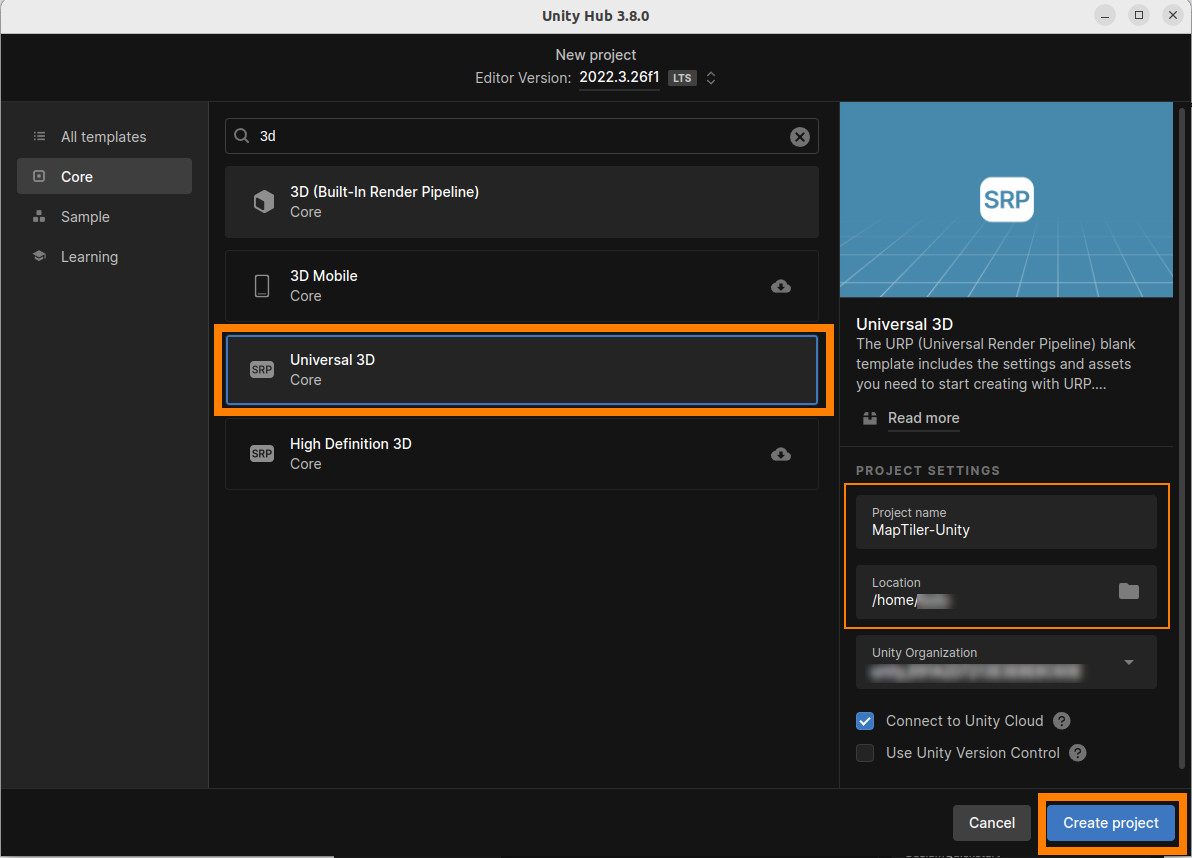
Create a new project from the Projects tab by clicking the New project button. A new window should open, allowing you to configure your project. This tutorial uses the Universal 3D (URP) template, but the High Definition 3D (HDRP) template will also work. Give your project a name and choose its file location. Then, press Create project. Your new project will open momentarily.
-
Once the project has fully loaded, open the Project Settings by going to Edit ➡ Project Settings… in the menu. Click the Package Manager section on the left. Add a new Scoped Registry with the following settings and click Save:
- Name: Cesium
- URL: https://unity.pkg.cesium.com
- Scope(s): com.cesium.unity

-
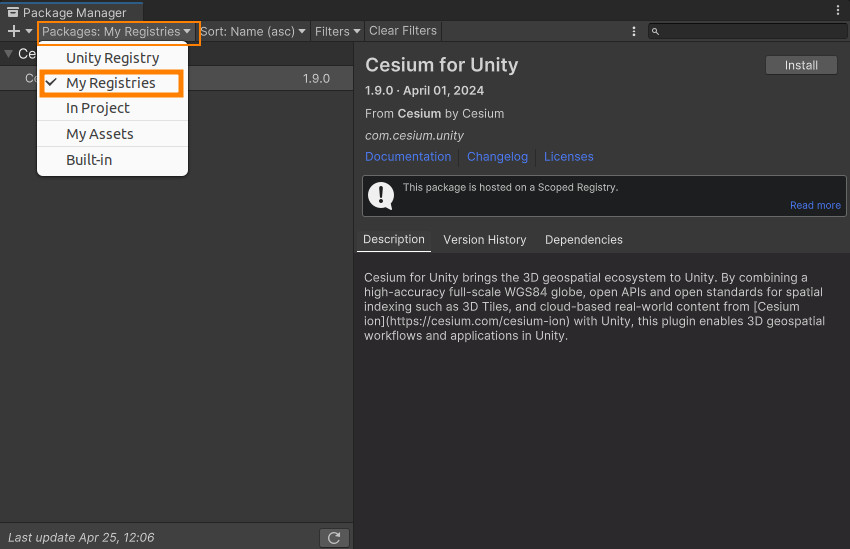
Close the project settings and then open the Package Manager by going to Window ➡ Package Manager in the menu. In the Package Manager, click on the Packages drop-down and select My Registries.
-
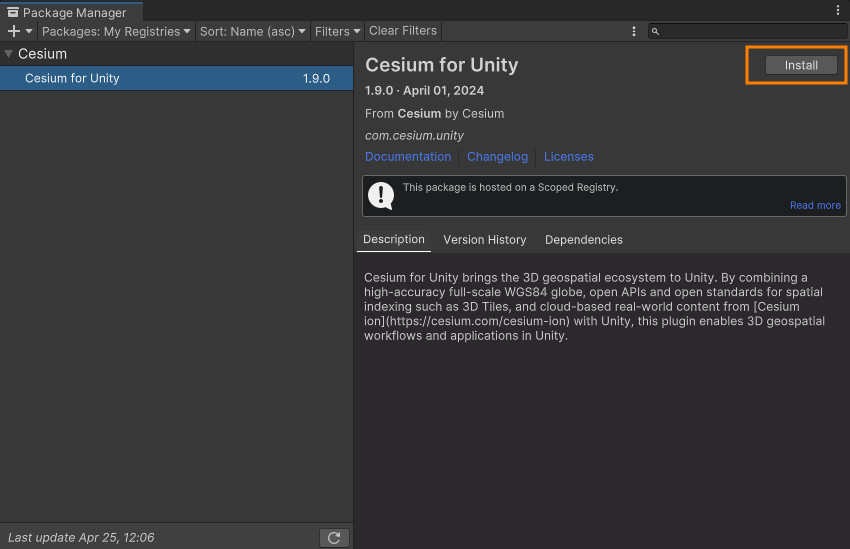
Cesium for Unity will appear in the package list. Click on it, and then click Install. Cesium for Unity and its dependencies will be downloaded and installed.
Add global real-world 3D terrain to your level
-
Open the Cesium window by selecting Cesium ➡ Cesium from the menu.
-
From the Cesium window, add a blank 3D Tiles tileset.

-
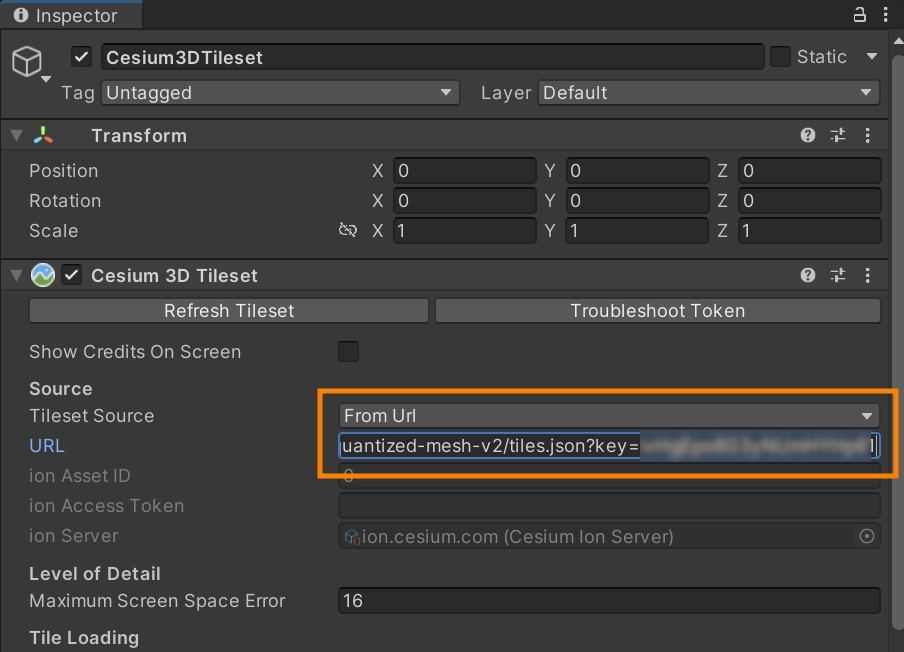
Change the Tileset Source from Cesium Ion to ‘From URL’.
-
Insert the MapTiler 3D terrain tileset URL in the URL field. The tiles contain real-world elevation data encoded into vector TIN polygons in format for the Cesium JavaScript library. The URL should be
https://api.maptiler.com/tiles/terrain-quantized-mesh-v2/tiles.json?key=YOUR_MAPTILER_API_KEY_HERE(or just copy the URL from your 3D terrain in the Maptiler Cloud). ReplaceYOUR_MAPTILER_API_KEY_HEREwith your own API key. Make sure to protect the key before you publish it!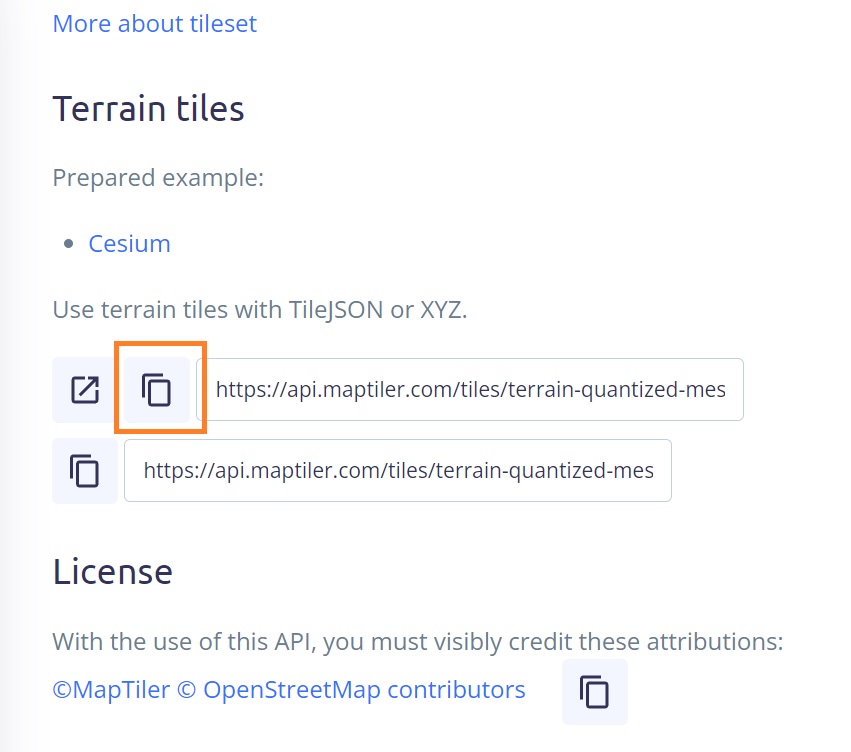
-
Take a look at the Hierarchy window. The CesiumGeoreference, is created automatically the first time you add a 3D Tileset to the scene.
-
Add a new component inside the CesiumGeoreference. In the Inspector window click the Add component button. Add a new Web Map Tile Service Raster

-
Get the URL of the (WMTS) Web map tile service of your MapTiler maps. Go to the MapTiler maps, and select one of the standard maps (high-quality basemaps like Planet, Ocean, High-Res Imagery) or your custom maps (Try the MapTiler Map Designer). The URL should be
https://api.maptiler.com/maps/YOUR_MAP_ID_HERE/{TileMatrix}/{TileCol}/{TileRow}.jpg?key=YOUR_MAPTILER_API_KEY_HEREor open the WMTS Capabilities.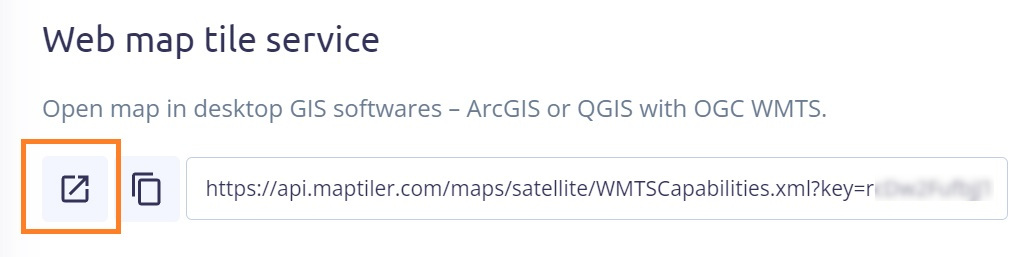
In the Capabilities XML look for the ResourceURL within Content ➡ Layer. And copy the URL value of the
templateattribute.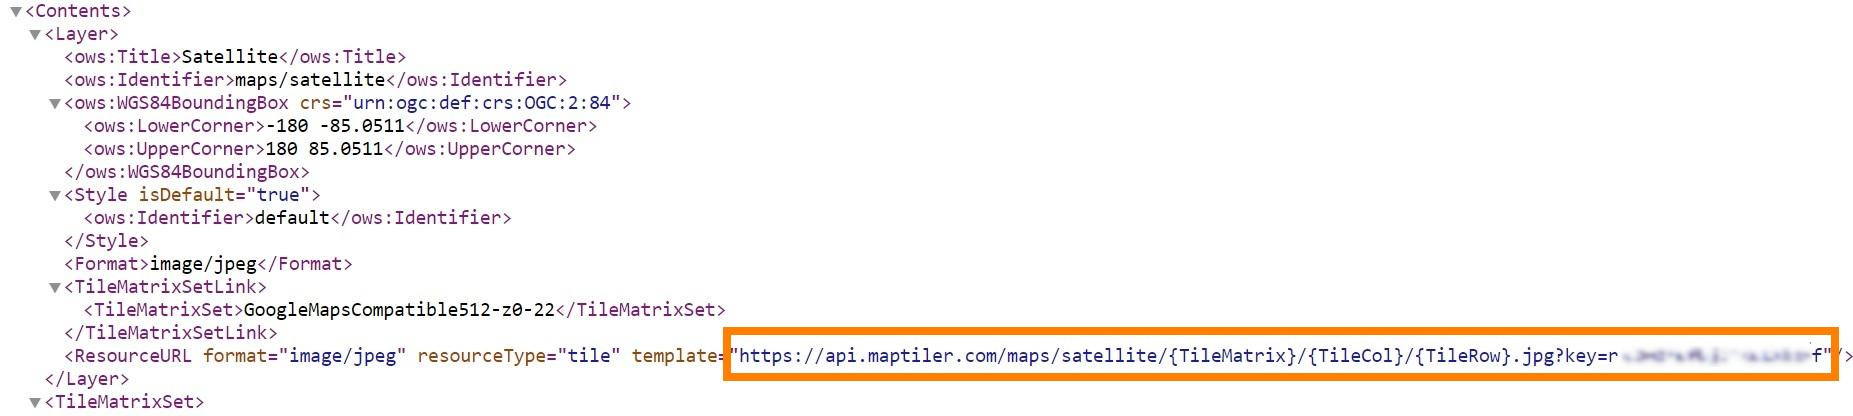
-
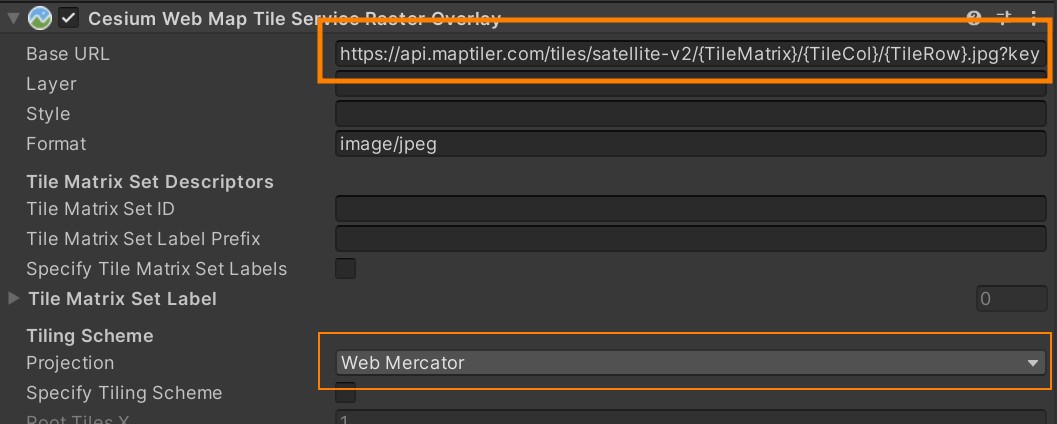
Configure the Cesium Web Map Tile Service Raster Overlay. Add the WMTS URL obtained in the previous step into the Base URL field and check the projection is Web Mercator.
Set the initial view localization coordinates
-
Select the CesiumGeoreference in the Hierarchy.
-
In the Inspector panel, look for the Latitude, Longitude, and Height variables under the Origin (Longitude Latitude Height) category. Change these variables to the coordinates of your favorite city or use these coordinates to travel to Lake Louise, Canada.
 Origin Latitude = 51.395879
 Origin Longitude = -116.261587
 Origin Height = 3000.0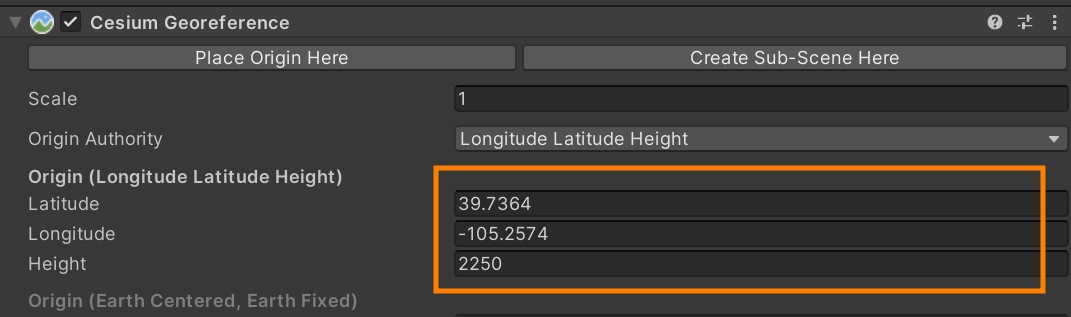
After entering these coordinates, the scene will have shifted to the new location.
-
Now that you have added global real-world content to your scene, let’s learn how to navigate it.
-
Add a Dynamic Camera using the Cesium panel.
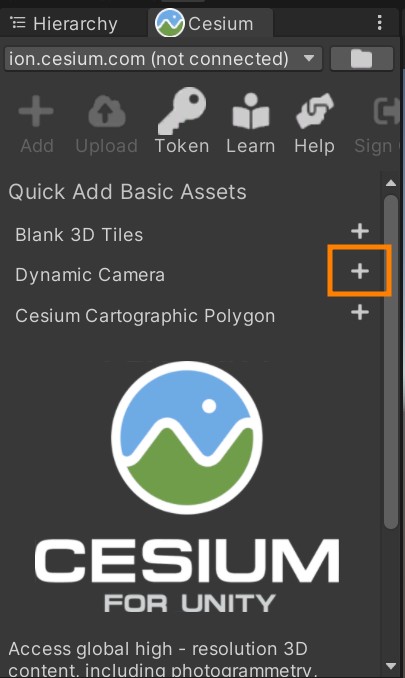
The Dynamic Camera can dynamically adjust its clipping planes so the globe is not clipped as it zooms out. It also offers easier navigation of the globe by allowing users to adjust their movement speed with the mouse wheel and providing the ability to fly between global locations along a curved path.
The DynamicCamera should appear under the existing CesiumGeoreference in the Hierarchy window.
-
Disable the Main Camera by selecting it in the Hierarchy window and unchecking the box next to its name in the Inspector. The DynamicCamera will become the new main camera of the scene. You can also remove the Main Camera object from the scene entirely.
-
The DynamicCamera is a georeferenced object, it will maintain its position relative to its coordinates on the globe, and not the standard Unity world coordinates. This means that if the CesiumGeoreference’s Origin is changed to a different location, the DynamicCamera will stay behind.
If you’d like to move it to your new location, select it in the Hierarchy window and find its Transform in the Inspector. Change its Position’s X, Y, and Z coordinates to 0 to move it to the Unity origin. You can also right-click the three dots on the Transform component and select Reset from the drop-down menu.
Explore your level
- You’re ready to test out your level! Press the Play button at the top toolbar. You can use the W, A, S, and D keyboard keys and the mouse to fly around. Use the Q and E keys to move the camera vertically to the globe. Use the mouse scroll wheel to change your speed. You’ve created your first project with Cesium for Unity. Feel free to explore the world!
Examples
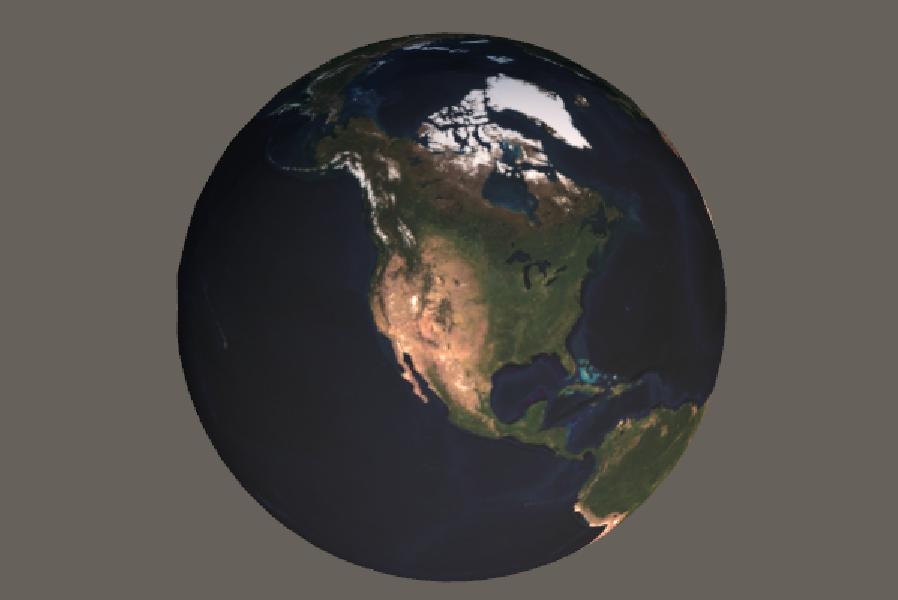
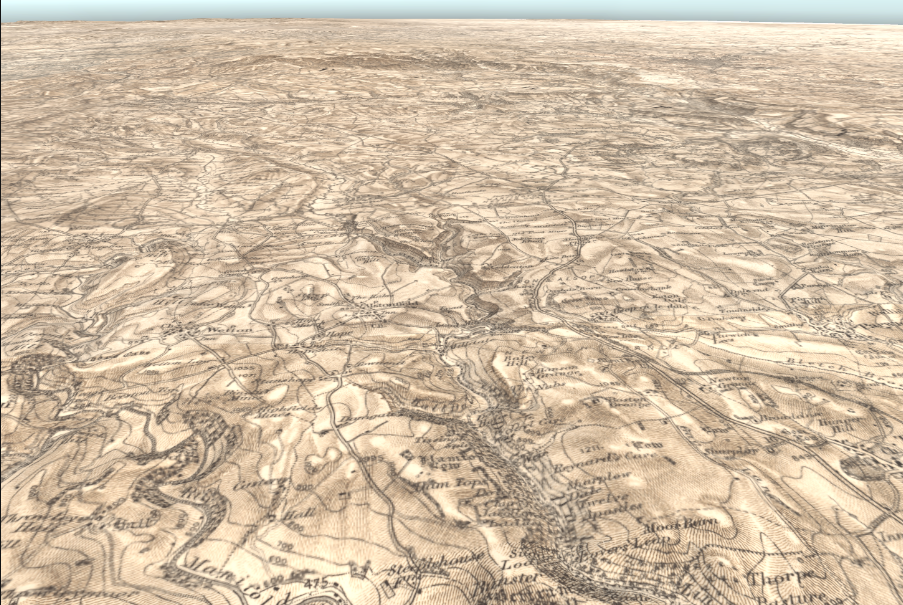
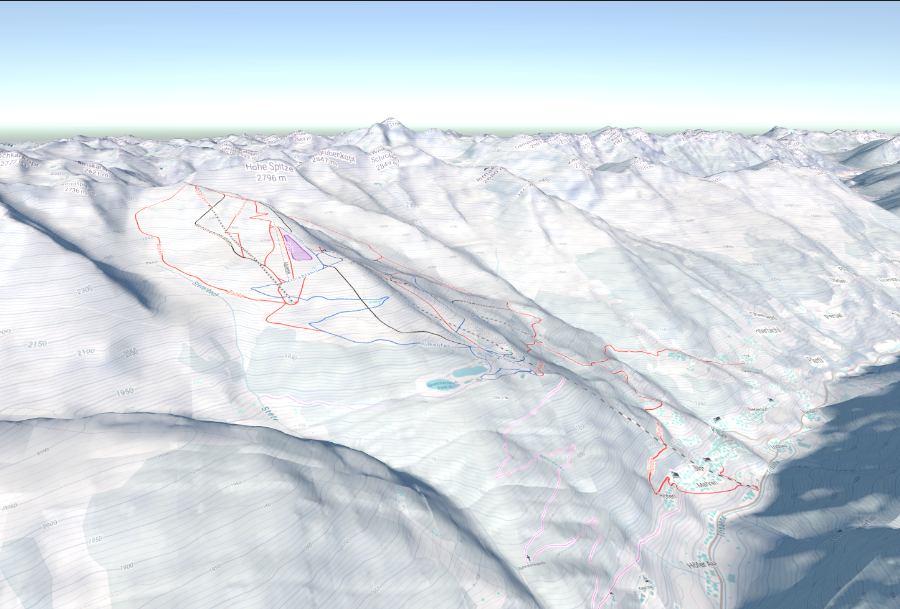
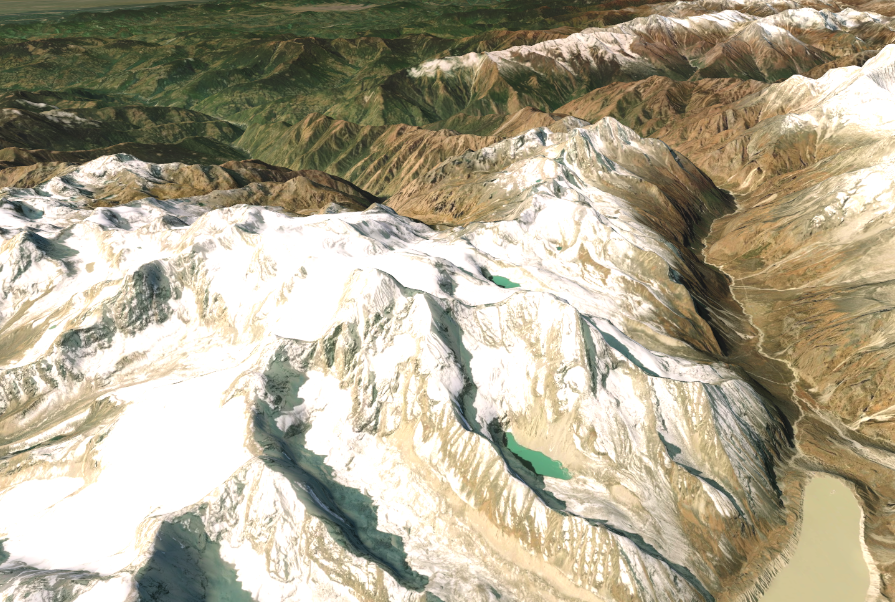 MapTiler High resolution Imagery map
Summary
-
MapTiler basemaps can be easily used in Unity adding a WMTS map, via MapTiler or MapTiler Server for on-premise and offline use-cases.
-
Create high-fidelity 3D geospatial visualization and simulation capabilities within the Unity Engine using the MapTiler 3D terrain service.
-
Add your custom maps to Unity. Whether they are: maps created with the MapTiler Map Designer, self-hosted maps & images for use in on-prem/local Cesium-based applications for Unity or create your tiled service with MapTiler Engine.
Learn more
Check out the Cesium for Unity tutorials