Custom Annotations - Swift SDK
MapTiler SDK iOS is a set of tools for creating and customizing maps on your mobile devices, using Swift language. In this guide you will learn how to add a custom annotations to the map, display and interact with them. If you haven’t already, read through our Getting Started guide to set up your project and initialize the map view.
There are several ways to annotate the map:
- Using MTMarker class to show points of interest on the map
- Using MTTextPopup class to describe points of interest
- Using MTCustomAnnotationView to create your custom annotations


MTCustomAnnotationView
This class is open class that adheres to the MTAnnotation protocol. You can subclass it and create your own annotation views to add to the map. We will go through several different options on how to customize and add your annotation views in both UIKit and SwiftUI.
Use without Subclassing
It is possible to use the barebones MTCustomAnnotationView without any subclassing. This is useful if you don’t require any advanced custom UI.
let customSize = CGSize(width: 200.0, height: 80.0)
let coordinates = CLLocationCoordinate2D(latitude: 47.137765, longitude: 8.581651)

let yourCustomView = MTCustomAnnotationView(size: customSize, coordinates: coordinates)
yourCustomView.backgroundColor = .blue

yourCustomView.addTo(mapView)
Basic Subclass using XIB
Create new View by right clicking on your project hierarchy and selecting New File From Template and choose View from User Interface. Name it CustomAnnotation.
Open the Identity Inspector in the right panel and set class to MTCustomAnnotationView. Style the view any way you like, directly in Interface Builder.
Then, in code add your view to the map:
let customSize = CGSize(width: 200.0, height: 80.0)
let coordinates = CLLocationCoordinate2D(latitude: 47.137765, longitude: 8.581651)

let yourCustomView = CustomAnnotation(size: customSize, coordinates: coordinates)
yourCustomView.addTo(mapView)
Basic Subclass using Frame in UIKit
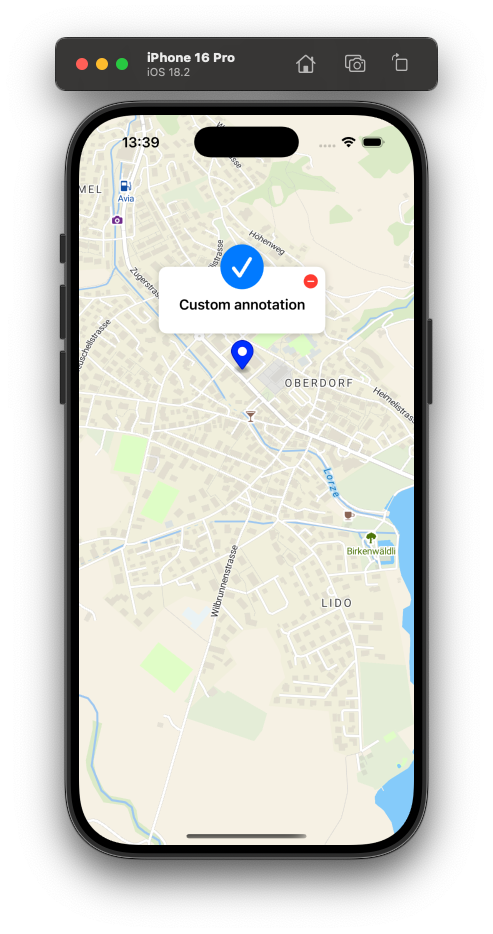
Create a new swift file with name CustomAnnotation, inherit from MTCustomAnnotationView and add your custom UI:
class CustomAnnotation: MTCustomAnnotationView {
  override init(size: CGSize, coordinates: CLLocationCoordinate2D, offset: MTPoint) {
    super.init(size: size, coordinates: coordinates, offset: offset)

    setUpView()
  }

  private func setUpView() {
    // Set background color and corner radius
    backgroundColor = .white
    layer.cornerRadius = 10

    // Add basic shadows
    layer.shadowColor = UIColor.black.cgColor
    layer.shadowOffset = CGSize(width: 0, height: 1.0)
    layer.shadowOpacity = 0.2
    layer.shadowRadius = 4.0

    // Add simple label
    let label = UILabel(frame: CGRect(x: 0, y: 0, width: 180, height: 40))
    label.center = CGPoint(x: center.x, y: center.y + 5)
    label.textAlignment = .center
    label.font = UIFont(descriptor: .preferredFontDescriptor(withTextStyle: .headline), size: 17)
    label.text = "Custom annotation"
    label.numberOfLines = 2

    addSubview(label)

    // Add simple image
    let imageView = UIImageView(frame: CGRect(x: 0, y: 0, width: 60, height: 60))
    imageView.image = UIImage.checkmark
    imageView.center = CGPoint(x: center.x, y: center.y - 40)

    addSubview(imageView)

    // Add button to remove the annotation from the map
    let closeButton = UIButton(frame: CGRect(x: 165, y: 0, width: 35, height: 35))
    closeButton.setImage(UIImage.remove, for: .normal)
    closeButton.addTarget(self, action: #selector(closeButtonTaped), for: .touchUpInside)

    addSubview(closeButton)
  }

  @objc private func closeButtonTaped(sender: UIButton!) {
    remove()
  }
}
Then, add your custom annotation view to the map:
let customSize = CGSize(width: 200.0, height: 80.0)
let coordinates = CLLocationCoordinate2D(latitude: 47.137765, longitude: 8.581651)
let offset = MTPoint(x: 0, y: -20)

let customAnnotation = CustomAnnotation(size: customSize, coordinates: coordinates, offset: offset)
customAnnotation.addTo(mapView)
Optionally, attach your custom annotation to the marker:
let marker = MTMarker(coordinates: coordinates)
marker.draggable = true
mapView.addMarker(marker)
marker.setDelegate(to: mapView) // make sure marker exists out of scope

marker.attachAnnotationView(customAnnotation)
Basic SwiftUI View
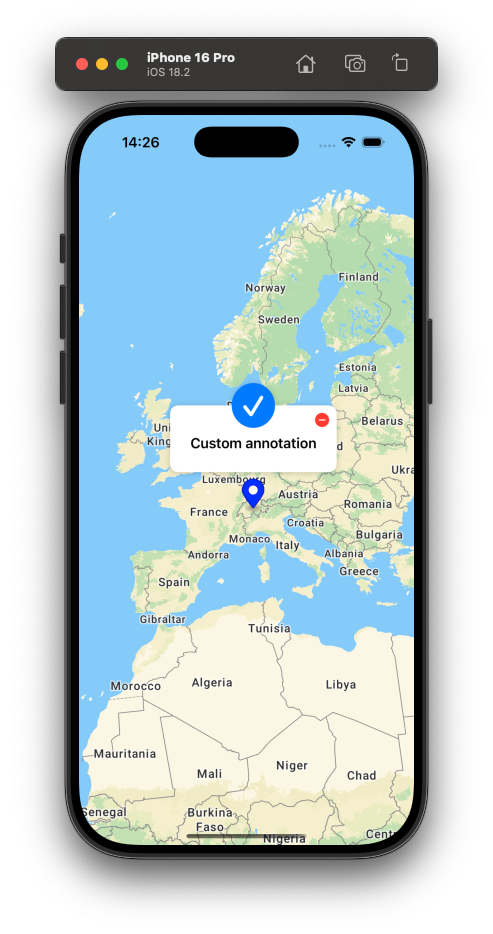
You can add your custom annotation view after map is initialized or inside MTMapViewContainer as content (CustomAnnotation is a subclass of MTCustomAnnotationView):
struct MyMapView: View {
  @State private var referenceStyle: MTMapReferenceStyle = .streets
  @State private var styleVariant: MTMapStyleVariant? = .defaultVariant

  @State private var map = MTMapView(options: MTMapOptions(zoom: 2.0))

  let coordinates = CLLocationCoordinate2D(latitude: 47.137765, longitude: 8.581651)
  let customSize = CGSize(width: 200.0, height: 80.0)
  let offset = MTPoint(x: 0, y: -80)

  var body: some View {
    MTMapViewContainer(map: map) {
      // Option 1
      CustomAnnotation(size: customSize, coordinates: coordinates, offset: offset)
    }
    .referenceStyle(referenceStyle)
    .styleVariant(styleVariant)
    .didInitialize {
      // Option 2
      let customAnnotation = CustomAnnotation(size: customSize, coordinates: coordinates, offset: offset)

      Task {
        await customAnnotation.addTo(map)
      }
    }
  }
}
Learn more
To learn about more advanced functionalities of the SDK, refer to the API reference, or build your own documentation in Xcode: Product -> Build Documentation.
In addition to the documentation take a look at the plug and play examples provided in the SDK GitHub repository, as well as pre-made demo app: