How to publish your geodata
This article demonstrates how to publish geodata. After you draw or upload your data in the Vector data editor or using the MapTiler Mobile app, it is time to publish them. Custom geodata are handled as Data sources In MapTiler.
Select a background map for presenting your data
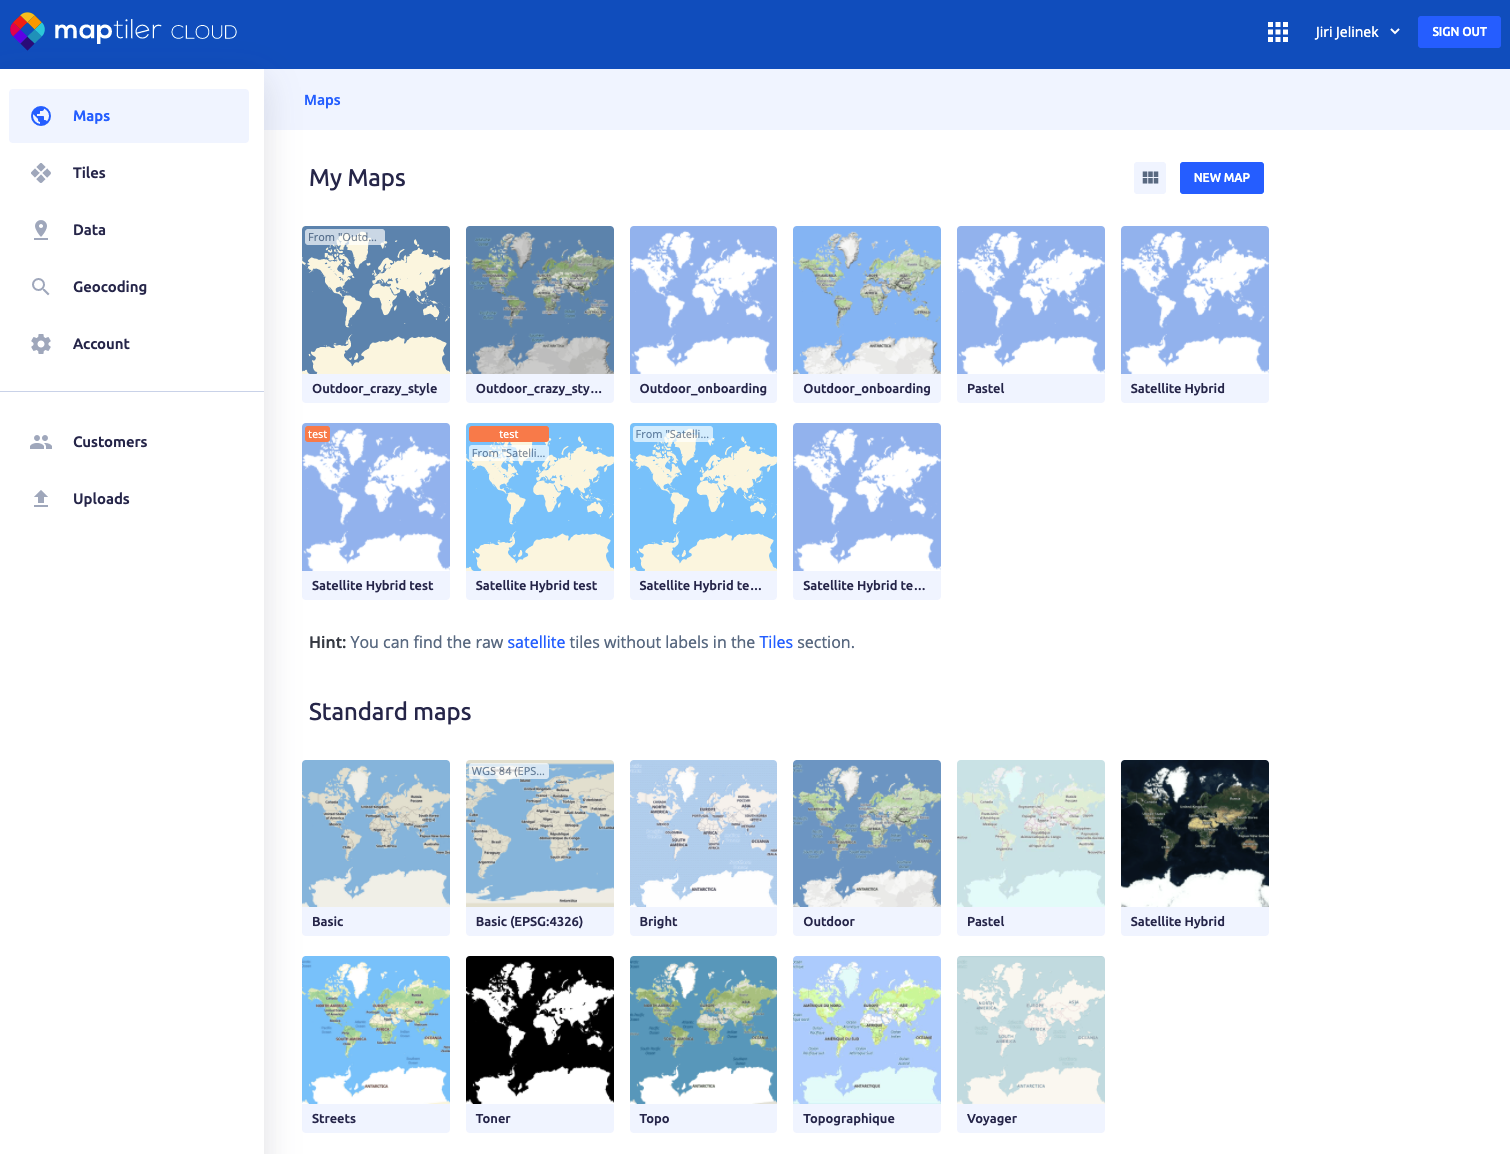
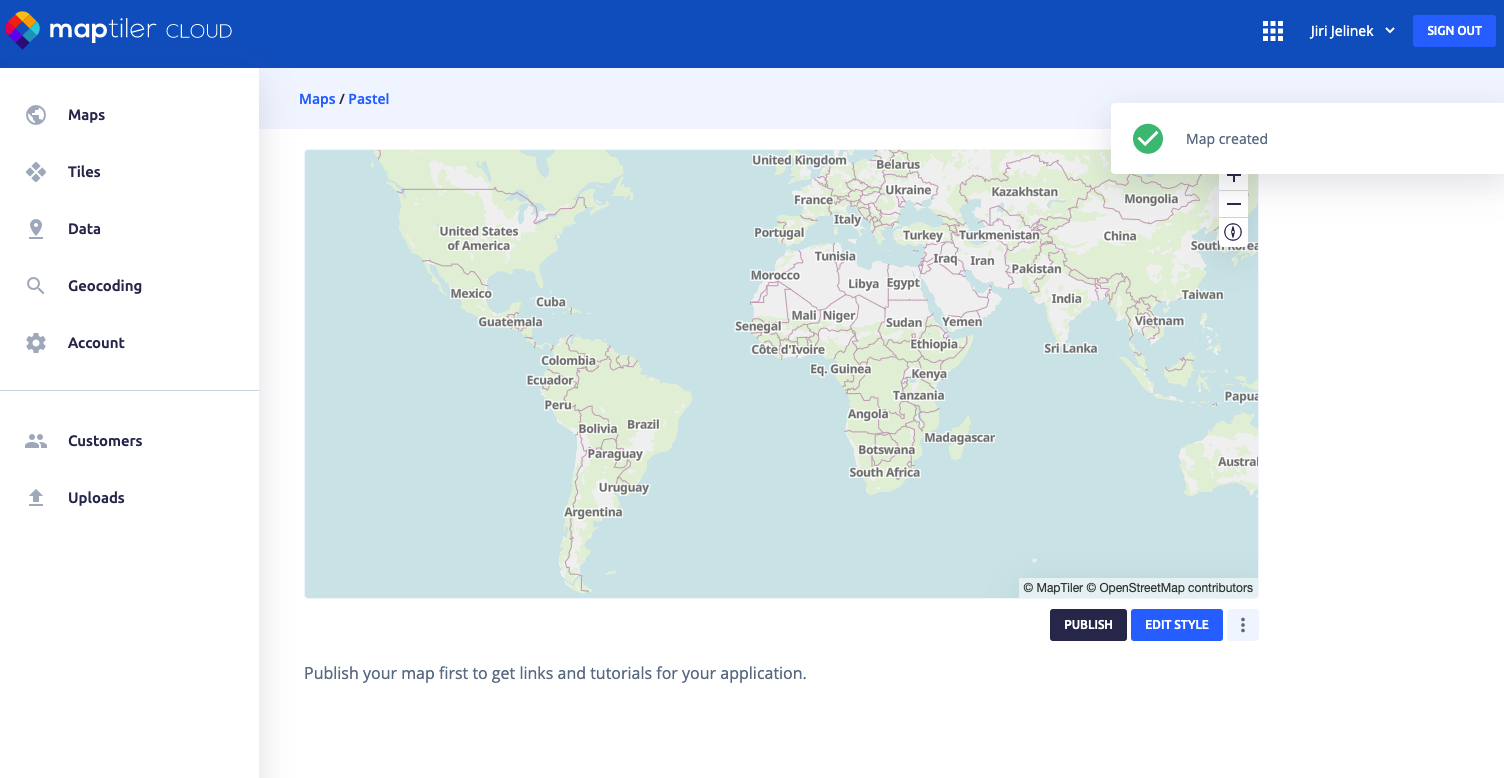
In the MapTiler administration, select a map that fits best your data.
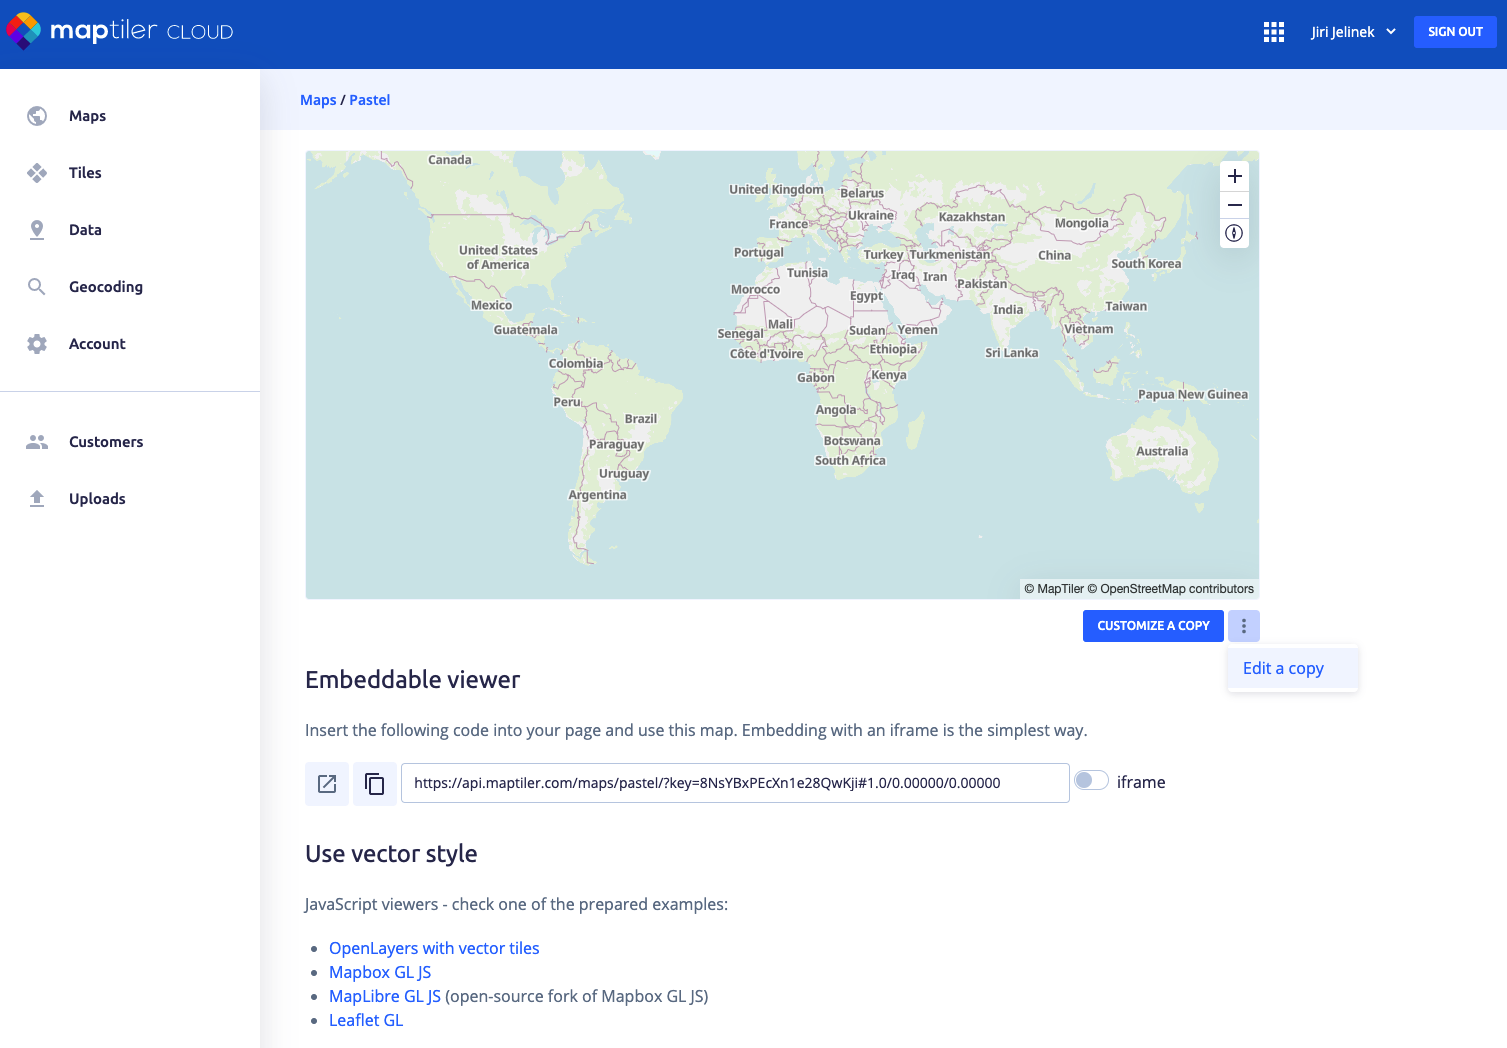
From the “⋮” menu, select Edit a copy.
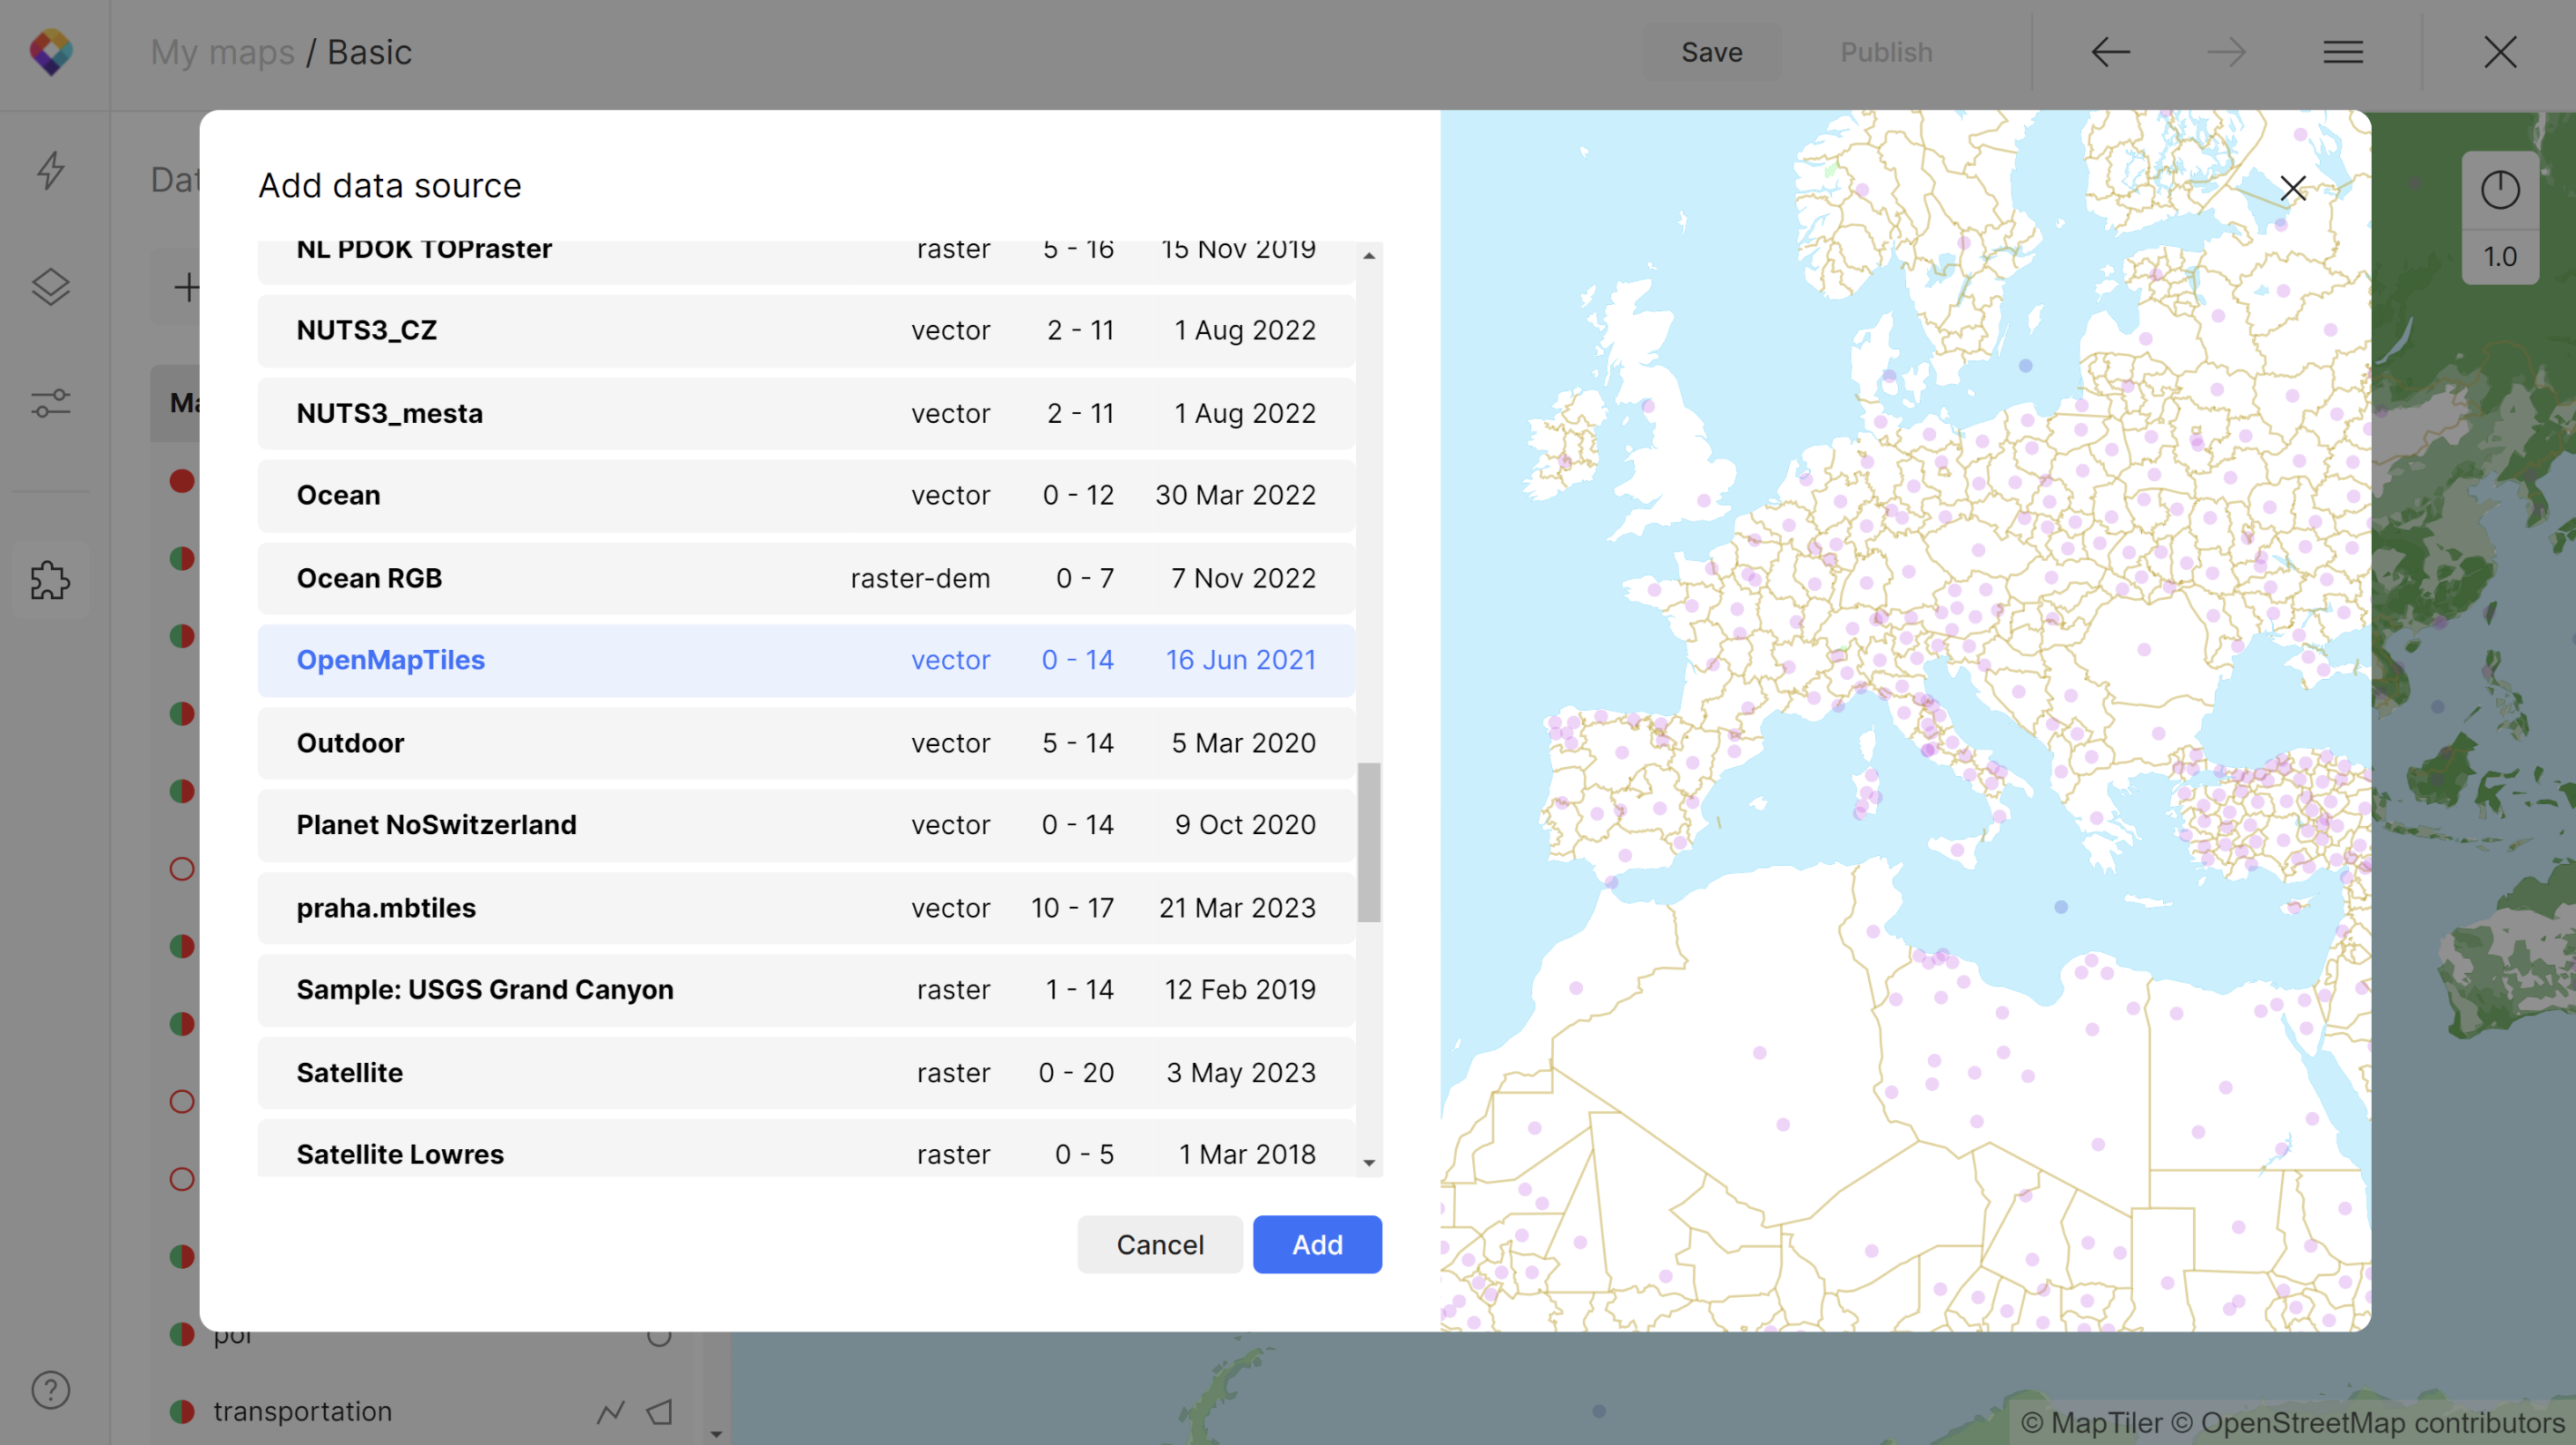
Add data source
Adding a data source is really easy; just use the “plus” button next to the search. In the dialogue window, you will see all available data sources with information (type, zoom, and date of creation) including your own uploaded data. When selecting your preferred data source, there is an overview map on the right which you can zoom in to explore the data thoroughly.
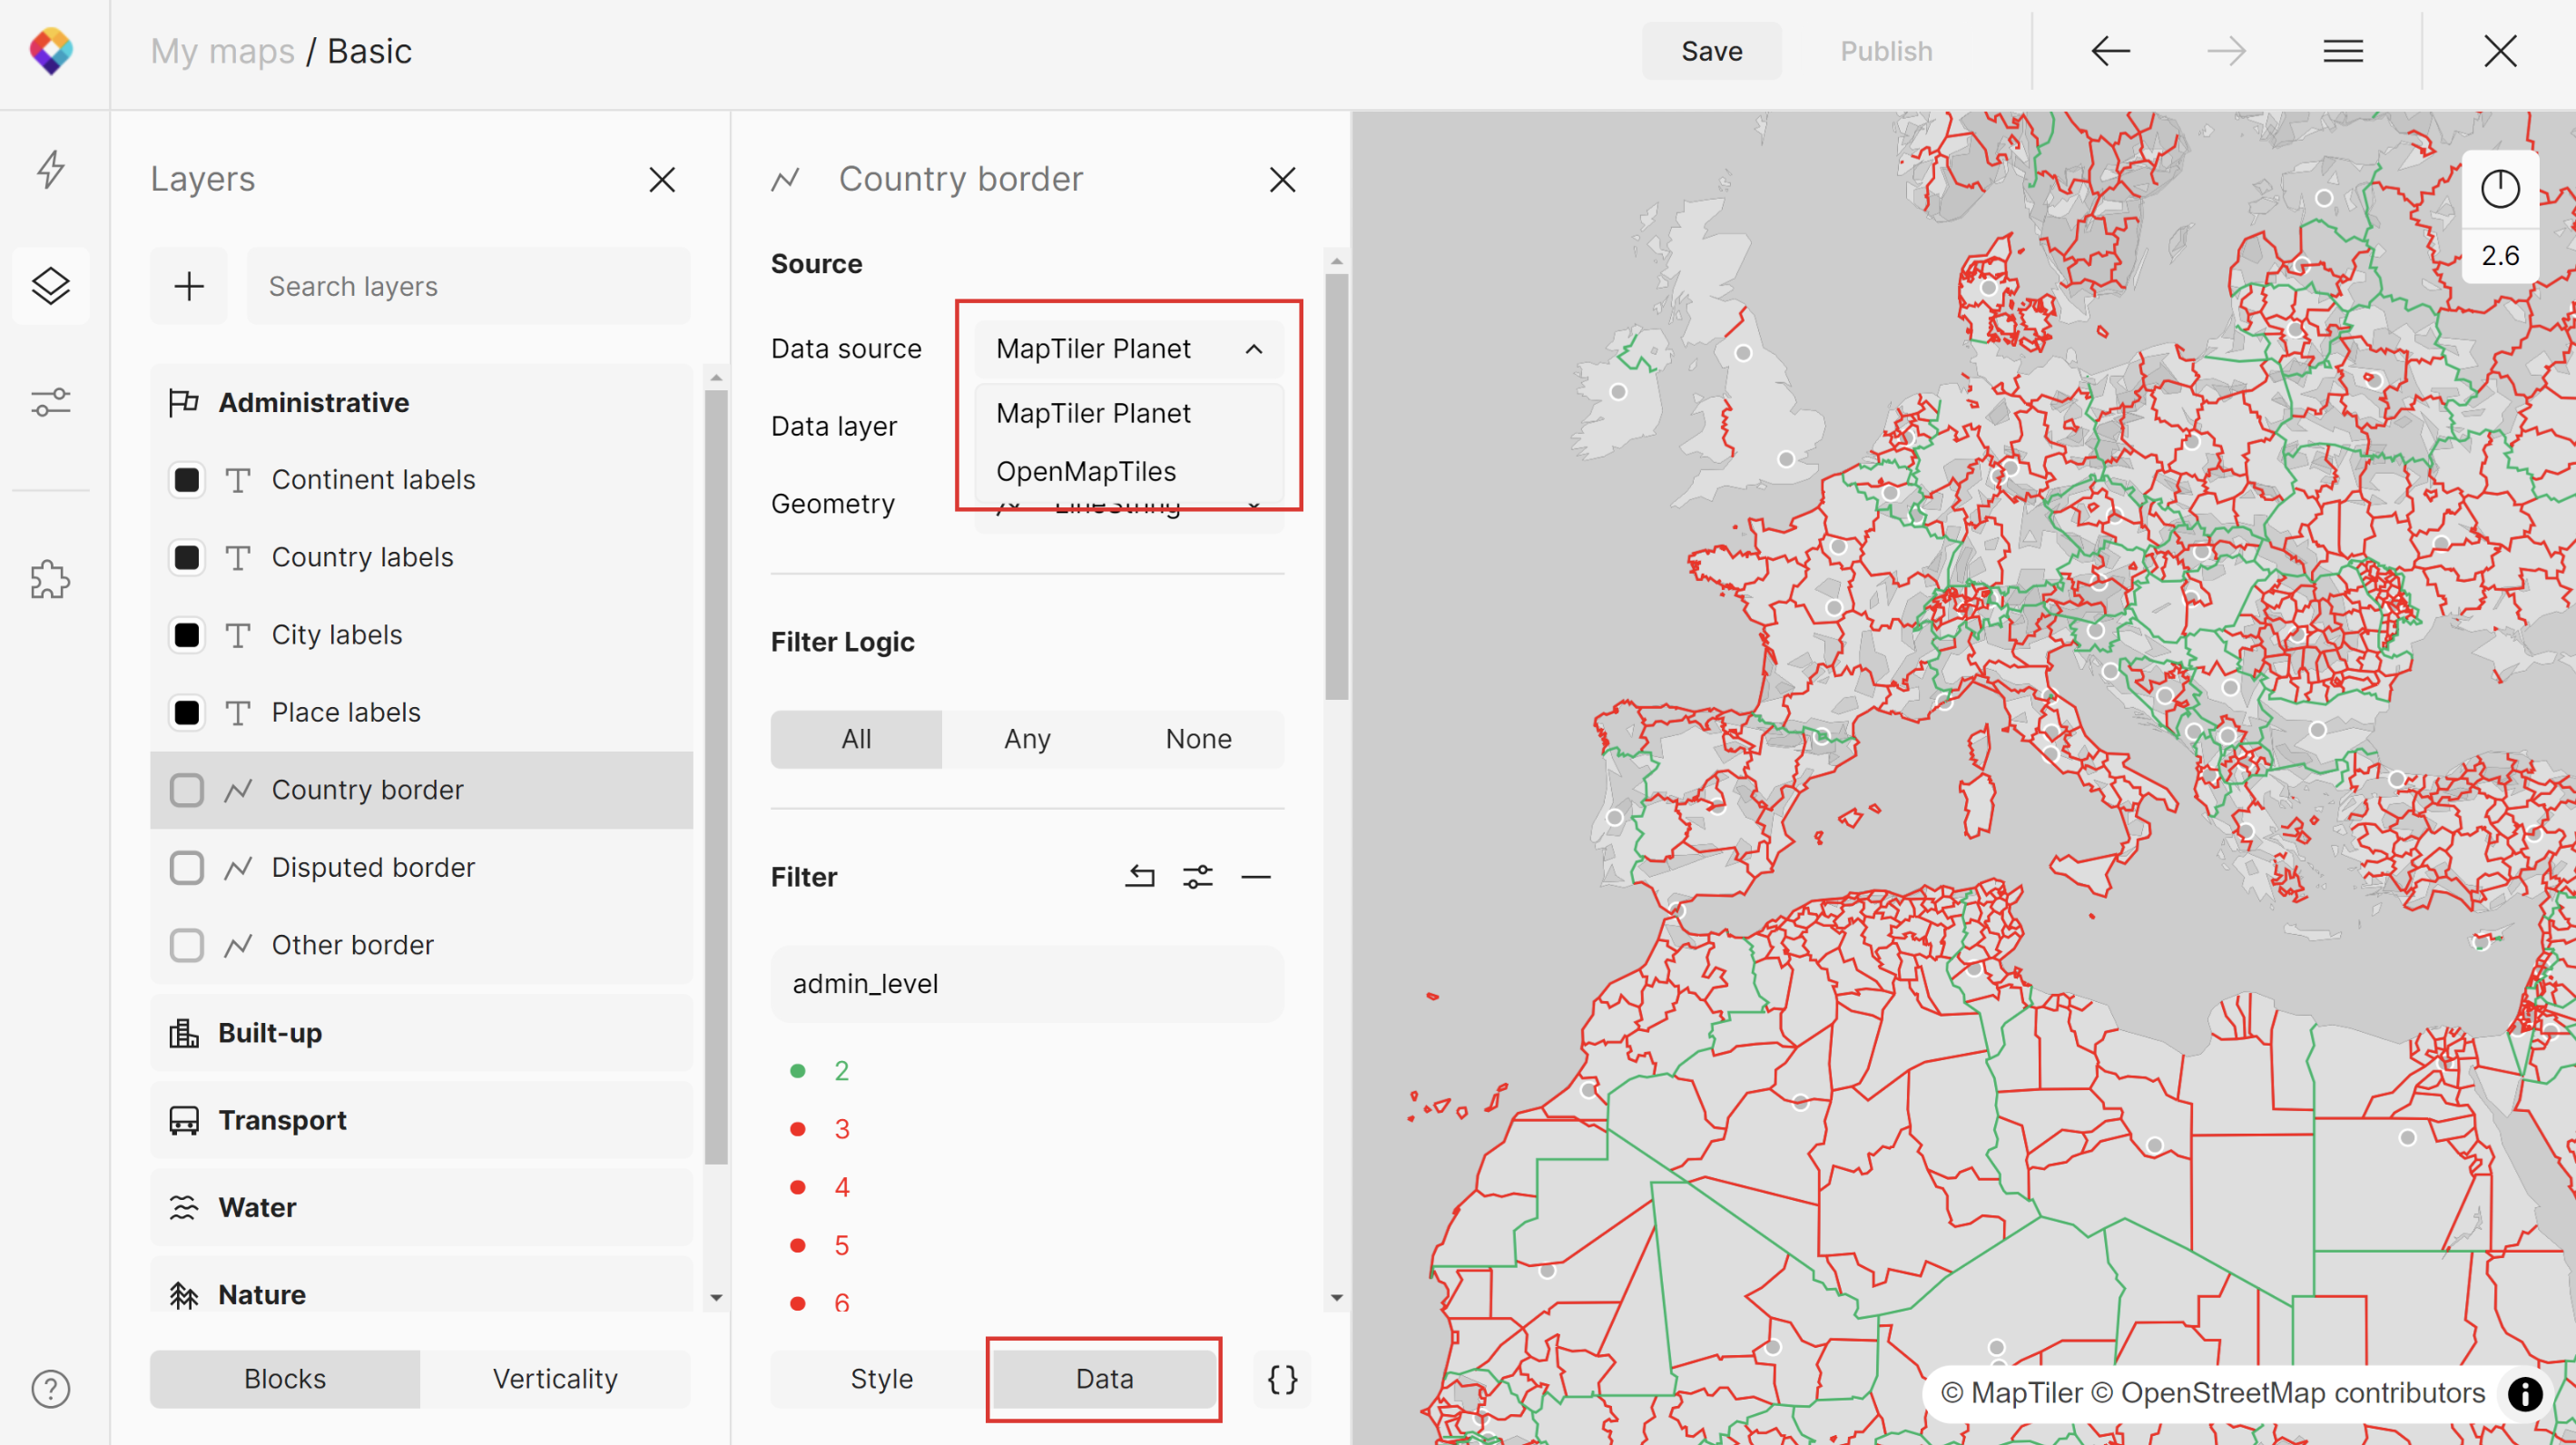
Once you have the data source added, you can go to the Layers panel (Alt+L) and include it in your style layers. It will appear as an option in a Source drop-down menu in the Data panel. However, be aware that raster sources can be chosen only for raster layers and vectors for vector layers.
Once you have your vector layer adjusted and styled, click Save, and then Publish the map. This way you can serve it through the API or via a WMTS endpoint.
Now your map is ready to be embedded in an iframe on your web or blog, used interactively with JavaScript, on mobile devices, desktop GIS, or printed.