How to use MapTiler in Felt
Felt is an easy and powerful tool for making maps on the Internet. If you want to take your maps to another level, change the default basemap and create your 100% custom and unique maps.
This example demonstrates how to use MapTiler maps in Felt. You will learn how change the map background in Felt to use your MapTiler custom map.
You will learn the following:
- Change the default Felt background map by your custimized MapTiler map.
- Use your own data from MapTiler in a Felt map.
Create your map design
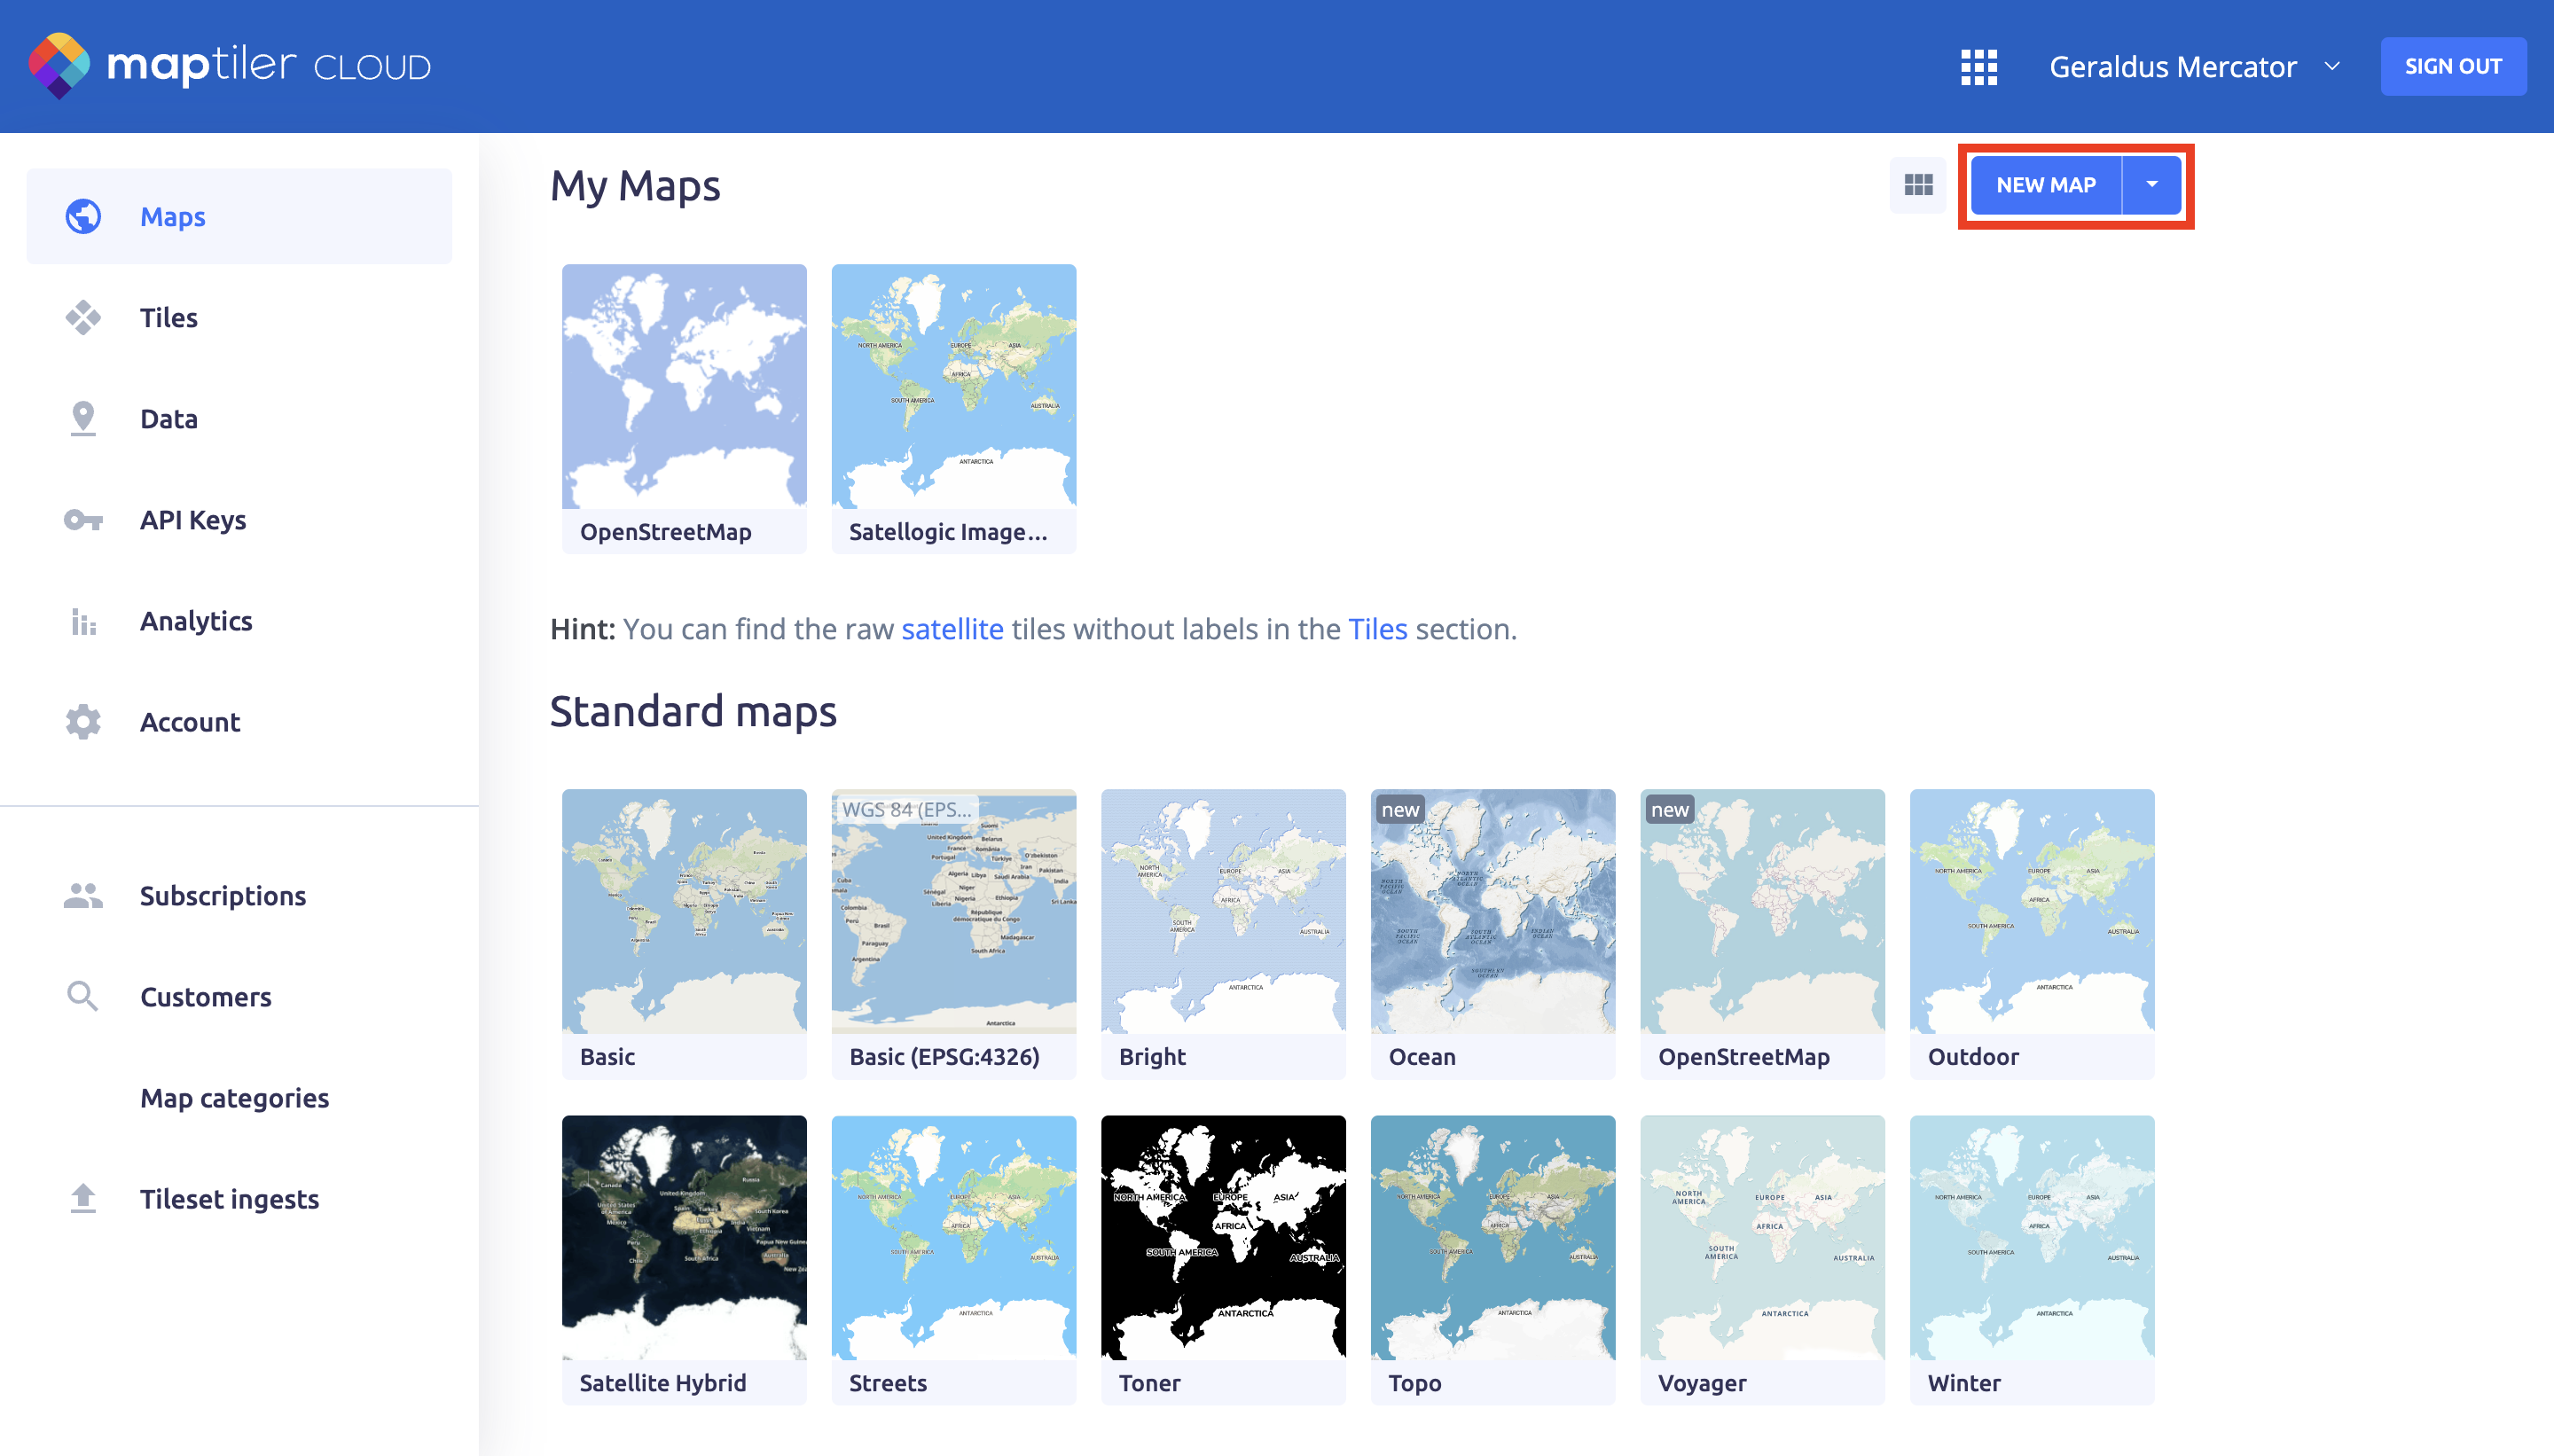
Go to MapTiler and click on a new map button.
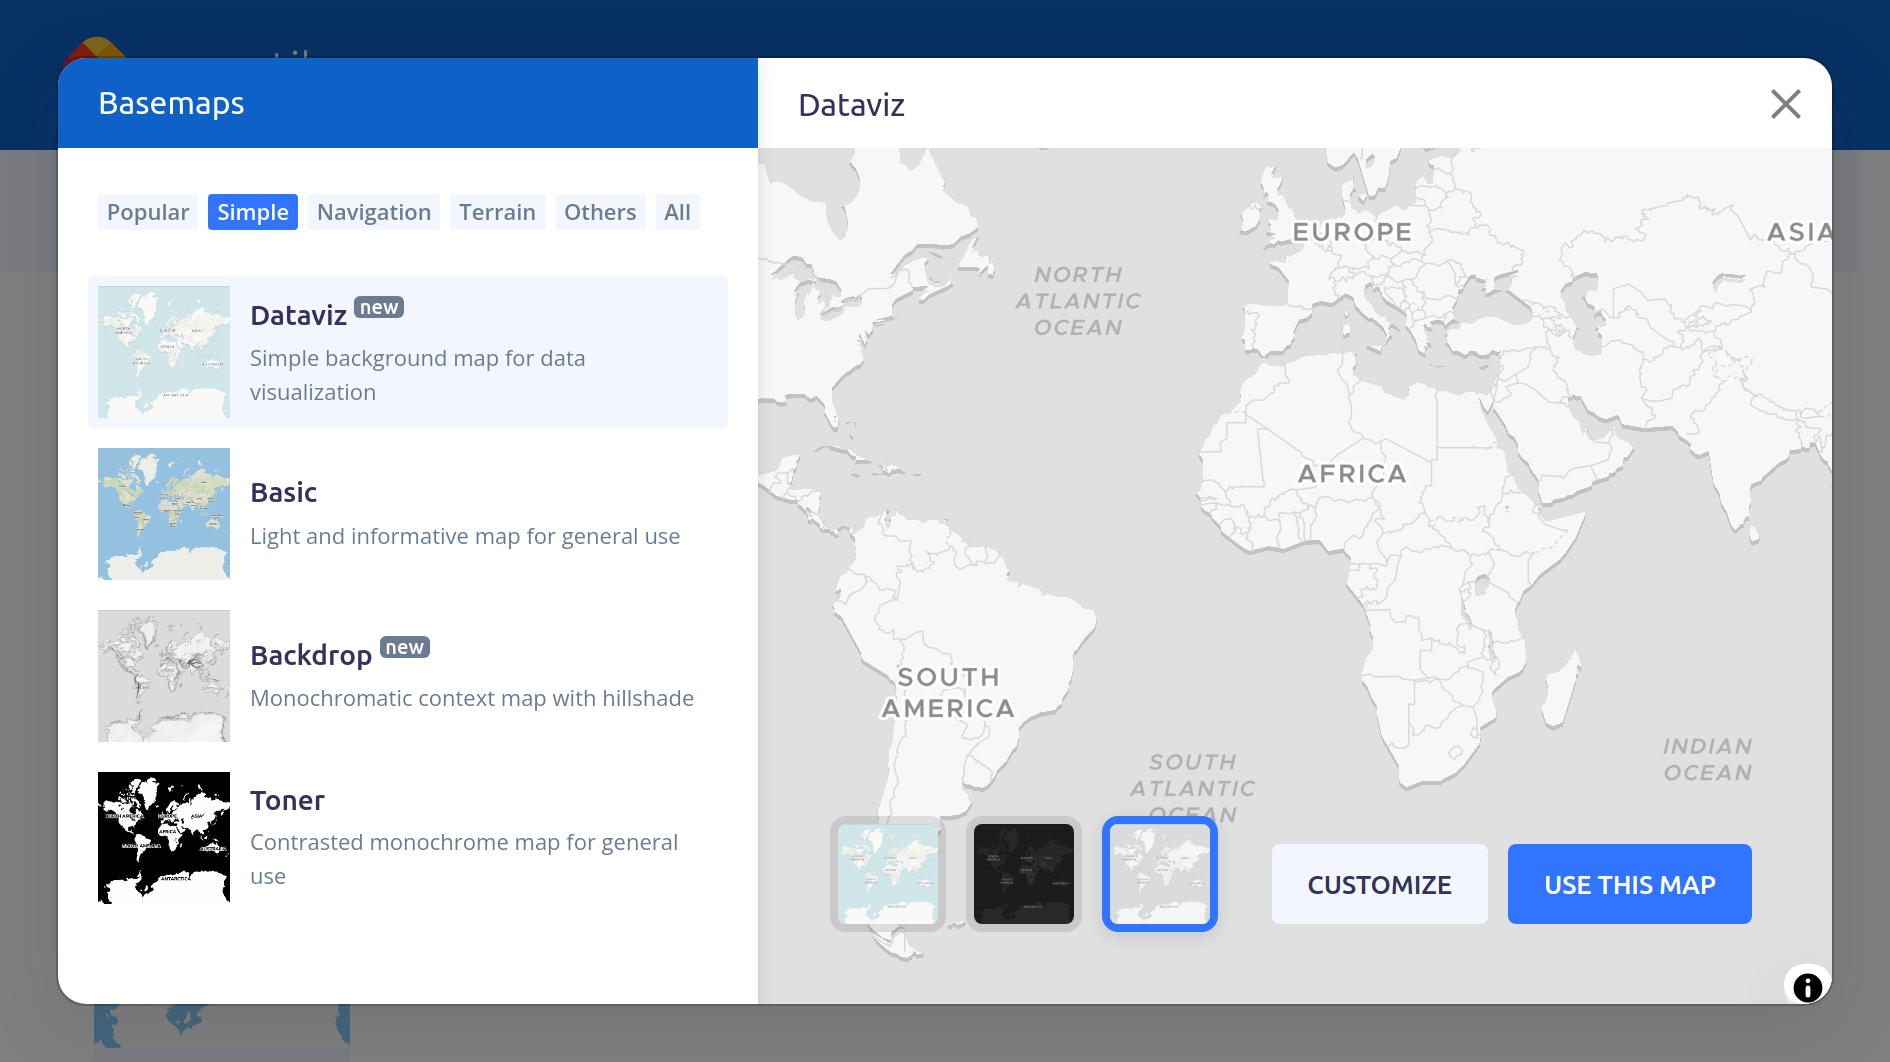
Then select the map which suits the best to your use case. Some of our maps offer several different color versions. You can find here maps for the light and dark modes of your application, and they will still have the same data as the default map for this use case.
In this example we will use the Dataviz light map. Select the simple tab and then the Dataviz map with light mode.
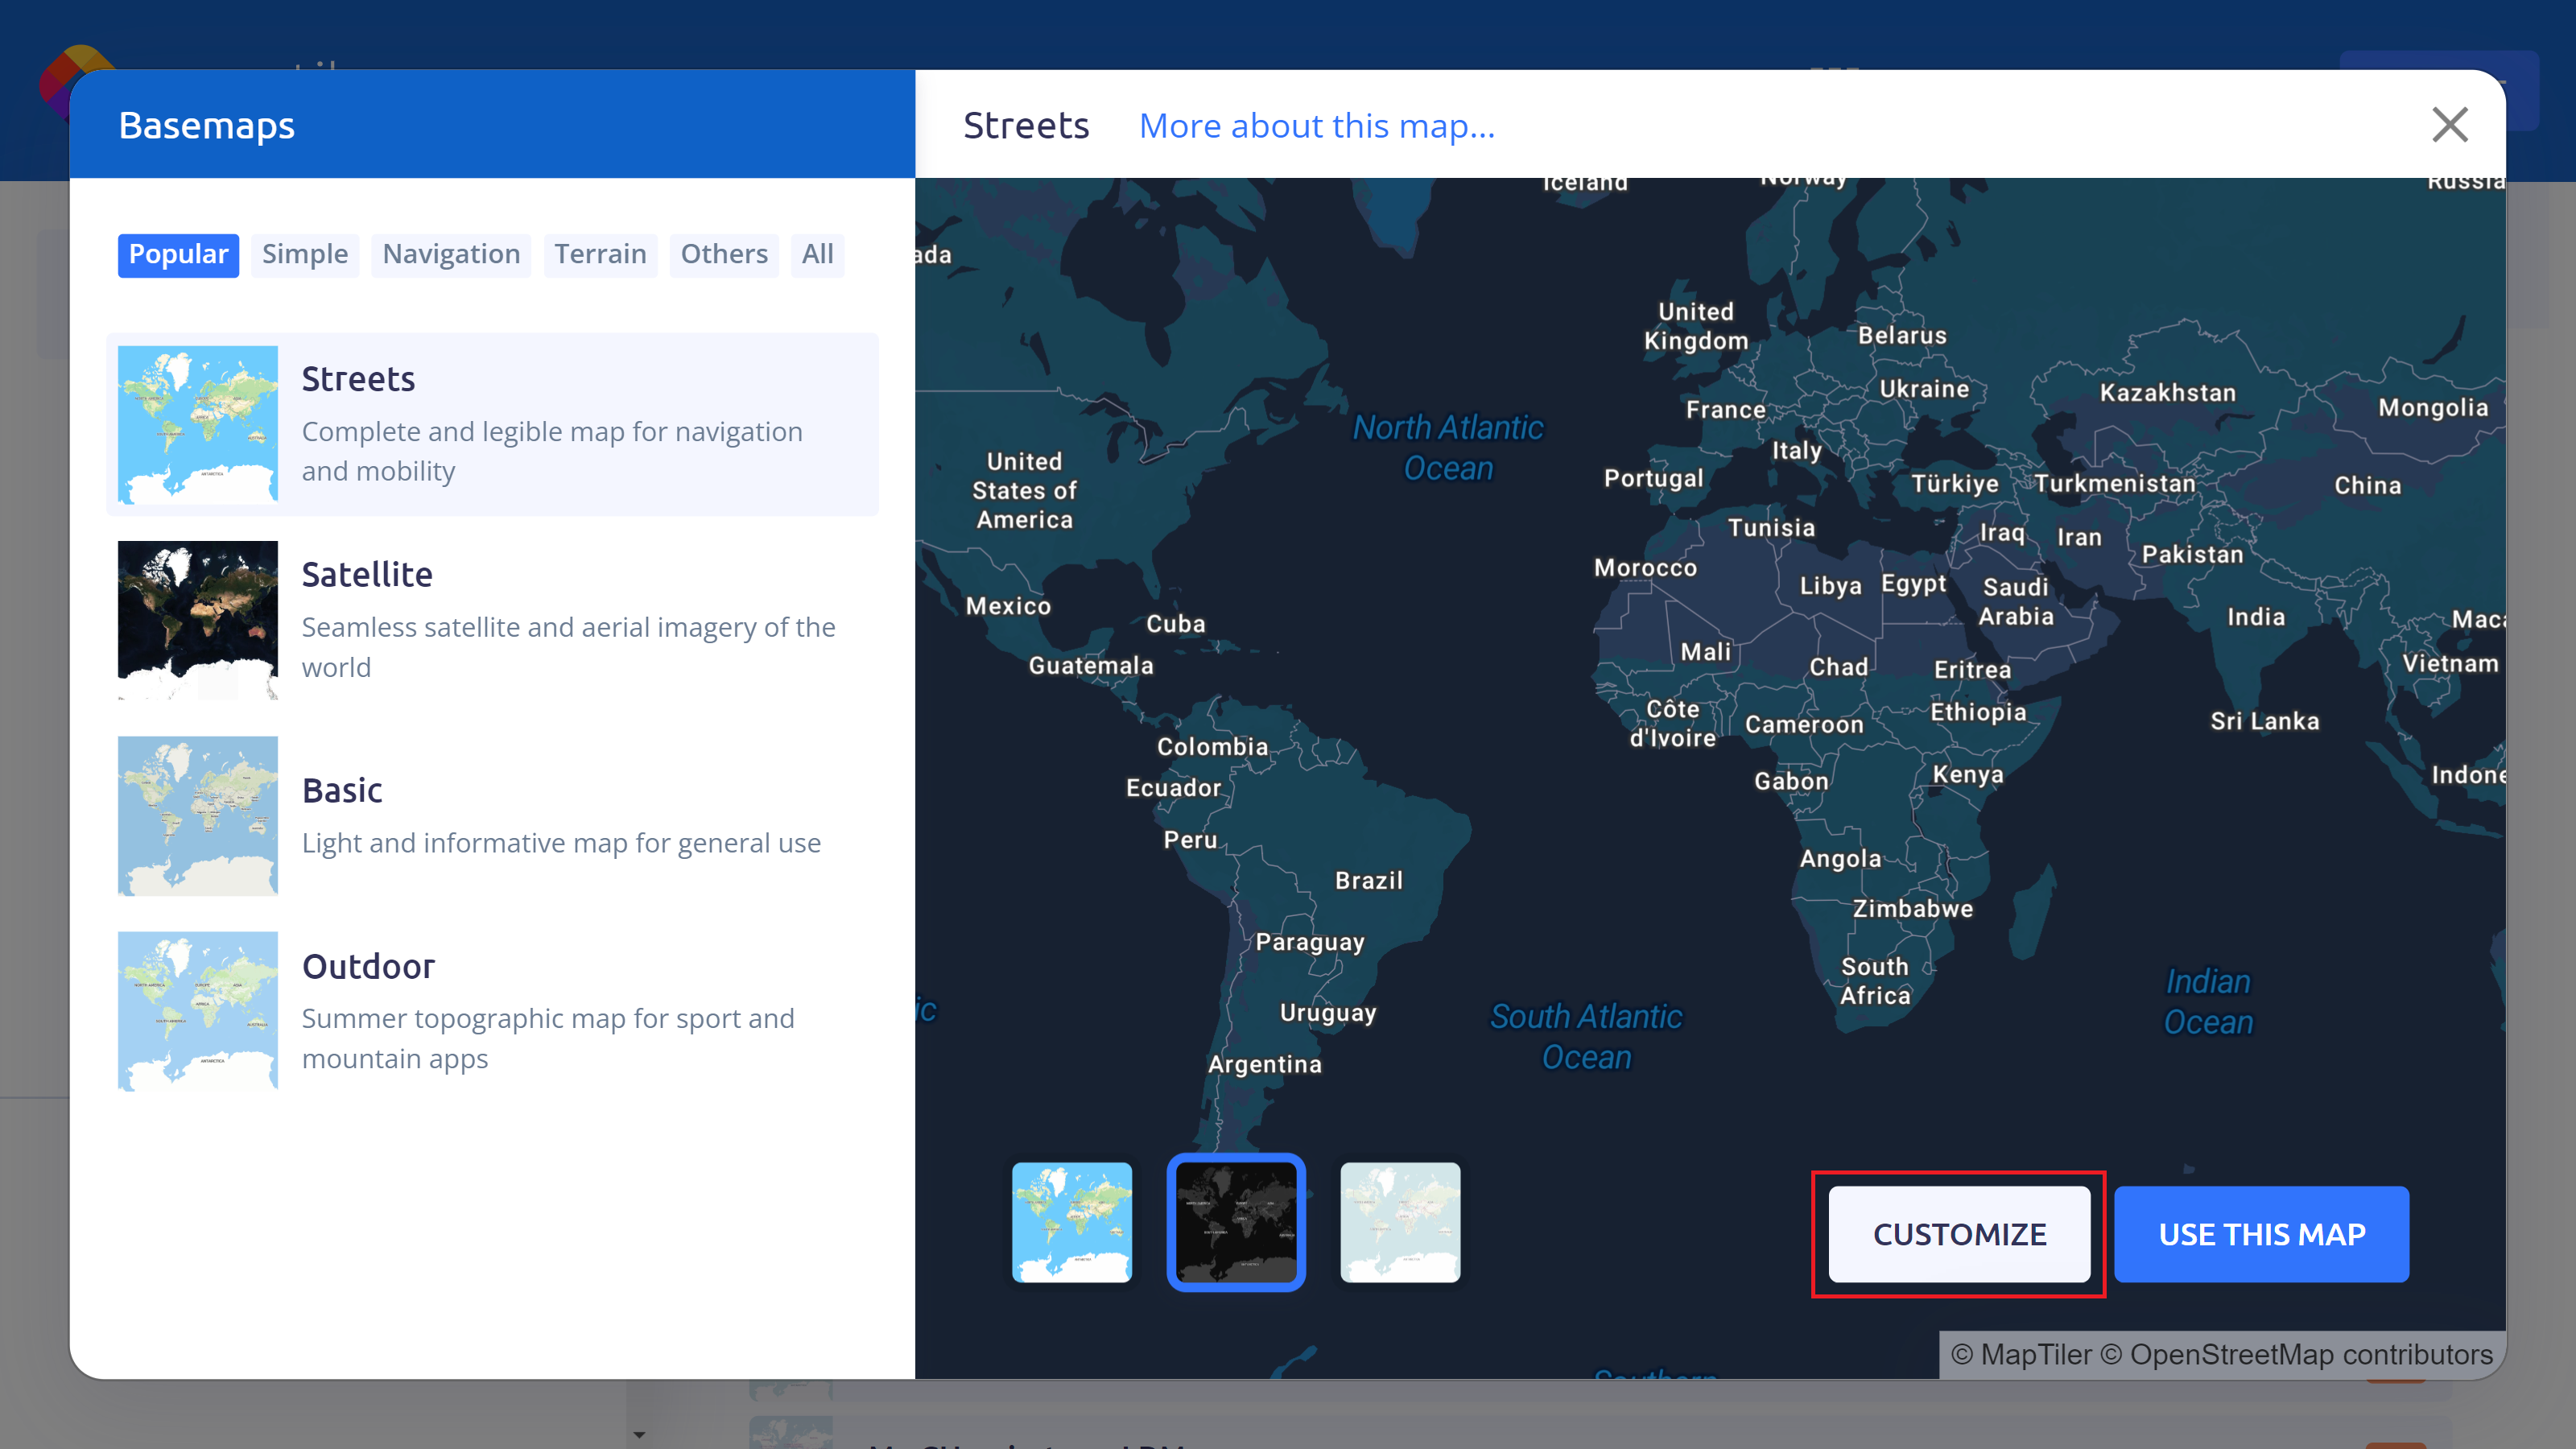
Click on the CUSTOMIZE button.
User-friendly Map Designer tool
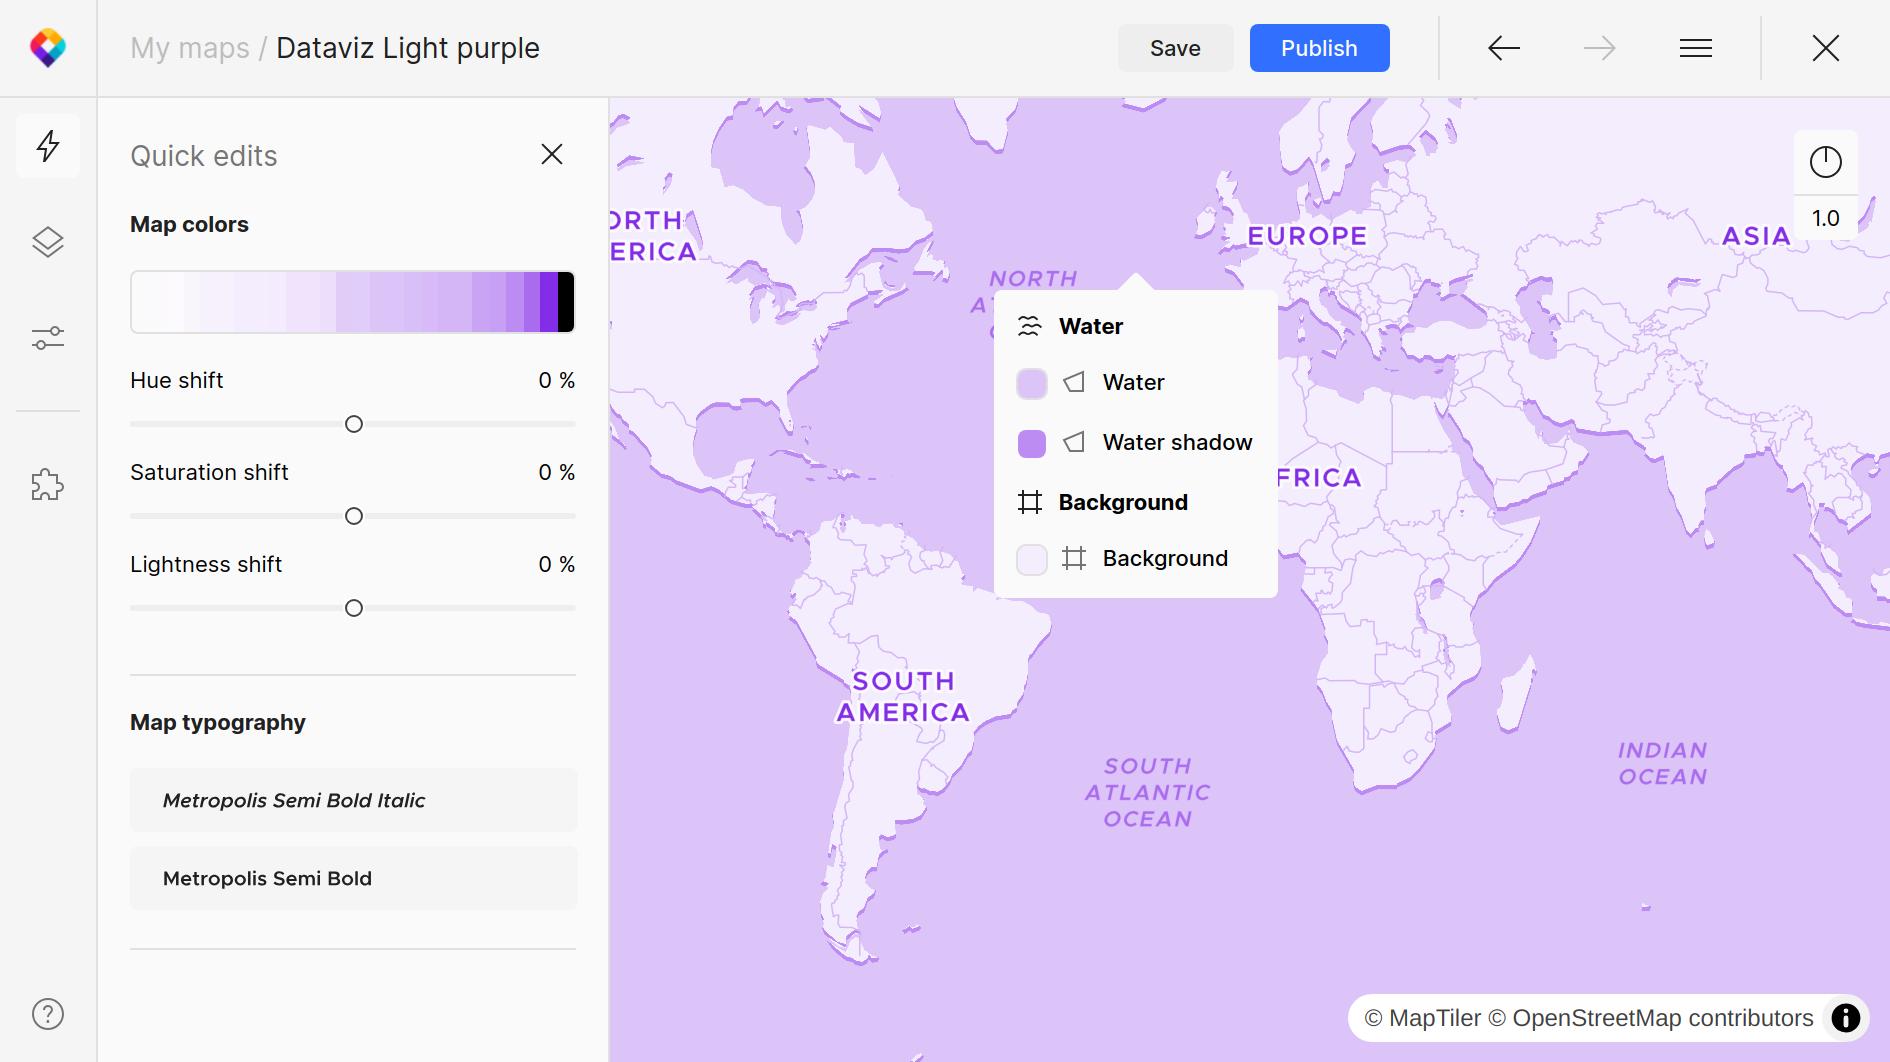
MapTiler Map Designer is a new-generation online map editor. When opening it, you will see the Quick edits (Alt+Q) panel, where you can adjust the map color scheme and typography.
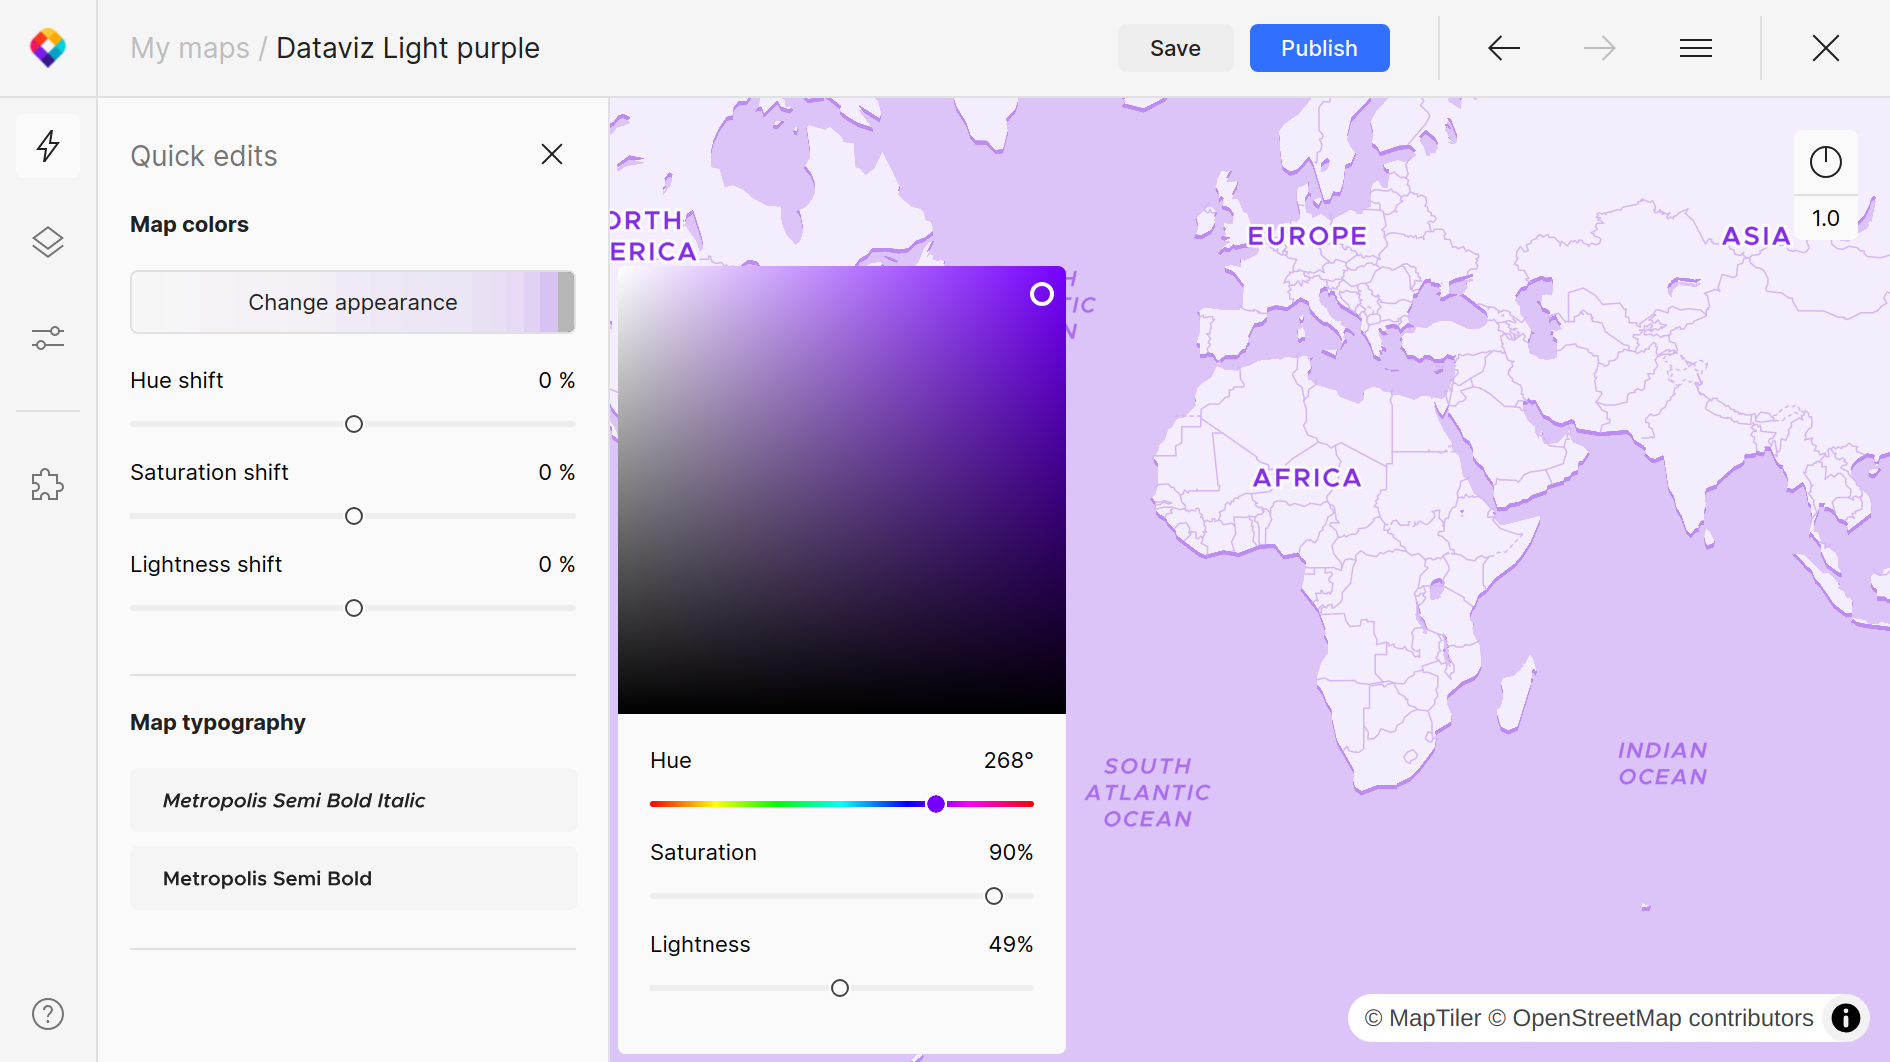
Open the Quick edits panel and change the map color scheme.
For more advanced customization options, check out the Map desing documentation
Publish your map
To make your map available for use, hit the Save & Publish. Then your map is available for insertion into your web, used on a web, inside a mobile app, as a static image, or as a WMTS service. This map is now available on My maps, where you have all mentioned services available, you can further Customize it or Delete it.
You can save the map with the name you want in our case we will save it as “Purple Map”.
Get your map Tile URL
In the my maps area of MapTiler, select the newly created map or any of the maps available on this page.
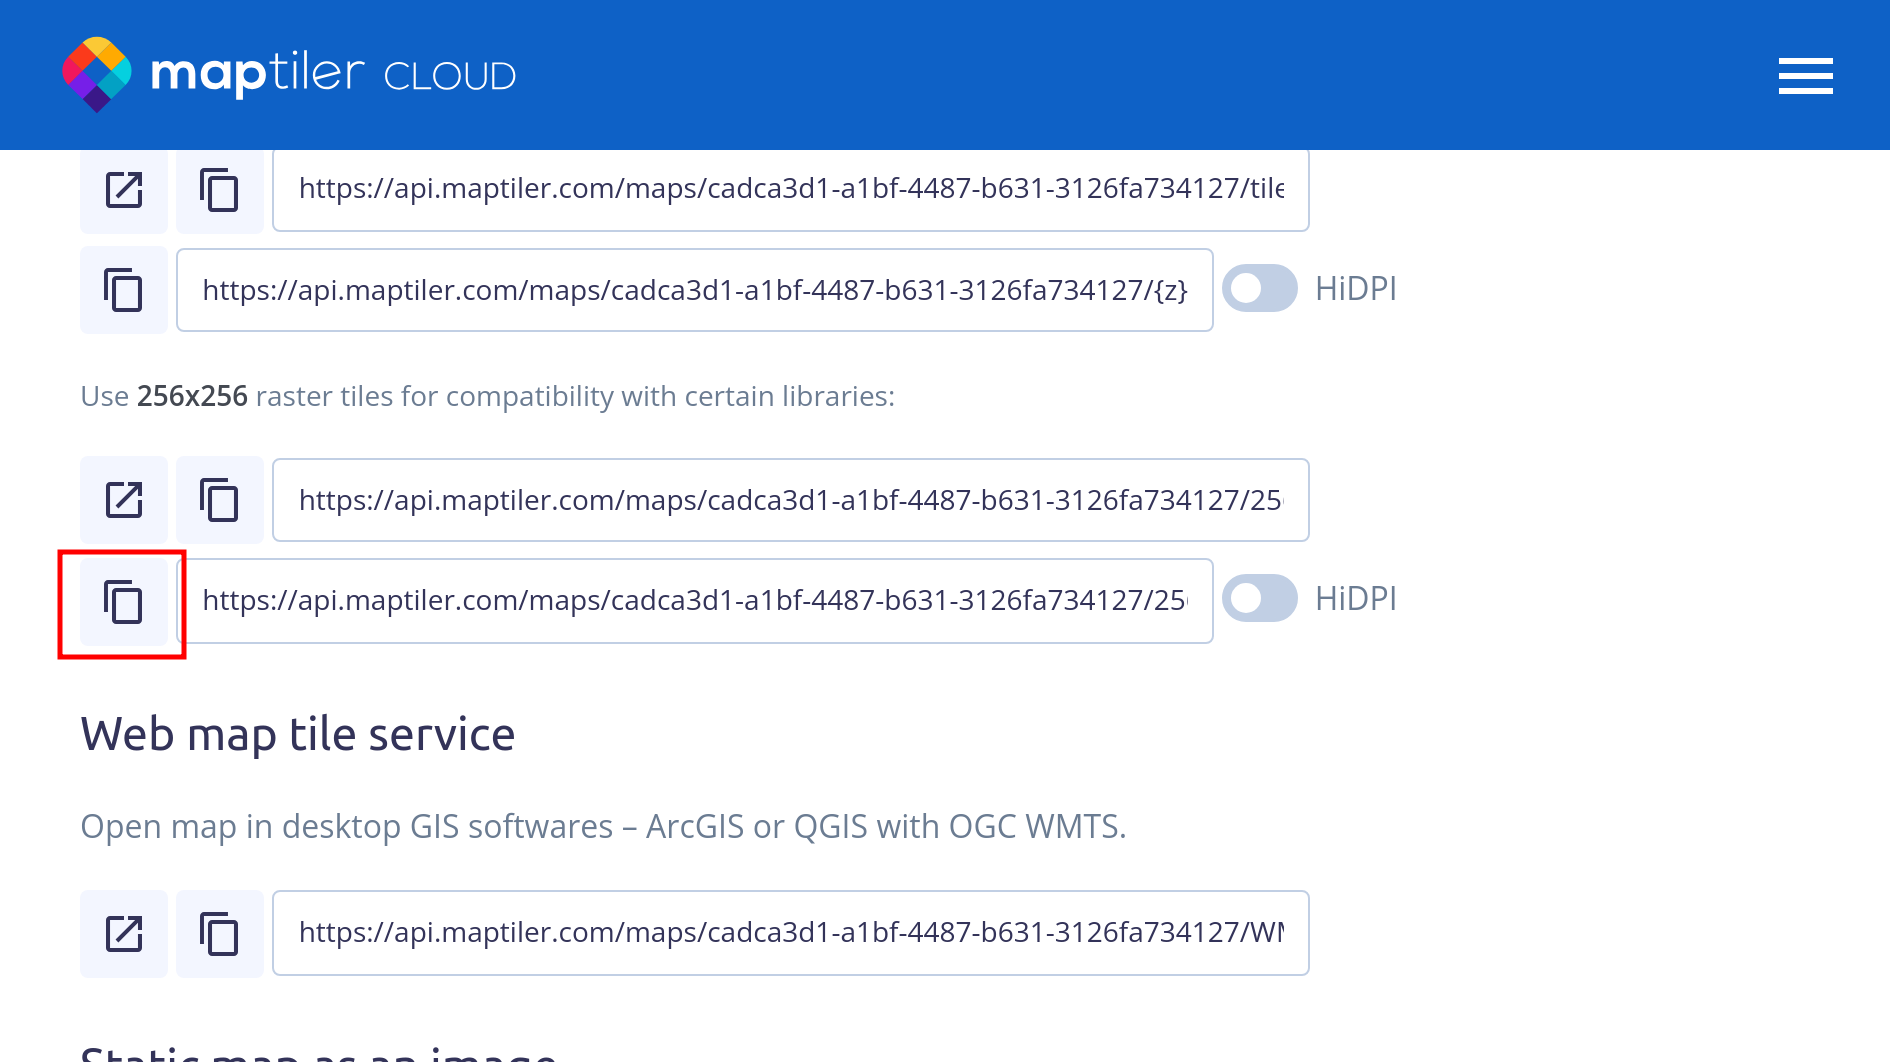
Scroll down until the Raster tiles section. You should now see the url of your map which you can use in the application. Copy the 256x256 XYZ URL. Felt use the standar 256x256 tiles.
Change the background map
Backgrounds are the canvas upon which your map is built.
Felt API
The Felt API lets developers build workflows and applications to interact with Felt using code!. Check out the full API documentation here: Felt Public API reference
To create a Felt map, simply perform a POST request to the following endpoint:
https://felt.com/api/v1/maps
The response will include the URL to the newly created map. Some optional parameters may be added to configure the map, such as title, basemap, etc.
To create a new map in Felt using your MapTiler basemap and your MapTiler data layer you can pass these parameters in the body of the POST request.
{
    "title": "MapTiler Map",
    "basemap": "https://api.maptiler.com/maps/YOUR_CUSTOM_MAP_ID/256/{z}/{x}/{y}.png?key=YOUR_MAPTILER_API_KEY_HERE",
    "layer_urls": [
        "https://api.maptiler.com/data/YOUR_MAPTILER_DATASET_ID_HERE/features.json?key=YOUR_MAPTILER_API_KEY_HERE"
    ],
    "lat": 50.07725,
    "lon": 14.43592,
    "zoom": 14.14
}
Replace YOUR_MAPTILER_API_KEY_HERE with your own API key. Make sure to protect the key before you publish it!