---
title: "Map in React JS with Material UI | React | JavaScript maps SDK"
description: "Create React JS maps with Material UI and MapTiler."
---
> For AI agents: a documentation index is available at [/llms.txt](https://docs.maptiler.com/llms.txt). Markdown versions of all pages are available by appending .md to any URL.
# Map in React JS with Material UI
## Maps in React series
This example is the code base (**Episode 0**) of the Maps in React series. In this series, we will learn how to create a map app in React with popups, a visualization switcher, geocoding control, 3D terrain, and a sidebar.
- **Episode 0: Map in React JS with Material UI**
- Episode 1: [Map in React JS point data from geojson data](https://docs.maptiler.com/react/sdk-js/geojson-points/)
- Episode 2: [Map in React JS create a heatmap](https://docs.maptiler.com/react/sdk-js/heatmap/)
- Episode 3: [Map in React js with popup and sidebar](https://docs.maptiler.com/react/sdk-js/popup-sidebar/)
- Episode 4: [Map in React js with geocoding control](https://docs.maptiler.com/react/sdk-js/geocoding-control/)
- Episode 5: [3D Map in React js with geocoding control](https://docs.maptiler.com/react/sdk-js/3d-map/)
In this step-by-step tutorial, you’ll learn how to create a application in React JS with Material UI (MUI) to render a map using the MapTiler SDK JS. Together we will build a simple full-screen map application, serving as a practical example of how to seamlessly integrate MapTiler maps into your own React app.
By the end of this tutorial, you will be able to create a full-screen map with a marker placed at a specified location. With your newfound knowledge, you will be able to create visually stunning maps within your React + MUI projects.
## Getting started
_Minimal requirements for completing this tutorial._
- **Basic React JS knowledge.** You don’t need a lot of experience using [React](https://reactjs.org/) for this tutorial, but you should be familiar with basic concepts and workflow.
- **Material UI (MUI).** You don’t need experience using (Material UI)\[https://mui.com/\]{:target=”\_blank” rel=”noopener”} for this tutorial.
- **MapTiler API key.** Your MapTiler account access key is on your MapTiler [Cloud](https://cloud.maptiler.com/account/keys) account page or [Get API key for FREE](https://cloud.maptiler.com/account/keys).
- **MapTiler SDK JS.** JavaScript library for building web maps. In this tutorial, you will learn how to install it.
- **Node.js and npm.** Necessary to run your React app locally. [Node.js](https://nodejs.org/en/)
## Create an app
In this step, we are going to learn how to create a React app.
To create a new react project run in your command-line:
```bash
npm create vite my-react-map -- --template react
```
`create vite` will create a simple one-page application in React. For more information follow [Scaffolding Your First Vite Project](https://vitejs.dev/guide/#scaffolding-your-first-vite-project).
Navigate to the newly created project folder `my-react-map`
```bash
cd my-react-map
```
Inside the newly created project, run `npm install` to install the dependencies.
To start your local environment, run `npm run dev`. You will find your app running on the address `http://localhost:5173/`.
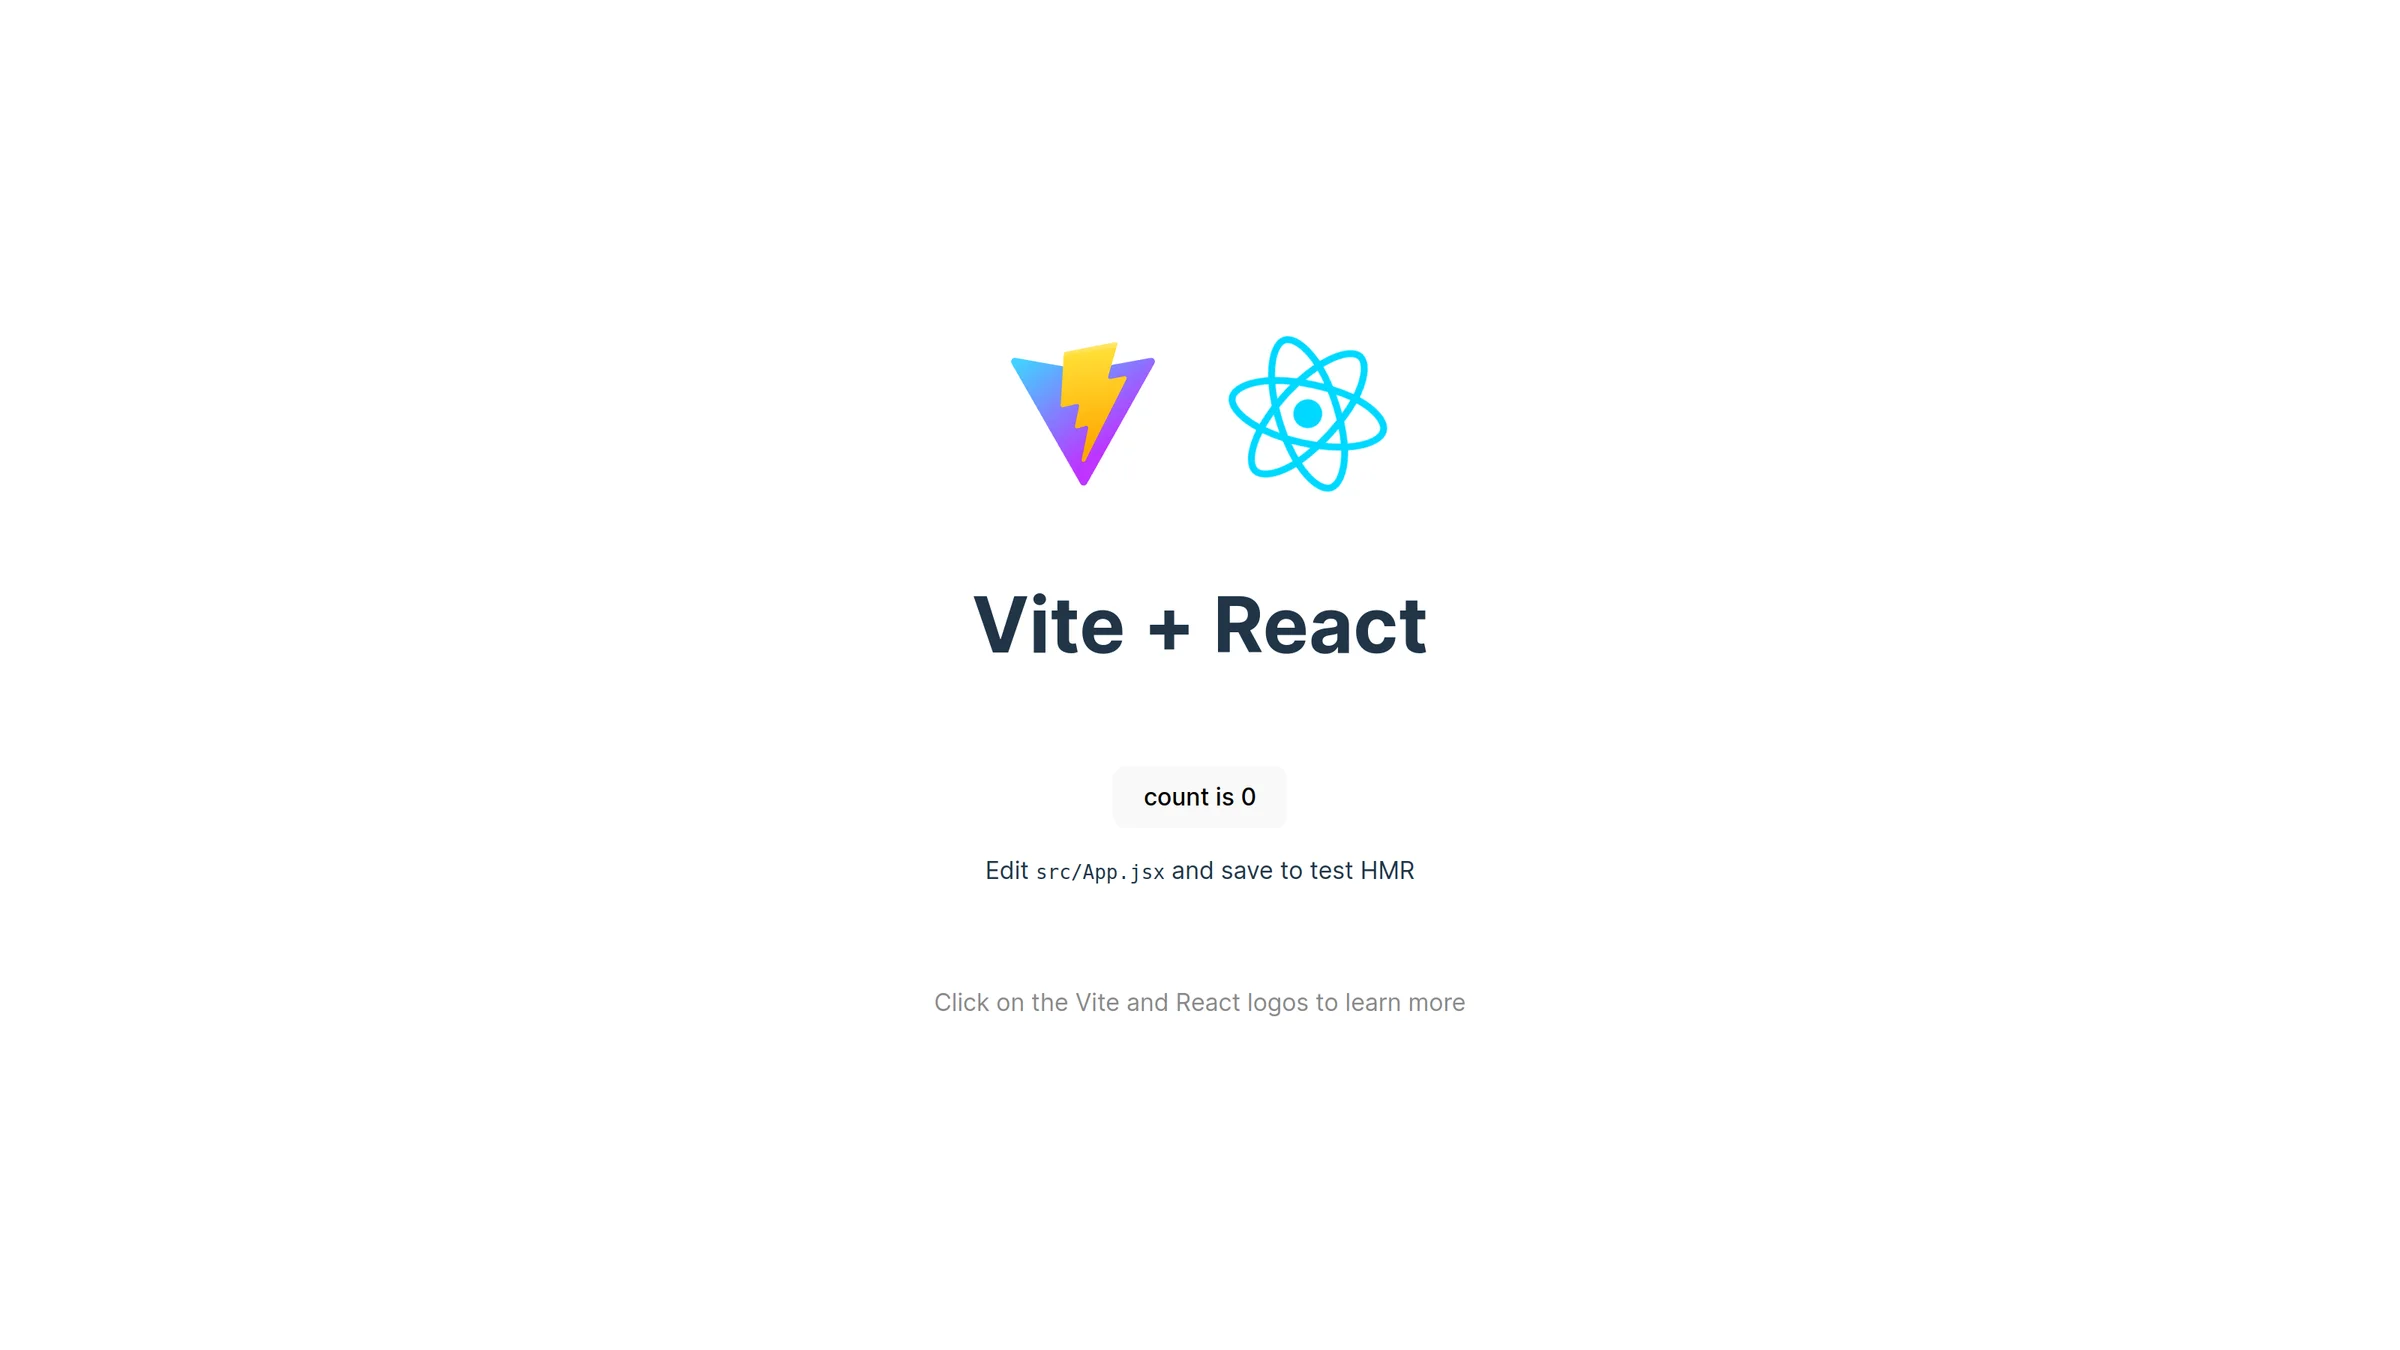
Now you should see the app in your browser.
### Installation and setting up
To install MapTiler SDK JS library, navigate to your project folder and run the command:
```bash
npm i @maptiler/sdk
```
To install Material UI library, run the command:
```bash
npm i @mui/material @mui/icons-material @emotion/react @emotion/styled
```
Navigate to the `src` folder
Delete the `index.css` file.
Open the `main.jsx` file and delete the import of the _index.css_.
```diff-jsx
import React from 'react'
import ReactDOM from 'react-dom/client'
import App from './App.jsx'
- import './index.css'
ReactDOM.createRoot(document.getElementById('root')).render(
,
)
```
Replace all the contents of the `App.css` file with the following lines:
```css
body {
margin: 0;
padding: 0;
font-family: -apple-system, BlinkMacSystemFont, 'Segoe UI', 'Roboto', 'Oxygen',
'Ubuntu', 'Cantarell', 'Fira Sans', 'Droid Sans', 'Helvetica Neue',
sans-serif;
-webkit-font-smoothing: antialiased;
-moz-osx-font-smoothing: grayscale;
}
code {
font-family: source-code-pro, Menlo, Monaco, Consolas, 'Courier New',
monospace;
}
```
Replace all the contents of the `App.jsx` file with the following lines:
```jsx
import React from 'react';
import './App.css';
function App() {
return (
This is my map App
);
}
export default App;
```
Now you should see “This is my map App“ in your browser.
### Create the config file
Create a new file called `config.js` inside the `src` folder. In this file we will create some configuration variables such as the MapTiler API key, the data layer IDs, etc.
Write the following in the `config.js` file:
```js
export default {
MAPTILER_API_KEY: "YOUR_MAPTILER_API_KEY_HERE",
};
```
Replace `YOUR_MAPTILER_API_KEY_HERE` with [your own API key](https://cloud.maptiler.com/account/keys/). Make sure to [secure the key](https://docs.maptiler.com/guides/credentials/api-key/#secure-key) before you publish it.
### Create a map component
In this step, we will create a simple map component.
Create a new folder called `components` inside the `src` folder.
Create a new folder called `Map` inside the `components` folder.
Create a new file called `map.jsx` inside the `Map` folder and write these lines:
```jsx
import React, { useRef, useEffect, useState } from "react";
import * as maptilersdk from "@maptiler/sdk";
import "@maptiler/sdk/dist/maptiler-sdk.css";
import "./map.css";
import configData from "../../config";
import Box from "@mui/material/Box";
export default function Map() {
const mapContainer = useRef(null);
const map = useRef(null);
const center = { lng: -157.9253, lat: 21.4732 };
const [zoom] = useState(9.79);
maptilersdk.config.apiKey = configData.MAPTILER_API_KEY;
useEffect(() => {
if (map.current) return; // stops map from intializing more than once
map.current = new maptilersdk.Map({
container: mapContainer.current,
style: maptilersdk.MapStyle.STREETS,
center: [center.lng, center.lat],
zoom: zoom,
});
}, [center.lng, center.lat, zoom]);
return (
);
}
```
If you want to better understand the code in the Map.jsx file, check out the [React JS with MapTiler maps - Learn the Basics](https://docs.maptiler.com/react/#create-a-map-component) tutorial.
Now we will need simple styling to render the map correctly. Create a file named `map.css` in `Map` folder for the map component style and write the following code to your `map.css` file:
```css
.container {
position: relative;
height: 100vh;
width: 100%;
}
.map {
top: 0;
left: 0;
position: absolute;
height: 100%;
width: 100%;
}
```
### Render a map
Now we will import the map component into your app.
, add the following line to the top of the `App.jsx`.
```jsx
import Map from './components/Map/map.jsx';
```
And then, add the imported `` component in your `App()` function. Your `App.jsx` file should then look like this:
```jsx
import React from 'react';
import Map from './components/map.jsx';
import './App.css';
function App() {
return(
)
}
export default App;
```
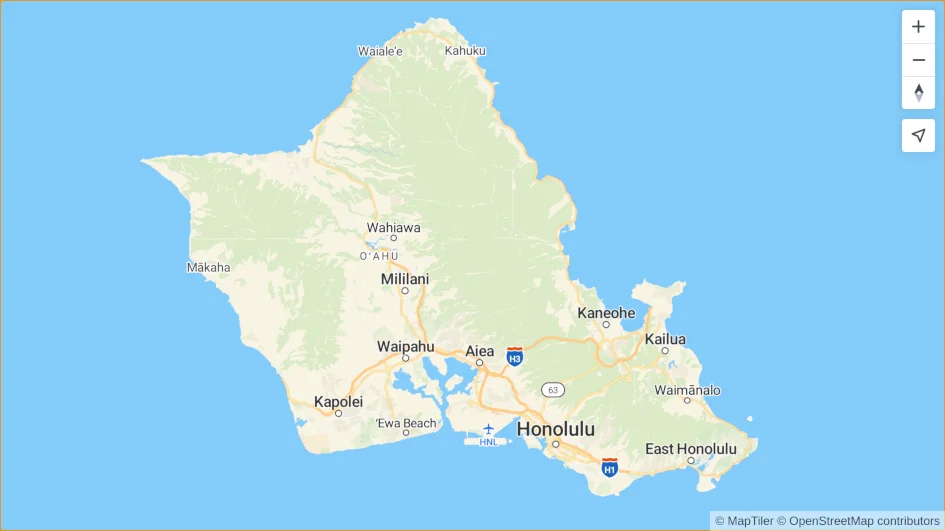
With everything done up until now, you should be able see your beautiful map in your browser.
### Create a navbar component
In this step, we will create a simple heading navbar component using the MUI AppBar.
Inside the `components` folder create a new folder called `Navbar`.
Create a new file called `navbar.jsx` inside the `Navbar` folder and write these lines:
```jsx
import Toolbar from "@mui/material/Toolbar";
import Typography from "@mui/material/Typography";
import IconButton from "@mui/material/IconButton";
import { styled } from "@mui/material/styles";
import MuiAppBar from "@mui/material/AppBar";
import MenuIcon from "@mui/icons-material/Menu";
export default function Navbar({ handleDrawerOpen, open }) {
const drawerWidth = 250;
const AppBar = styled(MuiAppBar, {
shouldForwardProp: (prop) => prop !== "open",
})(({ theme, open }) => ({
transition: theme.transitions.create("margin", {
easing: theme.transitions.easing.sharp,
duration: theme.transitions.duration.leavingScreen,
}),
...(open && {
width: `calc(100% - ${drawerWidth}px)`,
marginLeft: `${drawerWidth}px`,
transition: theme.transitions.create("margin", {
easing: theme.transitions.easing.easeOut,
duration: theme.transitions.duration.enteringScreen,
}),
}),
}));
return (
{/*ready for epizode 3 where we will add sidebar */}
This is my map App
);
}
```
Finally, to display the `Navbar` we need to import the Navbar component and add it to our Map component `map.jsx`.
Import the navbar component into `map.jsx` write the following line at the beginning of the file
```jsx
import Box from "@mui/material/Box";
import Navbar from '../Navbar/navbar.jsx';
```
And then, add the imported `` component in your `return` function.
```jsx
return (
);
```
Modify the map style `map.css` so that the navbar does not cover the map controls.
```css
.container {
position: relative;
height: calc(100vh - 64px);
width: 100%;
top: 64px;
}
```
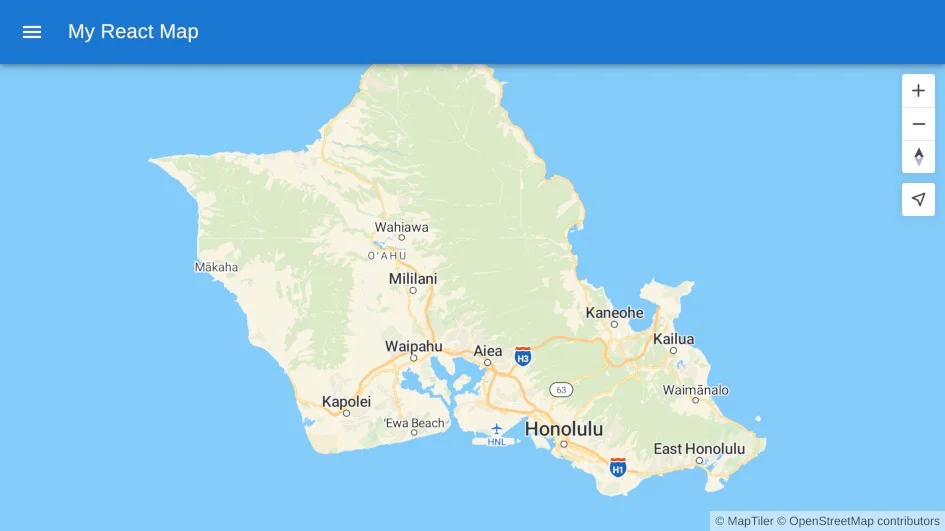
Now you should see the blue navbar at the top of your map.
### Map marker
Another basic thing to add to your map could be a [marker](https://docs.maptiler.com/sdk-js/api/markers/#marker) of some location.
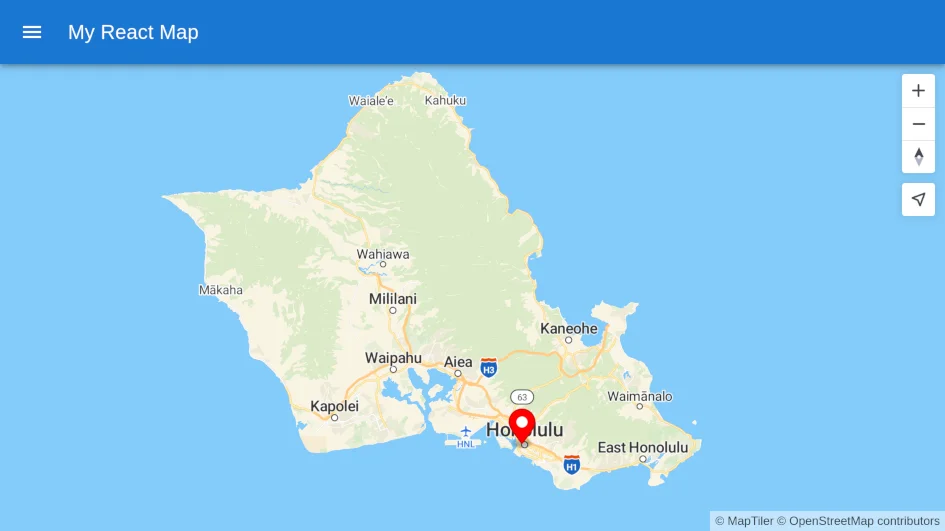
We create a new marker using the `.marker` function. We added the color option to make it red, then set Lng/Lat of the marker using `.setLngLat()` function , and finally added it to the current map using `.addTo()` function.
```jsx
new maptilersdk.Marker({color: "#FF0000"})
.setLngLat([-157.858677, 21.3067])
.addTo(map.current);
```
We are finished with our basic map objects, your `map.jsx` file should look like this:
```jsx
import React, { useRef, useEffect, useState } from "react";
import * as maptilersdk from "@maptiler/sdk";
import "@maptiler/sdk/dist/maptiler-sdk.css";
import "./map.css";
import configData from "../../config";
import Box from "@mui/material/Box";
import Navbar from "../Navbar/navbar";
export default function Map() {
const mapContainer = useRef(null);
const map = useRef(null);
const center = { lng: -157.9253, lat: 21.4732 };
const [zoom] = useState(9.79);
maptilersdk.config.apiKey = configData.MAPTILER_API_KEY;
useEffect(() => {
if (map.current) return; // stops map from intializing more than once
map.current = new maptilersdk.Map({
container: mapContainer.current,
style: maptilersdk.MapStyle.STREETS,
center: [center.lng, center.lat],
zoom: zoom
});
new maptilersdk.Marker({color: "#FF0000"})
.setLngLat([-157.858677, 21.3067])
.addTo(map.current);
}, [center.lng, center.lat, zoom]);
return (
);
}
```
## Conclusion
Congratulations! You have finished your simple full-screen map app using React JS and Material UI, showing a marker on Honolulu. You can explore more about MapTiler SDK JS for your map in the [MapTiler SDK JS API reference](https://docs.maptiler.com/sdk-js).
With MapTiler SDK JS, React developers can create stunning visualizations and data-driven maps that are responsive and efficient. It also provides support for advanced features like WebGL rendering, 3D maps, and animations.
## Full code to download
We have created a repository with the result of this tutorial that will serve as a basis to build future applications. You can access the repository at [Maps in React](https://github.com/maptiler/maps-in-react/).
## Next episode
Continue to [Episode 1: Map in React JS point data from geojson data](https://docs.maptiler.com/react/sdk-js/geojson-points/) to learn how to add geojson points to your React JS map using the MapTiler SDK JS.
## Useful links
[MapTiler SDK JS API](https://docs.maptiler.com/sdk-js/)
[NPM - MapTiler SDK JS](https://www.npmjs.com/package/@maptiler/sdk)
[Vite - Getting Started](https://vitejs.dev/guide/)
[MapTiler - Map Designer](https://www.maptiler.com/cloud/customize/)
## Learn more
Check the more than [100 MapTiler SDK JS examples](https://docs.maptiler.com/sdk-js/examples/) that we have prepared so that you can see the limitless possibilities of MapTiler SDK JS and unlock the full potential of your React applications. It offers easy terrain, built-in styles, language switching, geocoding, TypeScript power, optional IP geolocation, etc.
### Get started with React JS and MapLibre GL JS
If you’re looking to develop React applications with MapLibre GL JS, you have two options. First, you can make use of the react-map-gl library, which provides an easy and convenient way to integrate MapLibre GL JS into your React projects. Alternatively, you can choose to develop your custom component from scratch. To get started, be sure to check out our tutorial titled [Get Started with React JS and MapLibre GL JS](https://docs.maptiler.com/react/maplibre-gl-js/get-started/). This tutorial will provide you with the necessary guidance and examples to kickstart your React and MapLibre GL JS development journey.
### Get Started With MapLibre GL JS for React Native
You can also develop your applications using React Native. Check out the tutorial [Get started with React Native and MapLibre GL JS](https://docs.maptiler.com/react-native/)
## Related examples
### [Learn the basics - React](https://docs.maptiler.com/react/)
Tutorials
Create React JS components for MapTiler SDK JS maps.
### [Geocoding component - React](https://docs.maptiler.com/react/sdk-js/geocoding-component/)
Tutorials
Search places using Geocoding control component in React JS.
### [Points from geojson - React](https://docs.maptiler.com/react/sdk-js/geojson-points/)
Tutorials
Add GeoJSON points to React JS maps with MapTiler.
### [Heatmap in React JS](https://docs.maptiler.com/react/sdk-js/heatmap/)
Tutorials
Create heatmap visualizations in React JS maps using MapTiler.
### [Popup and sidebar - React](https://docs.maptiler.com/react/sdk-js/popup-sidebar/)
Tutorials
Create popups and sidebars in React JS maps.
### [Geocoding control - React](https://docs.maptiler.com/react/sdk-js/geocoding-control/)
Tutorials
Add geocoding control to React JS maps using MapTiler.
### [3D Terrain Map](https://docs.maptiler.com/react/sdk-js/3d-map/)
Tutorials
Create 3D terrain maps with geocoding in React JS.